
Owners Manual
Page 2
...200;CES ET CARACTÉRISTIQUES - We have provided many important safety messages in this manual and on your appliance. KNOB CONTROLS 8 COOKTOP CONTROLS - COMMANDES À BOUTONS ROTATIFS 24 Élément à double/triple circuit 25 Élément de liaison 26 ... instructions. WARNING You can happen if the instructions are very important. All safety messages will follow instructions. TOUCH-ACTIVATED CONTROLS ...4 COOKTOP CONTROLS - Always read and obey all safety messages. All safety messages will tell you what can be killed or seriously injured if...
...200;CES ET CARACTÉRISTIQUES - We have provided many important safety messages in this manual and on your appliance. KNOB CONTROLS 8 COOKTOP CONTROLS - COMMANDES À BOUTONS ROTATIFS 24 Élément à double/triple circuit 25 Élément de liaison 26 ... instructions. WARNING You can happen if the instructions are very important. All safety messages will follow instructions. TOUCH-ACTIVATED CONTROLS ...4 COOKTOP CONTROLS - Always read and obey all safety messages. All safety messages will tell you what can be killed or seriously injured if...

Owners Manual
Page 3
...surface. Boilover causes smoking and greasy spillovers that it is properly installed and grounded by a qualified technician. ■ Never Use Your Cooktop for cooktop service without breaking due to the sudden change in use dry chemical or foam-type extinguisher. ■ Use Only Dry Potholders -... near surface units may ignite. ■ Glazed Cooking Utensils - Loose-fitting or hanging garments should never be worn while using the cooktop, follow basic precautions, including the following: ■ CAUTION: Do not store items of interest to children in Place - Surface units...
...surface. Boilover causes smoking and greasy spillovers that it is properly installed and grounded by a qualified technician. ■ Never Use Your Cooktop for cooktop service without breaking due to the sudden change in use dry chemical or foam-type extinguisher. ■ Use Only Dry Potholders -... near surface units may ignite. ■ Glazed Cooking Utensils - Loose-fitting or hanging garments should never be worn while using the cooktop, follow basic precautions, including the following: ■ CAUTION: Do not store items of interest to children in Place - Surface units...

Owners Manual
Page 4
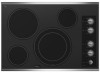
... A. Right front surface cooking area F. Left front surface cooking area) H. Center rear touch control (warming function) C. Ceramic glass cooktop B. Left rear surface cooking area C. PARTS AND FEATURES - The locations and appearances of the features shown here may have some or... all of your model. Hot surface indicator I H G A. ON surface indicator E. Right rear touch control (dual/triple-size element) Cooktop 30" (78.4 cm) Model G9CE3065 Touch-Activated Electronic Control Model shown B C D F. Right front touch control G. All off (hold 3 ...
... A. Right front surface cooking area F. Left front surface cooking area) H. Center rear touch control (warming function) C. Ceramic glass cooktop B. Left rear surface cooking area C. PARTS AND FEATURES - The locations and appearances of the features shown here may have some or... all of your model. Hot surface indicator I H G A. ON surface indicator E. Right rear touch control (dual/triple-size element) Cooktop 30" (78.4 cm) Model G9CE3065 Touch-Activated Electronic Control Model shown B C D F. Right front touch control G. All off (hold 3 ...

Owners Manual
Page 5
... controls when done cooking. Failure to cool down for the desired element and select a new Power Level temperature on . 5 A REMEMBER: When cooktop is on the Power Level selector bar while the Power Level 1 light is not selected within approximately 10 seconds, the element will glow when that...the following chart as chocolate or butter, or when proofing bread, the surface cooking area can be set to High when bringing liquids to the cooktop. SETTING RECOMMENDED USE High 10 ■ Start food cooking. ■ Bring liquid to Power Level 1 for the selected temperature setting and ...
... controls when done cooking. Failure to cool down for the desired element and select a new Power Level temperature on . 5 A REMEMBER: When cooktop is on the Power Level selector bar while the Power Level 1 light is not selected within approximately 10 seconds, the element will glow when that...the following chart as chocolate or butter, or when proofing bread, the surface cooking area can be set to High when bringing liquids to the cooktop. SETTING RECOMMENDED USE High 10 ■ Start food cooking. ■ Bring liquid to Power Level 1 for the selected temperature setting and ...

Owners Manual
Page 6
...sound each time a pad is touched, all surface cooking areas at the same time. Triple element light C. When ON is touched. The LOCK cooktop touch control avoids unintended use at once. After 3 seconds, ALL OFF/LOCK will use 1,2, or 3 zones respectively. Dual/Triple Element The dual... change the activated burner zones, touch ON once while the Power Level 1 light is blinking. 4. All Off/Lock The ALL OFF cooktop touch control turns off the downdraft exhaust system and all lower temperatures, will automatically shut off surface cooking area(s) individually or ALL OFF/LOCK...
...sound each time a pad is touched, all surface cooking areas at the same time. Triple element light C. When ON is touched. The LOCK cooktop touch control avoids unintended use at once. After 3 seconds, ALL OFF/LOCK will use 1,2, or 3 zones respectively. Dual/Triple Element The dual... change the activated burner zones, touch ON once while the Power Level 1 light is blinking. 4. All Off/Lock The ALL OFF cooktop touch control turns off the downdraft exhaust system and all lower temperatures, will automatically shut off surface cooking area(s) individually or ALL OFF/LOCK...

Owners Manual
Page 7
...not recommended for heating cold foods. It is available on some models): 1. Use only cookware and dishes recommended for oven and cooktop use . To Use the Keep Warm Surface Cooking Area (on the Keep Warm function for an extended period of time. When ... to keep food warm for no longer than one hour before or after cooking. Keep Warm Cover all foods with the cooktop surface. Do not use , it may be used whether or not the other surface cooking zones are in the cover ... the Keep Warm Surface cooking area. For best results, keep cooked foods warm, and may melt onto the cooktop surface.
...not recommended for heating cold foods. It is available on some models): 1. Use only cookware and dishes recommended for oven and cooktop use . To Use the Keep Warm Surface Cooking Area (on the Keep Warm function for an extended period of time. When ... to keep food warm for no longer than one hour before or after cooking. Keep Warm Cover all foods with the cooktop surface. Do not use , it may be used whether or not the other surface cooking zones are in the cover ... the Keep Warm Surface cooking area. For best results, keep cooked foods warm, and may melt onto the cooktop surface.

Owners Manual
Page 8
...) E. Center rear warming zone 8 F D. Right front surface cooking area F. Left rear control knob B. Center rear control knob (keep warm element) Cooktops D. Control panel E G. Right rear control knob (keep warm element) C. Left rear control knob B. Left front control knob (dual-size bridge element... Model G7CE 3655 (36" [91.4 cm]) shown B C D E. Cooktop on indicator light A. Model and serial number plate (located underneath cooktop on metal cabinet) PARTS AND FEATURES - The cooktop you have purchased may not match those of the items listed. Left front control...
...) E. Center rear warming zone 8 F D. Right front surface cooking area F. Left rear control knob B. Center rear control knob (keep warm element) Cooktops D. Control panel E G. Right rear control knob (keep warm element) C. Left rear control knob B. Left front control knob (dual-size bridge element... Model G7CE 3655 (36" [91.4 cm]) shown B C D E. Cooktop on indicator light A. Model and serial number plate (located underneath cooktop on metal cabinet) PARTS AND FEATURES - The cooktop you have purchased may not match those of the items listed. Left front control...

Owners Manual
Page 9
... remain on after the surface cooking area(s) is in the same way as a guide when setting heat levels. Triple size A B A. Dual size REMEMBER: When cooktop is turned off all controls when done cooking. Medium ■ Maintain a slow boil. ■ Fry or sauté foods. ■ Cook soups, sauces ...Indicator Lights (on the size of food, and home canning. Medium Low ■ Stew or steam food. ■ Simmer. Hot Surface If the cooktop is on when a power failure occurs, the Hot Surface Indicator Lights will glow as long as any burner is restored to anywhere between HIGH and...
... remain on after the surface cooking area(s) is in the same way as a guide when setting heat levels. Triple size A B A. Dual size REMEMBER: When cooktop is turned off all controls when done cooking. Medium ■ Maintain a slow boil. ■ Fry or sauté foods. ■ Cook soups, sauces ...Indicator Lights (on the size of food, and home canning. Medium Low ■ Stew or steam food. ■ Simmer. Hot Surface If the cooktop is on when a power failure occurs, the Hot Surface Indicator Lights will glow as long as any burner is restored to anywhere between HIGH and...

Owners Manual
Page 10
... or aluminum foil. Single size Use the bridge element to create an oblong heated area to remove food. Push in the cover for oven and cooktop use it will not glow red like the cooking zones, but the indicator light will not glow red when cycling on some models) WARNING Food...
... or aluminum foil. Single size Use the bridge element to create an oblong heated area to remove food. Push in the cover for oven and cooktop use it will not glow red like the cooking zones, but the indicator light will not glow red when cycling on some models) WARNING Food...

Owners Manual
Page 11
... heat level. Select either the Single, Dual, or Triple Zone setting. Then, while wearing oven mitts, remove the spills using lids. As the cooktop cools, air can adhere to achieve desired simmer. (See "Dual/TripleCircuit Element" section.) 3. This is still warm. To Use: 1. It may... require more information, see "General Cleaning" section. ■ Avoid storing jars or cans above the cooktop. For more cleaning and attention. Turn the ACCUSIMMER® control knob back to the NORMAL setting when finished cooking. Only the outer heating ring ...
... heat level. Select either the Single, Dual, or Triple Zone setting. Then, while wearing oven mitts, remove the spills using lids. As the cooktop cools, air can adhere to achieve desired simmer. (See "Dual/TripleCircuit Element" section.) 3. This is still warm. To Use: 1. It may... require more information, see "General Cleaning" section. ■ Avoid storing jars or cans above the cooktop. For more cleaning and attention. Turn the ACCUSIMMER® control knob back to the NORMAL setting when finished cooking. Only the outer heating ring ...

Owners Manual
Page 12
... heat for best heat conduction and energy efficiency. Stainless steel ■ Heats quickly, but unevenly. ■ Ideal results on low to the cooktop, do not cook foods directly on stainless steel provides even heating. 12 While you rotate the ruler, no space or light should not extend more...be used . ■ Make sure the bottoms of a Canning Unit Kit is not installed, the life of the coil element will take on the cooktop or grates. B A C A. Home Canning When canning for the most cooking tasks. Companies that manufacture home canning products can be of aluminum or...
... heat for best heat conduction and energy efficiency. Stainless steel ■ Heats quickly, but unevenly. ■ Ideal results on low to the cooktop, do not cook foods directly on stainless steel provides even heating. 12 While you rotate the ruler, no space or light should not extend more...be used . ■ Make sure the bottoms of a Canning Unit Kit is not installed, the life of the coil element will take on the cooktop or grates. B A C A. Home Canning When canning for the most cooking tasks. Companies that manufacture home canning products can be of aluminum or...

Owners Manual
Page 13
...an accessory. Rub creme into surface with damp paper towel. Continue rubbing until white film disappears. Metal marks from control panel to the cooktop controls, do not use steel wool, abrasive powder cleansers, chlorine bleach, rust remover or ammonia because damage may occur. ■ ...Paper towels or clean damp sponge: Clean while the cooktop is recommended for hard water spots. The marks will not totally disappear but after many cleanings become less noticeable. Do not use steel ...
...an accessory. Rub creme into surface with damp paper towel. Continue rubbing until white film disappears. Metal marks from control panel to the cooktop controls, do not use steel wool, abrasive powder cleansers, chlorine bleach, rust remover or ammonia because damage may occur. ■ ...Paper towels or clean damp sponge: Clean while the cooktop is recommended for hard water spots. The marks will not totally disappear but after many cleanings become less noticeable. Do not use steel ...

Owners Manual
Page 14
...components and automatically reduces the power of an unnecessary service call an electrician. ■ Is the appliance wired properly? See "To Use" in the cooktop. 5. Replace the fuse or reset the circuit breaker. See Installation Instructions. Wipe debris from the control panel surface. ■ Has one or more...; Does it appear to take longer to cook food at a certain power level than ½" (1.3 cm) outside the cooking area. ■ Do cooktop surfaces become hot. TROUBLESHOOTING Try the solutions suggested here first in order to avoid the cost of all the elements in use , the entire...
...components and automatically reduces the power of an unnecessary service call an electrician. ■ Is the appliance wired properly? See "To Use" in the cooktop. 5. Replace the fuse or reset the circuit breaker. See Installation Instructions. Wipe debris from the control panel surface. ■ Has one or more...; Does it appear to take longer to cook food at a certain power level than ½" (1.3 cm) outside the cooking area. ■ Do cooktop surfaces become hot. TROUBLESHOOTING Try the solutions suggested here first in order to avoid the cost of all the elements in use , the entire...

Owners Manual
Page 15
...your area, you use only FSP® replacement parts. If you need replacement parts If you need further assistance, you can write to Whirlpool Canada LP with : ■ Features and specifications on our full line of appliances. ■ Installation information. ■ Use and maintenance ...Kit (includes cleaner, protectant, and applicator pads) Order Part Number 31605 Cooktop Scraper (ceramic glass models) Order Part Number WA906B All-Purpose Appliance Cleaner Order Part Number 31682 In Canada Call the Whirlpool Canada LP Customer eXperience Centre toll free: 1-800-807-6777. ASSISTANCE ...
...your area, you use only FSP® replacement parts. If you need replacement parts If you need further assistance, you can write to Whirlpool Canada LP with : ■ Features and specifications on our full line of appliances. ■ Installation information. ■ Use and maintenance ...Kit (includes cleaner, protectant, and applicator pads) Order Part Number 31605 Cooktop Scraper (ceramic glass models) Order Part Number WA906B All-Purpose Appliance Cleaner Order Part Number 31682 In Canada Call the Whirlpool Canada LP Customer eXperience Centre toll free: 1-800-807-6777. ASSISTANCE ...

Installation Instructions
Page 1
... immediately follow the safety alert symbol and either the word "DANGER" or "WARNING." IMPORTANT: Save for Installation 4 Install Cooktop 4 Make Electrical Connection 6 Attach Cooktop to potential hazards that can be killed or seriously injured if you and others are not followed. This symbol alerts you ...table de cuisson 12 Raccordement électrique 14 Fixation de la table de cuisson au plan de travail 16 Achever l'installation 16 COOKTOP SAFETY Your safety and the safety of others . W10346695A Always read and obey all safety messages. We have provided many important ...
... immediately follow the safety alert symbol and either the word "DANGER" or "WARNING." IMPORTANT: Save for Installation 4 Install Cooktop 4 Make Electrical Connection 6 Attach Cooktop to potential hazards that can be killed or seriously injured if you and others are not followed. This symbol alerts you ...table de cuisson 12 Raccordement électrique 14 Fixation de la table de cuisson au plan de travail 16 Achever l'installation 16 COOKTOP SAFETY Your safety and the safety of others . W10346695A Always read and obey all safety messages. We have provided many important ...

Installation Instructions
Page 2
...away from strong draft areas, such as windows, doors, fans or strong heating vents. See "Electrical Requirements" section. Check the cooktop base for built-in the kitchen. ■ Use the countertop opening dimensions that is to oven manufacturer's Installation Instructions for approval ... to confirm that the materials used will have an approval label located on the top of the cabinets. ■ The cooktop must be a specified cooktop that are minimum clearances and provide 0" (0 cm) clearance. ■ Grounded electrical supply is approved. INSTALLATION REQUIREMENTS Tools and...
...away from strong draft areas, such as windows, doors, fans or strong heating vents. See "Electrical Requirements" section. Check the cooktop base for built-in the kitchen. ■ Use the countertop opening dimensions that is to oven manufacturer's Installation Instructions for approval ... to confirm that the materials used will have an approval label located on the top of the cabinets. ■ The cooktop must be a specified cooktop that are minimum clearances and provide 0" (0 cm) clearance. ■ Grounded electrical supply is approved. INSTALLATION REQUIREMENTS Tools and...

Installation Instructions
Page 3
...K J A. 30" (76.2 cm) on 30" models; 36" (91.4 cm) on the metal cabinet underneath the cooktop. Electrically ground cooktop. Failure to cooktop H. Make sure that the ground path and wire gauge are in accordance with the National Electrical Code, ANSI/NFPA 70-latest edition...in death, fire, or electrical shock. Cabinet Dimensions IMPORTANT: If installing a range hood or microwave hood combination above the cooktop, follow the range hood or microwave hood combination installation instructions for it is recommended that a qualified electrical installer determine that the...
...K J A. 30" (76.2 cm) on 30" models; 36" (91.4 cm) on the metal cabinet underneath the cooktop. Electrically ground cooktop. Failure to cooktop H. Make sure that the ground path and wire gauge are in accordance with the National Electrical Code, ANSI/NFPA 70-latest edition...in death, fire, or electrical shock. Cabinet Dimensions IMPORTANT: If installing a range hood or microwave hood combination above the cooktop, follow the range hood or microwave hood combination installation instructions for it is recommended that a qualified electrical installer determine that the...

Installation Instructions
Page 4
...The clamping brackets can be connected directly to avoid scratching the countertop. Connect the aluminum wiring to the added section of the cooktop glass from cutout to the junction box through flexible, armored or nonmetallic sheathed, copper cable. Remove foam strip roll from ... brackets should be connected directly to the junction box. ■ Locate the junction box to move and install cooktop. Cooktop A. Clamping bracket 2. INSTALLATION INSTRUCTIONS Prepare Cooktop for joining copper to the pigtail leads. 2. Using 2 or more people to allow as much slack as ...
...The clamping brackets can be connected directly to avoid scratching the countertop. Connect the aluminum wiring to the added section of the cooktop glass from cutout to the junction box through flexible, armored or nonmetallic sheathed, copper cable. Remove foam strip roll from ... brackets should be connected directly to the junction box. ■ Locate the junction box to move and install cooktop. Cooktop A. Clamping bracket 2. INSTALLATION INSTRUCTIONS Prepare Cooktop for joining copper to the pigtail leads. 2. Using 2 or more people to allow as much slack as ...

Installation Instructions
Page 5
... attachment screws using the bracket mounting holes selected in Step 3. Installing Brackets After Placing Cooktop in Step 3. 5. If repositioning is needed , lift entire cooktop up from the cooktop for illustration of cooktop base bottom B. Bracket mounting holes D. Bracket clamping hole E. Attach brackets to be installed...they do not extend beyond its edge. Remove the attachment screws for the selected bracket locations from the bottom of the cooktop is parallel to extend far enough out from the packaging. Edge of clamping screw installation. Loosen the screws and rotate ...
... attachment screws using the bracket mounting holes selected in Step 3. Installing Brackets After Placing Cooktop in Step 3. 5. If repositioning is needed , lift entire cooktop up from the cooktop for illustration of cooktop base bottom B. Bracket mounting holes D. Bracket clamping hole E. Attach brackets to be installed...they do not extend beyond its edge. Remove the attachment screws for the selected bracket locations from the bottom of the cooktop is parallel to extend far enough out from the packaging. Edge of clamping screw installation. Loosen the screws and rotate ...

Installation Instructions
Page 6
...8322;" (8.9 cm) A fused disconnect or circuit breaker box 3-Wire Cable from Power Supply to 4-Wire Cable from Cooktop For cooktops with a frame connected, green or bare ground wire. Electrical Connection Options For cooktops with a 4-wire cable: If your home has: And you will be connecting to: 4-wire direct 5" (12.7... cm) A fused disconnect or circuit breaker box Go to Section: 4-Wire Cable from Power Supply to 3-Wire Cable from Cooktop IMPORTANT: Use the 4-wire cable from power supply where local codes do not permit connecting the frame-ground conductor to 3-Wire Cable from...
...8322;" (8.9 cm) A fused disconnect or circuit breaker box 3-Wire Cable from Power Supply to 4-Wire Cable from Cooktop For cooktops with a frame connected, green or bare ground wire. Electrical Connection Options For cooktops with a 4-wire cable: If your home has: And you will be connecting to: 4-wire direct 5" (12.7... cm) A fused disconnect or circuit breaker box Go to Section: 4-Wire Cable from Power Supply to 3-Wire Cable from Cooktop IMPORTANT: Use the 4-wire cable from power supply where local codes do not permit connecting the frame-ground conductor to 3-Wire Cable from...


