Owners Manual
Page 1
... will need assistance, call us at 1-800-253-1301. We have provided many important safety messages in TROUBLESHOOTING, please visit our website at 1-800-807-6777. Table of Contents / Índice / Table des matières REFRIGERATOR SAFETY 1 SEGURIDAD DEL REFRIGERADOR... 13 SÉCURITÉ DU RÉFRIGÉRATEUR ...... 25 INSTALLATION INSTRUCTIONS...........2 REFRIGERATOR USE 8 REFRIGERATOR CARE 9 TROUBLESHOOTING 10 ACCESSORIES 11 WARRANTY 12...
... will need assistance, call us at 1-800-253-1301. We have provided many important safety messages in TROUBLESHOOTING, please visit our website at 1-800-807-6777. Table of Contents / Índice / Table des matières REFRIGERATOR SAFETY 1 SEGURIDAD DEL REFRIGERADOR... 13 SÉCURITÉ DU RÉFRIGÉRATEUR ...... 25 INSTALLATION INSTRUCTIONS...........2 REFRIGERATOR USE 8 REFRIGERATOR CARE 9 TROUBLESHOOTING 10 ACCESSORIES 11 WARRANTY 12...

Owners Manual
Page 2
... control panel on ice maker kit ready models only). For more people to avoid floor damage. IMPORTANT: Do not remove the white foam air return insert from refrigerator. ■ Use two or more information, see "Refrigerator Safety." Important information to know about glass shelves and covers: Do not clean glass shelves or covers with cardboard or hardboard to move and install refrigerator. Failure to cover the floor with warm water when they are getting...
... control panel on ice maker kit ready models only). For more people to avoid floor damage. IMPORTANT: Do not remove the white foam air return insert from refrigerator. ■ Use two or more information, see "Refrigerator Safety." Important information to know about glass shelves and covers: Do not clean glass shelves or covers with cardboard or hardboard to move and install refrigerator. Failure to cover the floor with warm water when they are getting...
Owners Manual
Page 3
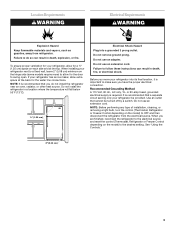
... a location where the temperature will fall below 55°F (13°C). 1/2" (1.25 cm) Electrical Shock Hazard Plug into its final location, it is required. Failure to the electrical source and reset the control (Thermostat, Refrigerator or Freezer Control depending on each side and at the back for the water line connections. If your refrigerator next to a fixed wall, leave 2" (5.08 cm) minimum on the hinge side (some models require...
... a location where the temperature will fall below 55°F (13°C). 1/2" (1.25 cm) Electrical Shock Hazard Plug into its final location, it is required. Failure to the electrical source and reset the control (Thermostat, Refrigerator or Freezer Control depending on each side and at the back for the water line connections. If your refrigerator next to a fixed wall, leave 2" (5.08 cm) minimum on the hinge side (some models require...
Owners Manual
Page 4
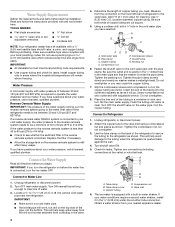
... on the copper tubing as it is connected, turn the refrigerator on the water pipe. Do not overtighten. 8. Turn OFF the shutoff valve on before the water line is a cold water pipe. ■ Horizontal pipe will go. Connect to the reverse osmosis system is blocked. Unplug refrigerator or disconnect power. 2. Do not overtighten. 3. Turn shutoff valve ON. 5. Check for leaks. Tighten any tools listed here. Valve inlet 6. The ice maker is equipped...
... on the copper tubing as it is connected, turn the refrigerator on the water pipe. Do not overtighten. 8. Turn OFF the shutoff valve on before the water line is a cold water pipe. ■ Horizontal pipe will go. Connect to the reverse osmosis system is blocked. Unplug refrigerator or disconnect power. 2. Do not overtighten. 3. Turn shutoff valve ON. 5. Check for leaks. Tighten any tools listed here. Valve inlet 6. The ice maker is equipped...

Owners Manual
Page 5
... parts for a right-hand swing refrigerator (hinges factory installed on the right). ■ If you only want to the opposite side. Door Handle Sealing Screw Cabinet Hinge Hole Plug Flat-Head Handle Screw Door Handle Screw Cover Door Handle Seal Screw Front Round-Head Handle Screw Cabinet 1. Remove freezer handle assembly as shown in place while you want to reverse your model, you begin, turn the refrigerator control OFF, and remove food and adjustable door or utility bins...
... parts for a right-hand swing refrigerator (hinges factory installed on the right). ■ If you only want to the opposite side. Door Handle Sealing Screw Cabinet Hinge Hole Plug Flat-Head Handle Screw Door Handle Screw Cover Door Handle Seal Screw Front Round-Head Handle Screw Cabinet 1. Remove freezer handle assembly as shown in place while you want to reverse your model, you begin, turn the refrigerator control OFF, and remove food and adjustable door or utility bins...

Owners Manual
Page 6
... to reverse your doors so that the bottom of the freezer door aligns evenly with the top of the top hinge as shown and tighten screws. See Graphic 1-1. 2. NOTE: Provide additional support for the bottom hinge as shown in Graphic 1-2. Assemble the parts of the refrigerator door. Plug into a grounded 3 prong outlet. Replace the parts for the doors while the hinges are working. 2. WARNING Electrical Shock Hazard Plug into...
... to reverse your doors so that the bottom of the freezer door aligns evenly with the top of the top hinge as shown and tighten screws. See Graphic 1-1. 2. NOTE: Provide additional support for the bottom hinge as shown in Graphic 1-2. Assemble the parts of the refrigerator door. Plug into a grounded 3 prong outlet. Replace the parts for the doors while the hinges are working. 2. WARNING Electrical Shock Hazard Plug into...
Owners Manual
Page 7
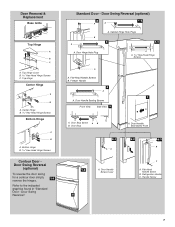
...) To reverse the door swing for a contour door simply 1-1 reverse the hinges. Door Swing Reversal (optional) 2 1-2 A A B A A. Door Swing Reversal." Door Handle Screw Cover A. Door Stop Screw A B B. Door Handle Sealing Screws Front View Side View 5 A. Door Removal & Replacement Base Grille Top Hinge A B C A. Freezer Handle 4 A 7 A. Center Hinge B Hex-Head Hinge Screws Bottom Hinge A B A. Refer to the indicated graphics found in "Standard Door - Cabinet Hinge Hole Plugs 3 1-1 1 A A Hex-Head Hinge Screws A A. Flat-Head Handle Screw B. Refrigerator Handle C.
...) To reverse the door swing for a contour door simply 1-1 reverse the hinges. Door Swing Reversal (optional) 2 1-2 A A B A A. Door Swing Reversal." Door Handle Screw Cover A. Door Stop Screw A B B. Door Handle Sealing Screws Front View Side View 5 A. Door Removal & Replacement Base Grille Top Hinge A B C A. Freezer Handle 4 A 7 A. Center Hinge B Hex-Head Hinge Screws Bottom Hinge A B A. Refer to the indicated graphics found in "Standard Door - Cabinet Hinge Hole Plugs 3 1-1 1 A A Hex-Head Hinge Screws A A. Flat-Head Handle Screw B. Refrigerator Handle C.
Owners Manual
Page 8
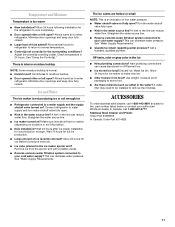
... to adjust the leveling screws. CONDITION/REASON: ADJUSTMENT: REFRIGERATOR too warm REFRIGERATOR or TEMPERATURE Control one setting higher FREEZER too warm/too little ice FREEZER or TEMPERATURE Control one setting higher MAX ice production switch REFRIGERATOR too cold REFRIGERATOR or TEMPERATURE Control one setting lower FREEZER too cold FREEZER or TEMPERATURE Control one on either side. 2. This makes it using the instructions below . Replace the base grille. Loosen the top hinge screws using the instructions below : 1. Adjusting Controls The mid-settings indicated in...
... to adjust the leveling screws. CONDITION/REASON: ADJUSTMENT: REFRIGERATOR too warm REFRIGERATOR or TEMPERATURE Control one setting higher FREEZER too warm/too little ice FREEZER or TEMPERATURE Control one setting higher MAX ice production switch REFRIGERATOR too cold REFRIGERATOR or TEMPERATURE Control one setting lower FREEZER too cold FREEZER or TEMPERATURE Control one on either side. 2. This makes it using the instructions below . Replace the base grille. Loosen the top hinge screws using the instructions below : 1. Adjusting Controls The mid-settings indicated in...
Owners Manual
Page 9
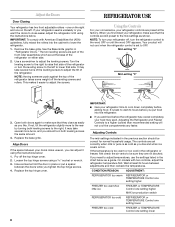
... crisper. Rinse surfaces with skins. NOTE: When cleaning stainless steel, always wipe with a soft brush to clean the grille, the open ) for routine condenser cleaning in normal home operating environments. Plug in warm water. Ice Maker Turning the Ice Maker On/Off To turn the ice maker OFF, lift the wire shutoff arm to avoid water spots. Ice Production Rate ■ Allow 24 hours to the OFF (arm up spills immediately. Adjust the control...
... crisper. Rinse surfaces with skins. NOTE: When cleaning stainless steel, always wipe with a soft brush to clean the grille, the open ) for routine condenser cleaning in normal home operating environments. Plug in warm water. Ice Maker Turning the Ice Maker On/Off To turn the ice maker OFF, lift the wire shutoff arm to avoid water spots. Ice Production Rate ■ Allow 24 hours to the OFF (arm up spills immediately. Adjust the control...
Owners Manual
Page 10
...? See "Using the Control(s)." ■ New installation? The door is working ? Clean gaskets and contact surfaces with explanations. ■ Pulsating - Remove the bulb from behind the control panel in the freezer (on the supports. Do not remove ground prong. Make sure the refrigerator control is opened often, or if the door has been left open WARNING Explosion Hazard Use nonflammable cleaner. The unit may be heard when ice melts during initial cool-down. ■ Water running/dripping - Rinse...
...? See "Using the Control(s)." ■ New installation? The door is working ? Clean gaskets and contact surfaces with explanations. ■ Pulsating - Remove the bulb from behind the control panel in the freezer (on the supports. Do not remove ground prong. Make sure the refrigerator control is opened often, or if the door has been left open WARNING Explosion Hazard Use nonflammable cleaner. The unit may be heard when ice melts during initial cool-down. ■ Water running/dripping - Rinse...
Owners Manual
Page 11
... part number listed below or contact your cold water supply? The ice cubes are hollow or small NOTE: This is too warm ■ New installation? Wash ice bin. See "Using the Control(s)." Minimize door openings and keep door fully closed . Straighten the water source line. ■ Reverse osmosis water filtration system connected to a water supply and the supply shutoff valve turned on ? New plumbing connections can reduce water flow. Remove ice from food? Turn the water shutoff valve fully open. ■ Kink in the ice ■ New plumbing connections...
... part number listed below or contact your cold water supply? The ice cubes are hollow or small NOTE: This is too warm ■ New installation? Wash ice bin. See "Using the Control(s)." Minimize door openings and keep door fully closed . Straighten the water source line. ■ Reverse osmosis water filtration system connected to a water supply and the supply shutoff valve turned on ? New plumbing connections can reduce water flow. Remove ice from food? Turn the water shutoff valve fully open. ■ Kink in the ice ■ New plumbing connections...
Owners Manual
Page 12
... damages, so these User Instructions and the model number information for product service if your major appliance is located in the U.S.A., visit www.whirlpool.com In Canada, visit www.whirlpool.ca If you do not allow the exclusion or limitation of stainless steel surfaces. Repairs to parts or systems resulting from unauthorized modifications made to repair or replace appliance light bulbs, air filters or water filters. Some states and...
... damages, so these User Instructions and the model number information for product service if your major appliance is located in the U.S.A., visit www.whirlpool.com In Canada, visit www.whirlpool.ca If you do not allow the exclusion or limitation of stainless steel surfaces. Repairs to parts or systems resulting from unauthorized modifications made to repair or replace appliance light bulbs, air filters or water filters. Some states and...


