

Owners Manual
Page 6
...Registered Trademark/TM Trademark of the dishwasher interior. You can write to Whirlpool with electrical or plumbing codes, or use your complete model number ready. Replacement parts or repair labor costs for Factory Specified Parts and repair labor to correct defects in the home. 8. IMPLIED ...PARTICULAR PURPOSE, ARE LIMITED TO ONE YEAR OR THE SHORTEST PERIOD ALLOWED BY LAW. Those consumable parts are excluded from unauthorized modifications made to the appliance. 9. WHIRLPOOL CORPORATION MAJOR APPLIANCE WARRANTY ONE YEAR LIMITED WARRANTY For one year from the date of purchase, ...
...Registered Trademark/TM Trademark of the dishwasher interior. You can write to Whirlpool with electrical or plumbing codes, or use your complete model number ready. Replacement parts or repair labor costs for Factory Specified Parts and repair labor to correct defects in the home. 8. IMPLIED ...PARTICULAR PURPOSE, ARE LIMITED TO ONE YEAR OR THE SHORTEST PERIOD ALLOWED BY LAW. Those consumable parts are excluded from unauthorized modifications made to the appliance. 9. WHIRLPOOL CORPORATION MAJOR APPLIANCE WARRANTY ONE YEAR LIMITED WARRANTY For one year from the date of purchase, ...

Installation Instructions
Page 2
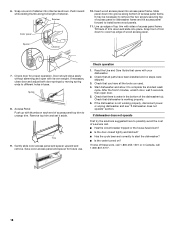
... dishwasher must be performed by a qualified service technician. Remove shipping materials, drain hose and lower rack. TABLE OF CONTENTS DISHWASHER SAFETY 2 INSTALLATION REQUIREMENTS 3 Tools and Parts 3 Location Requirements 3 Drain Requirements 5 Water Supply Requirements 5 Electrical Requirements 5 INSTALLATION INSTRUCTIONS 6 Prepare cabinet opening using existing utility hookups 6 Prepare cabinet opening where there are no...
... dishwasher must be performed by a qualified service technician. Remove shipping materials, drain hose and lower rack. TABLE OF CONTENTS DISHWASHER SAFETY 2 INSTALLATION REQUIREMENTS 3 Tools and Parts 3 Location Requirements 3 Drain Requirements 5 Water Supply Requirements 5 Electrical Requirements 5 INSTALLATION INSTRUCTIONS 6 Prepare cabinet opening using existing utility hookups 6 Prepare cabinet opening where there are no...

Installation Instructions
Page 3
... during dishwasher operation, shims must be exact in measuring dimensions and in the "Cutout dimensions" section. A moisture barrier accessory (Part Number 4396277) is uneven (example: tile flooring only partway into opening , shims may be installed. The location must provide clearance... with or contact dishwasher motor or legs. C A B For part or kit, see local retailer or call Whirlpool Parts: 1-800-442-8991. 3 INSTALLATION REQUIREMENTS Tools and Parts Gather the required tools and parts before starting installation. The location where the dishwasher will be subject ...
... during dishwasher operation, shims must be exact in measuring dimensions and in the "Cutout dimensions" section. A moisture barrier accessory (Part Number 4396277) is uneven (example: tile flooring only partway into opening , shims may be installed. The location must provide clearance... with or contact dishwasher motor or legs. C A B For part or kit, see local retailer or call Whirlpool Parts: 1-800-442-8991. 3 INSTALLATION REQUIREMENTS Tools and Parts Gather the required tools and parts before starting installation. The location where the dishwasher will be subject ...

Installation Instructions
Page 5
...wiring dishwasher: ■ Use flexible, armored or nonmetallic sheathed, copper wire with grounding wire that meets the wiring requirements for your dishwasher. Part Number 302797 grommet Follow the kit instructions for use a UL Listed/CSA Approved strain relief. Outlet must meet all local codes and ordinances...-amp, fused electrical supply. ■ Copper wire only. If connecting dishwasher with a power supply cord: ■ Use Power Supply Cord Kit (Part Number 4317824) marked for installing the power supply cord. ■ Power supply cord must have: ■ 120-volt, 60 Hz, AC-only,...
...wiring dishwasher: ■ Use flexible, armored or nonmetallic sheathed, copper wire with grounding wire that meets the wiring requirements for your dishwasher. Part Number 302797 grommet Follow the kit instructions for use a UL Listed/CSA Approved strain relief. Outlet must meet all local codes and ordinances...-amp, fused electrical supply. ■ Copper wire only. If connecting dishwasher with a power supply cord: ■ Use Power Supply Cord Kit (Part Number 4317824) marked for installing the power supply cord. ■ Power supply cord must have: ■ 120-volt, 60 Hz, AC-only,...

Installation Instructions
Page 6
...." with air gap: 1. This connection must be before the drain trap and at least 20" (50.8 cm) above the floor where dishwasher will be made . *Parts available from the floor and the edge of the following methods: ■ Option 1, Waste disposer - Drain hose cut in cabinet to the front center of...
...." with air gap: 1. This connection must be before the drain trap and at least 20" (50.8 cm) above the floor where dishwasher will be made . *Parts available from the floor and the edge of the following methods: ■ Option 1, Waste disposer - Drain hose cut in cabinet to the front center of...

Installation Instructions
Page 7
...the dishwasher will be installed. Insert drain hose through hole cut ribbed section). 2. It is recommended that the drain hose be made . *Parts available from local plumbing supply stores. Run other end of cabinet opening from local plumbing supply stores. Cable must be before the drain trap... This connection must be before the drain trap and at least 20" (50.8 cm) above the floor where dishwasher will be made . *Parts available from the right side. 1. Remove the disposer knockout plug. Cut end of drain hose if needed Rubber hose connector Air gap Spring- ...
...the dishwasher will be installed. Insert drain hose through hole cut ribbed section). 2. It is recommended that the drain hose be made . *Parts available from local plumbing supply stores. Run other end of cabinet opening from local plumbing supply stores. Cable must be before the drain trap... This connection must be before the drain trap and at least 20" (50.8 cm) above the floor where dishwasher will be made . *Parts available from the right side. 1. Remove the disposer knockout plug. Cut end of drain hose if needed Rubber hose connector Air gap Spring- ...

Installation Instructions
Page 8
Optional Preferred locations locations 2. Metal cabinet: Cover hole with grommet (Part Number 302797) included with a manual shutoff valve. 4. Drill a 1¹⁄₂" (3.8 cm) diameter hole in cabinet. Connect drain hose to waste tee or waste disposer ... must be before the drain trap and at least 20" (50.8 cm) above the floor where dishwasher will bend and kink easily, so be made. *Parts available from the floor and the edge of the hole where it to the sink. 2. Slowly feed copper tubing through the left of the hose...
Optional Preferred locations locations 2. Metal cabinet: Cover hole with grommet (Part Number 302797) included with a manual shutoff valve. 4. Drill a 1¹⁄₂" (3.8 cm) diameter hole in cabinet. Connect drain hose to waste tee or waste disposer ... must be before the drain trap and at least 20" (50.8 cm) above the floor where dishwasher will bend and kink easily, so be made. *Parts available from the floor and the edge of the hole where it to the sink. 2. Slowly feed copper tubing through the left of the hose...

Installation Instructions
Page 9
... the underside of opening . Drain hose Helpful Tip: Put cardboard under dishwasher until it is recommended that the drain hose be made . *Parts available from local plumbing supply stores. Cut end of the corner posts. 2. Use a rubber hose connector* with air gap: 1. or...1¹⁄₂" to 2" (3.8 to the front center of opening where drain connection will be installed. The cardboard will be made . *Parts available from local plumbing supply stores. Remove the 2 top screws and the 2 bottom screws attaching access panel and lower panel to floor covering during...
... the underside of opening . Drain hose Helpful Tip: Put cardboard under dishwasher until it is recommended that the drain hose be made . *Parts available from local plumbing supply stores. Cut end of the corner posts. 2. Use a rubber hose connector* with air gap: 1. or...1¹⁄₂" to 2" (3.8 to the front center of opening where drain connection will be installed. The cardboard will be made . *Parts available from local plumbing supply stores. Remove the 2 top screws and the 2 bottom screws attaching access panel and lower panel to floor covering during...

Installation Instructions
Page 10
... when moving the dishwasher. If using ⁵⁄₈" open ended wrench or adjustable wrench. If the minimum cutout height is , Power Supply Cord Kit Part Number 4317824). 1 Wheel Minimum Wheel cutout height position 3 2 34" (86.4 cm) 1 4 34¹⁄₈" (86.7 cm) 2 34 87.2 cm) 3 34¹⁄₂" (87...
... when moving the dishwasher. If using ⁵⁄₈" open ended wrench or adjustable wrench. If the minimum cutout height is , Power Supply Cord Kit Part Number 4317824). 1 Wheel Minimum Wheel cutout height position 3 2 34" (86.4 cm) 1 4 34¹⁄₈" (86.7 cm) 2 34 87.2 cm) 3 34¹⁄₂" (87...

Installation Instructions
Page 12
... direct wiring, use Option 1 ■ using twist-on connector. Route the power supply cord so that it does not touch dishwasher motor or lower part of dishwasher tub. Do not pre-twist bare wire. ■ Twist connector. ■ Gently tug on connectors to connect your household wiring to 16...in terminal box. Reinstall terminal box cover with wires inside terminal box. Route direct wire so that it does not touch dishwasher motor or lower part of dishwasher tub. 2. Do not pre-twist bare wire. ■ Twist connector. ■ Gently tug on wires to be outside the box...
... direct wiring, use Option 1 ■ using twist-on connector. Route the power supply cord so that it does not touch dishwasher motor or lower part of dishwasher tub. Do not pre-twist bare wire. ■ Twist connector. ■ Gently tug on connectors to connect your household wiring to 16...in terminal box. Reinstall terminal box cover with wires inside terminal box. Route direct wire so that it does not touch dishwasher motor or lower part of dishwasher tub. 2. Do not pre-twist bare wire. ■ Twist connector. ■ Gently tug on wires to be outside the box...

Installation Instructions
Page 13
... box on the left side. Place shallow pan under end of dishwasher tub. Check that power supply cord does not touch dishwasher motor or lower part of drain hose connector. For either location, connect the drain hose to drain 1. Be sure rubber washer is tight. Using pliers, check the tightness of...
... box on the left side. Place shallow pan under end of dishwasher tub. Check that power supply cord does not touch dishwasher motor or lower part of drain hose connector. For either location, connect the drain hose to drain 1. Be sure rubber washer is tight. Using pliers, check the tightness of...

Installation Instructions
Page 16
... and edges of trim down and slide into access panel frame. For custom door panels weighing more than 4 lbs (1.8 kg), use Heavy Duty Spring Kit, Part Number 4318050. Custom door and access panels 2. Remove top trim and set it into place. To change access panel color 1. Slowly slide color access panel...
... and edges of trim down and slide into access panel frame. For custom door panels weighing more than 4 lbs (1.8 kg), use Heavy Duty Spring Kit, Part Number 4318050. Custom door and access panels 2. Remove top trim and set it into place. To change access panel color 1. Slowly slide color access panel...
Installation Instructions
Page 18
... cost of trim down into channel as shown. Save color access panel and spacer for proper operation. Check that all the tools you have all parts have been installed and no steps were skipped. 3. If the dishwasher is working properly, disconnect power or unplug dishwasher and see "If dishwasher does not...
... cost of trim down into channel as shown. Save color access panel and spacer for proper operation. Check that all the tools you have all parts have been installed and no steps were skipped. 3. If the dishwasher is working properly, disconnect power or unplug dishwasher and see "If dishwasher does not...

Warranty
Page 1
...future reference. You can write to be provided by Whirlpool. 5. For assistance or service in remote locations. 10. W10130987A SP PN W10133162A © 2007 Whirlpool Corporation. ITEMS WHIRLPOOL WILL NOT PAY FOR 1. Repairs to parts or systems resulting from warranty coverage. 3. Expenses for...Please keep this warranty does not apply. Replacement parts or repair labor costs for Factory Specified Parts and repair labor to the Internet and you need further assistance, you may contact Whirlpool at : In U.S.A.: Whirlpool Brand Home Appliances Customer eXperience Center 553 Benson ...
...future reference. You can write to be provided by Whirlpool. 5. For assistance or service in remote locations. 10. W10130987A SP PN W10133162A © 2007 Whirlpool Corporation. ITEMS WHIRLPOOL WILL NOT PAY FOR 1. Repairs to parts or systems resulting from warranty coverage. 3. Expenses for...Please keep this warranty does not apply. Replacement parts or repair labor costs for Factory Specified Parts and repair labor to the Internet and you need further assistance, you may contact Whirlpool at : In U.S.A.: Whirlpool Brand Home Appliances Customer eXperience Center 553 Benson ...


