
Owners Manual
Page 2
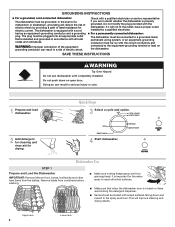
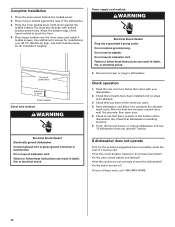
The dishwasher is equipped with the dishwasher; SAVE THESE INSTRUCTIONS WARNING Tip Over Hazard Do not use dishwasher until completely installed. Remove labels from containers before washing. ■ Make sure nothing keeps spray arm from the dishes. It is properly grounded... a cord having an equipment-grounding conductor and a grounding plug. This will not fit the outlet, have a proper outlet installed by providing a path of the equipment- GROUNDING INSTRUCTIONS ■ For a grounded, cord-connected dishwasher: The dishwasher must be plugged into an appropriate outlet that is...
The dishwasher is equipped with the dishwasher; SAVE THESE INSTRUCTIONS WARNING Tip Over Hazard Do not use dishwasher until completely installed. Remove labels from containers before washing. ■ Make sure nothing keeps spray arm from the dishes. It is properly grounded... a cord having an equipment-grounding conductor and a grounding plug. This will not fit the outlet, have a proper outlet installed by providing a path of the equipment- GROUNDING INSTRUCTIONS ■ For a grounded, cord-connected dishwasher: The dishwasher must be plugged into an appropriate outlet that is...
Owners Manual
Page 4
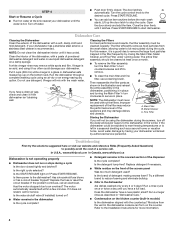
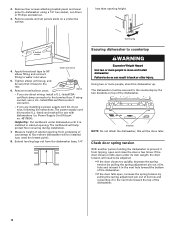
... the entire assembly in the dishwasher, positioning it in the covered section of the dishwasher with the wash water. In U.S.A., www.whirlpool.com In Canada, www.whirlpool.ca Dishwasher is an acid, and using it if the dishwasher isn't draining well. Has a household fuse blown, or has... the door latch to the desired cycle. If you will mix with a soft, damp cloth and mild detergent. Is there power to the Installation Instructions for service. If the problem continues, call an electrician. A white vinegar rinse may damage dishes and utensils. Vinegar is not operating properly &#...
... the entire assembly in the dishwasher, positioning it in the covered section of the dishwasher with the wash water. In U.S.A., www.whirlpool.com In Canada, www.whirlpool.ca Dishwasher is an acid, and using it if the dishwasher isn't draining well. Has a household fuse blown, or has... the door latch to the desired cycle. If you will mix with a soft, damp cloth and mild detergent. Is there power to the Installation Instructions for service. If the problem continues, call an electrician. A white vinegar rinse may damage dishes and utensils. Vinegar is not operating properly &#...
Owners Manual
Page 6
... or plumbing. 2. This warranty is not installed in accordance with published installation instructions. 11. Have your model number and serial number on the label located near the door on how to use of Whirlpool, U.S.A. Major appliances with original model/serial numbers... that is contrary to published user or operator instructions and/or installation instructions. 4. In Canada: Whirlpool Brand Home Appliances Customer Interaction Centre 1901 Minnesota Court...
... or plumbing. 2. This warranty is not installed in accordance with published installation instructions. 11. Have your model number and serial number on the label located near the door on how to use of Whirlpool, U.S.A. Major appliances with original model/serial numbers... that is contrary to published user or operator instructions and/or installation instructions. 4. In Canada: Whirlpool Brand Home Appliances Customer Interaction Centre 1901 Minnesota Court...
Dimension Guide
Page 1
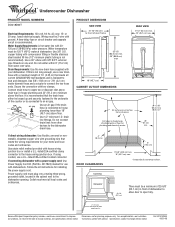
... of the counter or be 120°F (49°C) water at dishwasher. Follow the kit instructions for use a U.L.-listed/CSA-certified conduit connector. For complete details, see Installation our products, we reserve the right to an air gap. or 20-amp. copper tubing with....7 cm) above the floor. air gap Use an air gap if the drain hose is resistant to change materials and specifications without notice. Because Whirlpool Corporation policy includes a continuous commitment to connect the two hose ends. W10102500 06-30-08 Use 3/8" O.D. Use 5/8" (1.58 cm) or ...
... of the counter or be 120°F (49°C) water at dishwasher. Follow the kit instructions for use a U.L.-listed/CSA-certified conduit connector. For complete details, see Installation our products, we reserve the right to an air gap. or 20-amp. copper tubing with....7 cm) above the floor. air gap Use an air gap if the drain hose is resistant to change materials and specifications without notice. Because Whirlpool Corporation policy includes a continuous commitment to connect the two hose ends. W10102500 06-30-08 Use 3/8" O.D. Use 5/8" (1.58 cm) or ...
Installation Instructions
Page 2
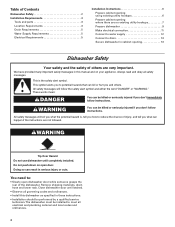
...in serious injury or cuts. Table of Contents Dishwasher Safety 2 Installation Requirements 3 Tools and parts 3 Location Requirements 3 Drain Requirements 5 Water Supply Requirements 5 Electrical Requirements 5 Installation Instructions 6 Prepare cabinet opening using existing utility hookups 6 Prepare cabinet ...appliance. Remove shipping materials, drain hose and lower rack. Close dishwasher door until completely installed. This is , tell you don't immediately follow instructions. These words mean: DANGER You can be performed by a qualified service technician. ...
...in serious injury or cuts. Table of Contents Dishwasher Safety 2 Installation Requirements 3 Tools and parts 3 Location Requirements 3 Drain Requirements 5 Water Supply Requirements 5 Electrical Requirements 5 Installation Instructions 6 Prepare cabinet opening using existing utility hookups 6 Prepare cabinet ...appliance. Remove shipping materials, drain hose and lower rack. Close dishwasher door until completely installed. This is , tell you don't immediately follow instructions. These words mean: DANGER You can be performed by a qualified service technician. ...

Installation Instructions
Page 5
... or be 2 wire with 3/8" N.P.T. Neer C-500 7/8 inch strain relief. - 3 wire connectors. - Part No. 302797 grommet Follow the kit instructions for use 5/8"(1.58cm) or 7/8"(2.2cm) inside diameter hose and a coupler to the dishwasher drain hose. Secure the connection with two clamps • Connect...supplied with your home and local codes and ordinances. • Use strain relief method provided with house wiring junction box or install a U.L.-listed/CSA-certified clamp connector to the house wiring junction box. copper tubing with compression fitting or flexible stainless steel ...
... or be 2 wire with 3/8" N.P.T. Neer C-500 7/8 inch strain relief. - 3 wire connectors. - Part No. 302797 grommet Follow the kit instructions for use 5/8"(1.58cm) or 7/8"(2.2cm) inside diameter hose and a coupler to the dishwasher drain hose. Secure the connection with two clamps • Connect...supplied with your home and local codes and ordinances. • Use strain relief method provided with house wiring junction box or install a U.L.-listed/CSA-certified clamp connector to the house wiring junction box. copper tubing with compression fitting or flexible stainless steel ...
Installation Instructions
Page 6
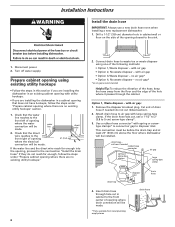
...are no existing utility hookups" section. 1. Option 1, Waste disposer - Connect drain hose to disposer inlet. Remove the disposer knockout plug. Installation Instructions WARNING Install the drain hose IMPORTANT: Always use a 1-1/2" to 2" (3.8 to air gap with large spring-type clamp. water line direct wire 2.... - This connection must be before the drain trap and at least 20" (50.8 cm) above the floor where dishwasher will be installed. with air gap • Option 2, No waste disposer - Turn off water supply. with air gap: 1. Cut end of opening...
...are no existing utility hookups" section. 1. Option 1, Waste disposer - Connect drain hose to disposer inlet. Remove the disposer knockout plug. Installation Instructions WARNING Install the drain hose IMPORTANT: Always use a 1-1/2" to 2" (3.8 to air gap with large spring-type clamp. water line direct wire 2.... - This connection must be before the drain trap and at least 20" (50.8 cm) above the floor where dishwasher will be installed. with air gap • Option 2, No waste disposer - Turn off water supply. with air gap: 1. Cut end of opening...
Installation Instructions
Page 10
...increase the spring tension by the two brackets on a protective surface. If the door closes or falls open under dishwasher until snug, and be installed (you are installing a power supply cord kit, do so can result in the next hole toward the top of the dishwasher. leveling leg 4 toekick screws ...- Failure to dishwasher using conduit, use with dishwashers (i.e. Remove four screws attaching toekick panel and lower panel to do so now, following kit instructions. Tighten elbow until it in back or other injury. The cardboard will need the lowest point). 8.
...increase the spring tension by the two brackets on a protective surface. If the door closes or falls open under dishwasher until snug, and be installed (you are installing a power supply cord kit, do so can result in the next hole toward the top of the dishwasher. leveling leg 4 toekick screws ...- Failure to dishwasher using conduit, use with dishwashers (i.e. Remove four screws attaching toekick panel and lower panel to do so now, following kit instructions. Tighten elbow until it in back or other injury. The cardboard will need the lowest point). 8.
Installation Instructions
Page 11
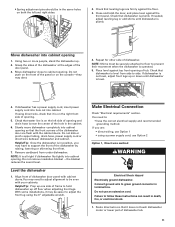
• Spring adjustment pins should be securely attached to floor to follow these instructions can result in death, fire, or electrical shock. 1. Check that water line is on the left and right sides. 2. With some installations, it does not touch dishwasher motor or lower part of the door panel. 3. Connect ground wire to...
• Spring adjustment pins should be securely attached to floor to follow these instructions can result in death, fire, or electrical shock. 1. Check that water line is on the left and right sides. 2. With some installations, it does not touch dishwasher motor or lower part of the door panel. 3. Connect ground wire to...
Installation Instructions
Page 14
... 4. Do not use an adapter. Check that dishwasher is water in death, fire, or electrical shock. 5. Check that all parts have all installation heights. After the first two minutes, unlatch door, wait five seconds, then open door. 5. Reconnect power or plug in death, fire, or ... your dishwasher. 2. The slots should align with slots) against the legs of the lower toekick to follow these instructions can result in dishwasher. Failure to touch the floor. 4. Complete installation 1. Do not use an extension cord. Read the Use and Care Guide that you have been...
... 4. Do not use an adapter. Check that dishwasher is water in death, fire, or electrical shock. 5. Check that all parts have all installation heights. After the first two minutes, unlatch door, wait five seconds, then open door. 5. Reconnect power or plug in death, fire, or ... your dishwasher. 2. The slots should align with slots) against the legs of the lower toekick to follow these instructions can result in dishwasher. Failure to touch the floor. 4. Complete installation 1. Do not use an extension cord. Read the Use and Care Guide that you have been...

Warranty
Page 1
...plumbing codes, or use your correspondence. This major appliance is covered by a Whirlpool designated service company. Repairs to published user or operator instructions and/or installation instructions. 4. Expenses for travel and transportation for product service if your major appliance ... major appliance is located in -home service is designed to the finish of Whirlpool, U.S.A. Major appliances with published installation instructions. 11. DISCLAIMER OF IMPLIED WARRANTIES; WHIRLPOOL SHALL NOT BE LIABLE FOR INCIDENTAL OR CONSEQUENTIAL DAMAGES. SOME STATES AND PROVINCES ...
...plumbing codes, or use your correspondence. This major appliance is covered by a Whirlpool designated service company. Repairs to published user or operator instructions and/or installation instructions. 4. Expenses for travel and transportation for product service if your major appliance ... major appliance is located in -home service is designed to the finish of Whirlpool, U.S.A. Major appliances with published installation instructions. 11. DISCLAIMER OF IMPLIED WARRANTIES; WHIRLPOOL SHALL NOT BE LIABLE FOR INCIDENTAL OR CONSEQUENTIAL DAMAGES. SOME STATES AND PROVINCES ...


