Quick Install Guide (pdf)
Page 1
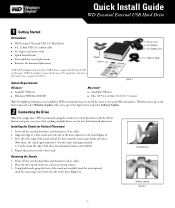
... edge of the drive adjacent to the Start menu and select Windows Update. Install Stands Removing the Stands 1. Available USB port ! Power off the external hard drive and disconnect all its cables. 2. Place the drive upside down on top for vertical placement ! Using ... to the Apple menu and select Software Update. 2 Connecting the Drive Note: For a single drive, WD recommends using the stands for vertical placement with the Power button on a clean and steady surface. 3. USB 2.0 is required for Vertical Placement 1. Remove Stands Figure 2 - 1 - Mac OS 9.2.2 or Mac ...
... edge of the drive adjacent to the Start menu and select Windows Update. Install Stands Removing the Stands 1. Available USB port ! Power off the external hard drive and disconnect all its cables. 2. Place the drive upside down on top for vertical placement ! Using ... to the Apple menu and select Software Update. 2 Connecting the Drive Note: For a single drive, WD recommends using the stands for vertical placement with the Power button on a clean and steady surface. 3. USB 2.0 is required for Vertical Placement 1. Remove Stands Figure 2 - 1 - Mac OS 9.2.2 or Mac ...
Quick Install Guide (pdf)
Page 2
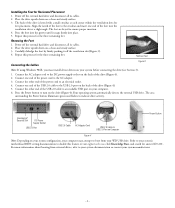
... operating system automatically detects the external USB drive. Kensington® Security Slot DC Power Supply Socket USB 2.0 Port USB 2.0 Cable AC Adapter Cord USB 2.0 Cable to USB 2.0 Port on Computer Power Button Figure 4 Note: Depending on your system's motherboard BIOS setting documentation to ... the groove until it off the external hard drive and disconnect all its cables. 2. Installing the Feet for feet placement. Press the Power button to ensure proper insertion. 4. The back of the drive is keyed with a small crossbar at a slight angle. Remove Feet ...
... operating system automatically detects the external USB drive. Kensington® Security Slot DC Power Supply Socket USB 2.0 Port USB 2.0 Cable AC Adapter Cord USB 2.0 Cable to USB 2.0 Port on Computer Power Button Figure 4 Note: Depending on your system's motherboard BIOS setting documentation to ... the groove until it off the external hard drive and disconnect all its cables. 2. Installing the Feet for feet placement. Press the Power button to ensure proper insertion. 4. The back of the drive is keyed with a small crossbar at a slight angle. Remove Feet ...
Quick Install Guide (pdf)
Page 3
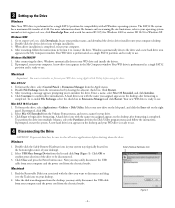
...Double-click the Safely Remove Hardware icon in your system tray (typically located on your computer and the power cord from your desktop. 2. Click Close and press the Power button once. After the disk icon disappears from the electrical outlet. Double-click the device driver icon to...drive and installs the drivers. 2. Your WD drive is preformatted as a single FAT32 partition and is completed, restart your computer and the power cord from the desktop, you assigned appears on the desktop after formatting is ready to begin drive formatting. To format the drive, select ...
...Double-click the Safely Remove Hardware icon in your system tray (typically located on your computer and the power cord from your desktop. 2. Click Close and press the Power button once. After the disk icon disappears from the electrical outlet. Double-click the device driver icon to...drive and installs the drivers. 2. Your WD drive is preformatted as a single FAT32 partition and is completed, restart your computer and the power cord from the desktop, you assigned appears on the desktop after formatting is ready to begin drive formatting. To format the drive, select ...


