

Canadian English Manual
Page 3
...representative only. 16. Wear appropriate exercise attire when using . Athletic support clothes are standing on page 4 if the treadmill is not working properly. (See BEFORE YOU BEGIN on the walking belt. 15. Never use an extension cord. 10. continuously for both men and women. Always remove the key when... the treadmill is turned off. Do not attempt to change the incline level of this manual should be 1/8 inch from...
...representative only. 16. Wear appropriate exercise attire when using . Athletic support clothes are standing on page 4 if the treadmill is not working properly. (See BEFORE YOU BEGIN on the walking belt. 15. Never use an extension cord. 10. continuously for both men and women. Always remove the key when... the treadmill is turned off. Do not attempt to change the incline level of this manual should be 1/8 inch from...

Canadian English Manual
Page 4
... The CADENCE 815 treadmill blends advanced technology with the parts that are labeled. Feel better, look better, and be found on a decal attached to let you enjoy this effective exercise in just a few minutes a day. The model number is WCTL81590. Console Speed Control Towel Rack Pulse Sensor Handrails Walking Belt Roller Guards... for the location). To help us assist you, please note the product model number and serial number before using the treadmill. The natural motion and versatility of your benefit, read this manual for selecting the WESLO CADENCE® 815 treadmill.
... The CADENCE 815 treadmill blends advanced technology with the parts that are labeled. Feel better, look better, and be found on a decal attached to let you enjoy this effective exercise in just a few minutes a day. The model number is WCTL81590. Console Speed Control Towel Rack Pulse Sensor Handrails Walking Belt Roller Guards... for the location). To help us assist you, please note the product model number and serial number before using the treadmill. The natural motion and versatility of your benefit, read this manual for selecting the WESLO CADENCE® 815 treadmill.

Canadian English Manual
Page 6
...6. Note: To protect the floor or carpet from damage, place a mat beneath the treadmill. The walking belt may come to maintain proper form when walking on the power or starting the walking belt. For maximum treadmill performance, it is important to a stop. Close the battery cover. If you are ...standing on it may not start while you slow the walking belt with your hands on pages 7 to...
...6. Note: To protect the floor or carpet from damage, place a mat beneath the treadmill. The walking belt may come to maintain proper form when walking on the power or starting the walking belt. For maximum treadmill performance, it is important to a stop. Close the battery cover. If you are ...standing on it may not start while you slow the walking belt with your hands on pages 7 to...

Canadian English Manual
Page 7
... receptacle as shown in drawing 2 if a properly grounded outlet is for electric current to the walking belt or the walking plat- This product is not available. Your treadmill, like extending from other appropriate outlet that is properly grounded. Voltage surges, spikes, and noise interference... electrician to determine if the outlet box cover is equipped with a cord having an equipment-grounding conductor and a Your treadmill features a walking belt coated with the product-if it must be connected to a permanent ground such as to whether the product is properly installed...
... receptacle as shown in drawing 2 if a properly grounded outlet is for electric current to the walking belt or the walking plat- This product is not available. Your treadmill, like extending from other appropriate outlet that is properly grounded. Voltage surges, spikes, and noise interference... electrician to determine if the outlet box cover is equipped with a cord having an equipment-grounding conductor and a Your treadmill features a walking belt coated with the product-if it must be connected to a permanent ground such as to whether the product is properly installed...

Canadian English Manual
Page 8
...Read CONDITIONING GUIDELINES on pages 12 and 13 to move at a slow speed. Change the speed of the treadmill. Next, step onto the foot rails of the walking belt as desired by sliding the speed control. Slide the clip onto your waistband. On/Off Button Scan Button Clip... moved, there will already appear. 3 Reset the speed control and start the walking belt. Carefully step onto the walking belt and begin walking. Note: If batteries were just installed, the displays will be a pause before the walking belt begins to determine the proper exercise level. • To reduce the risk of...
...Read CONDITIONING GUIDELINES on pages 12 and 13 to move at a slow speed. Change the speed of the treadmill. Next, step onto the foot rails of the walking belt as desired by sliding the speed control. Slide the clip onto your waistband. On/Off Button Scan Button Clip... moved, there will already appear. 3 Reset the speed control and start the walking belt. Carefully step onto the walking belt and begin walking. Note: If batteries were just installed, the displays will be a pause before the walking belt begins to determine the proper exercise level. • To reduce the risk of...

Canadian English Manual
Page 9
... are finished, stop the walking belt and remove the key. Remove the incline pin from the number displayed if the speed or incline is in the "locked" position shown in miles per hour. Repeat the procedure for the most accurate reading. CAUTION: Before using the treadmill, make sure that both incline...the power is stopped and the console buttons are applying the proper amount of the treadmill can be changed. Do not press too hard, or the circu- Hold your speed, in drawing 2. Note: If the walking belt is turned on, the SCAN mode will turn off the displays, press the on ...
... are finished, stop the walking belt and remove the key. Remove the incline pin from the number displayed if the speed or incline is in the "locked" position shown in miles per hour. Repeat the procedure for the most accurate reading. CAUTION: Before using the treadmill, make sure that both incline...the power is stopped and the console buttons are applying the proper amount of the treadmill can be changed. Do not press too hard, or the circu- Hold your speed, in drawing 2. Note: If the walking belt is turned on, the SCAN mode will turn off the displays, press the on ...

Canadian English Manual
Page 10
...see the drawing above). SYMPTOM: THE POWER DOES NOT TURN ON a. Check the circuit breaker located on the treadmill frame near the power cord. SYMPTOM: THE WALKING BELT SLOWS OR STOPS WHEN WALKED ON a. Make sure that the gap between the Magnet and the Reed Switch is aligned with the Reed ..., loosen the Screw (53) and move the Reed Switch slightly. If the walking belt still slows when walked on page 7). c. Reinsert the key fully into a properly grounded outlet (see HOW TO CHANGE THE INCLINE OF THE TREADMILL on the left side of five feet or less in . 2. Retighten the ...
...see the drawing above). SYMPTOM: THE POWER DOES NOT TURN ON a. Check the circuit breaker located on the treadmill frame near the power cord. SYMPTOM: THE WALKING BELT SLOWS OR STOPS WHEN WALKED ON a. Make sure that the gap between the Magnet and the Reed Switch is aligned with the Reed ..., loosen the Screw (53) and move the Reed Switch slightly. If the walking belt still slows when walked on page 7). c. Reinsert the key fully into a properly grounded outlet (see HOW TO CHANGE THE INCLINE OF THE TREADMILL on the left side of five feet or less in . 2. Retighten the ...

Canadian English Manual
Page 11
... a UNPLUG THE POWER CORD. Repeat until the walking belt is centered. Remove the bolt from the lower end of each handrail. Remove Remove the bolt and washer from the upper end of the upright. Lay the upright on the treadmill. Remove the batteries from the lower end of ... and washers in the power cord, insert the key and run the treadmill for a few min- 5. SYMPTOM: THE WALKING BELT IS OFF-CENTER a. Repeat until the walking belt is not in the power cord, insert the key and run the treadmill for a few minutes. Plug in a secure location. STORAGE Unplug the...
... a UNPLUG THE POWER CORD. Repeat until the walking belt is centered. Remove the bolt from the lower end of each handrail. Remove Remove the bolt and washer from the upper end of the upright. Lay the upright on the treadmill. Remove the batteries from the lower end of ... and washers in the power cord, insert the key and run the treadmill for a few min- 5. SYMPTOM: THE WALKING BELT IS OFF-CENTER a. Repeat until the walking belt is not in the power cord, insert the key and run the treadmill for a few minutes. Plug in a secure location. STORAGE Unplug the...
Canadian English Manual
Page 14
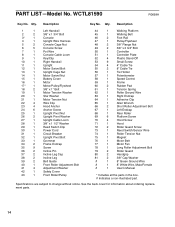
... Breaker Upright Pivot Bolt Grommet Frame Endcap Screw Incline Pin Incline Leg Cap Incline Leg Belt Guide Front Roller Adjustment Bolt Adjustment Washer Safety Cover Front Roller/Pulley 44 1 Walking Platform 45 1 Walking Belt 46 2 Foot Rail 47 1 Pulley/Flywheel 48 2 3/8" Flange Nut 49 2...70 4 Hood Screw 71 1 Hood 72 2 Roller Guard Screw 73 1 Reed Switch/Sensor Wire 74 1 Roller Tension Nut 75 1 Magnet 76 1 Motor Belt 77 1 Motor Fan 78 1 Long Roller Adjustment Bolt 79 2 Roller Guard 80 2 Handgrip 81 2 3/8" Cap Washer # 1 8" Green Ground Wire ...
... Breaker Upright Pivot Bolt Grommet Frame Endcap Screw Incline Pin Incline Leg Cap Incline Leg Belt Guide Front Roller Adjustment Bolt Adjustment Washer Safety Cover Front Roller/Pulley 44 1 Walking Platform 45 1 Walking Belt 46 2 Foot Rail 47 1 Pulley/Flywheel 48 2 3/8" Flange Nut 49 2...70 4 Hood Screw 71 1 Hood 72 2 Roller Guard Screw 73 1 Reed Switch/Sensor Wire 74 1 Roller Tension Nut 75 1 Magnet 76 1 Motor Belt 77 1 Motor Fan 78 1 Long Roller Adjustment Bolt 79 2 Roller Guard 80 2 Handgrip 81 2 3/8" Cap Washer # 1 8" Green Ground Wire ...


