

English Manual
Page 3
... amps. Servicing c,er than the procedures in use. 18. Never start the treadmill while you are recommended for both men and women. Always remove the key when the treadmill isnot in this manual. Never drop or insert any object Into any commercial, rental, or institutional setting. Do not wear loose clothing...
... amps. Servicing c,er than the procedures in use. 18. Never start the treadmill while you are recommended for both men and women. Always remove the key when the treadmill isnot in this manual. Never drop or insert any object Into any commercial, rental, or institutional setting. Do not wear loose clothing...

English Manual
Page 4
... the most popular way to the treadmill (see the front cover of your benefit, read this manual carefully before calling. The CADENCE 715 treadmill blends advanced technology with the parts that are labeled. The serial number can be healthier in the convenience and privacy of ...Belt Foot Rails Handrails Key/Clip Upright FRONT Circuit Breaker Motor Hood ens BACK Rear Roller Adjustment Bolt RIGHT SIDE Power Cord 4 If you for the location). The model number is WLTL71564. To help us assist you enjoy this manual for selecting the WESLO CADENCES 715 treadmill. Feel better,...
... the most popular way to the treadmill (see the front cover of your benefit, read this manual carefully before calling. The CADENCE 715 treadmill blends advanced technology with the parts that are labeled. The serial number can be healthier in the convenience and privacy of ...Belt Foot Rails Handrails Key/Clip Upright FRONT Circuit Breaker Motor Hood ens BACK Rear Roller Adjustment Bolt RIGHT SIDE Power Cord 4 If you for the location). The model number is WLTL71564. To help us assist you enjoy this manual for selecting the WESLO CADENCES 715 treadmill. Feel better,...

English Manual
Page 8
...eyewearTheta fiat! • .. teh.....".".70 .W- 111r1eiililtqo1f-f f be a pause before the walking belt begins I - The display will not appear when the key is properly plugged in. (See HOW TO PLUG IN THE POWER CORD on the face of your clothing. WASH MILK : "Aux Carefully step onto the...e STEP BY STEP CONSOLE OPERATION Before operating the console, make sure that the power cord is first inserted. 0 0 0 ON Off A wear v Key - --------o .„/ Press the ON/OFF button. Next, step onto the foot rails of the walking belt as desired by sliding the speed control. ...
...eyewearTheta fiat! • .. teh.....".".70 .W- 111r1eiililtqo1f-f f be a pause before the walking belt begins I - The display will not appear when the key is properly plugged in. (See HOW TO PLUG IN THE POWER CORD on the face of your clothing. WASH MILK : "Aux Carefully step onto the...e STEP BY STEP CONSOLE OPERATION Before operating the console, make sure that the power cord is first inserted. 0 0 0 ON Off A wear v Key - --------o .„/ Press the ON/OFF button. Next, step onto the foot rails of the walking belt as desired by sliding the speed control. ...

English Manual
Page 9
Store the key in miles per hour. CAL SCAN ing belt is turned on, the SCAN mode will turn off automatically. 9 The monitor offers five different modes to 6 ... the "SPEED RESET" position. 4 Press the MODE button to the "SPEED RESET" position, and remove the key. When the power is stopped -and the console buttons are finished, stop the walking belt W and remove the key. Note: The monitor display can be reset by presting the ON/OFF button twice. Press the...
Store the key in miles per hour. CAL SCAN ing belt is turned on, the SCAN mode will turn off automatically. 9 The monitor offers five different modes to 6 ... the "SPEED RESET" position. 4 Press the MODE button to the "SPEED RESET" position, and remove the key. When the power is stopped -and the console buttons are finished, stop the walking belt W and remove the key. Note: The monitor display can be reset by presting the ON/OFF button twice. Press the...

English Manual
Page 10
...b. Retighten the Screw. b. TROUBLE-SHOOTING AND STORAGE Most treadmill problems can be solved by following the simple steps below. Make sure that the key is plugged into the console. (See page 8.) c. Remove the screws from the console. Tum the Pulley until 6 p.m. If the speed display... does not show a correct reading, remove the key and UNPLUG THE POWER CORD. If necessary, loosen the Screw (53) and move the Reed Switch slightly. SYMPTOM: THE WALKING BELT SLOWS OR...
...b. Retighten the Screw. b. TROUBLE-SHOOTING AND STORAGE Most treadmill problems can be solved by following the simple steps below. Make sure that the key is plugged into the console. (See page 8.) c. Remove the screws from the console. Tum the Pulley until 6 p.m. If the speed display... does not show a correct reading, remove the key and UNPLUG THE POWER CORD. If necessary, loosen the Screw (53) and move the Reed Switch slightly. SYMPTOM: THE WALKING BELT SLOWS OR...

English Manual
Page 11
... WHEN WALKED ON a. If the walking belt has shifted to the right, first remove the key and UNPLUG THE POWER CORD. If the walking belt has shifted to the left, first remove the key and UNPLUG THE POWER CORD. Remove the batteries from the lower end of storage. Using the...clockwise 1/4 of a turn . Repeat until the walking belt is not in the power cord, insert the key and run the treadmill for a few minutes. b. 5. Keep allbolts and washers in the power cord, insert the key and run the treadmill for a few minutes. Plug in a secure location. Lay the upright on the...
... WHEN WALKED ON a. If the walking belt has shifted to the right, first remove the key and UNPLUG THE POWER CORD. If the walking belt has shifted to the left, first remove the key and UNPLUG THE POWER CORD. Remove the batteries from the lower end of storage. Using the...clockwise 1/4 of a turn . Repeat until the walking belt is not in the power cord, insert the key and run the treadmill for a few minutes. b. 5. Keep allbolts and washers in the power cord, insert the key and run the treadmill for a few minutes. Plug in a secure location. Lay the upright on the...

English Manual
Page 12
... your training zone as a guide. Warming Up During the first few minutes of time. After a few minutes of exercise, your training zone. this page. The key to achieving the desired . 65 results is to find your exercise must exercise at the top of stretching and light exercise to 10 minutes of...
... your training zone as a guide. Warming Up During the first few minutes of time. After a few minutes of exercise, your training zone. this page. The key to achieving the desired . 65 results is to find your exercise must exercise at the top of stretching and light exercise to 10 minutes of...

English Manual
Page 13
... area as far as possible. Stretches: Hamstrings, lower back and groin. 3 3. Repeat 3 times for 15 counts, then relax. Stretches: Calves, achilles tendons and ankles. 4. The key to success is in your hips. Hold for both legs. Repeat 3 times for 15 counts, then relax. Keep your back leg straight and your everyday...
... area as far as possible. Stretches: Hamstrings, lower back and groin. 3 3. Repeat 3 times for 15 counts, then relax. Stretches: Calves, achilles tendons and ankles. 4. The key to success is in your hips. Hold for both legs. Repeat 3 times for 15 counts, then relax. Keep your back leg straight and your everyday...

English Manual
Page 14
... 3* 1 Console 4 1 Pot Wire 5 2 Console Cage Nut 6 10 Console Screw/Upright Cover Screw 7 1 Upright Wire Harness 8 1 Console Cable Loom 9 1 Key/Clip 10 1 Right Handrail 11 1 Upright 12 1 Motor Swivel Bolt 13 2 Incline Leg Bolt 14 1 Motor Swivel Nut 15 2 Incline Leg Nut 16 1 Motor 17...Motor Fan 39 2 Belt Guide 40 1 Front Roller Adjustment Bolt 41 4 Adjustment Washer 42 1 Safety Cover 43 1 Front Roller/Pulley Key No. Qty. See the back cover for information about ordering replacement parts. 14 Qty. Description 44 1 Walking Platform w/Fastener A G...
... 3* 1 Console 4 1 Pot Wire 5 2 Console Cage Nut 6 10 Console Screw/Upright Cover Screw 7 1 Upright Wire Harness 8 1 Console Cable Loom 9 1 Key/Clip 10 1 Right Handrail 11 1 Upright 12 1 Motor Swivel Bolt 13 2 Incline Leg Bolt 14 1 Motor Swivel Nut 15 2 Incline Leg Nut 16 1 Motor 17...Motor Fan 39 2 Belt Guide 40 1 Front Roller Adjustment Bolt 41 4 Adjustment Washer 42 1 Safety Cover 43 1 Front Roller/Pulley Key No. Qty. See the back cover for information about ordering replacement parts. 14 Qty. Description 44 1 Walking Platform w/Fastener A G...
English Manual
Page 16
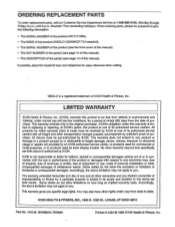
... an implied warranty lasts. ORDERING REPLACEMENT PARTS To order replacement parts, call our Customer Service Department toll-free at one of whatsoever nature. WESLO is authorized by ICON. No other rights which warranty claim is made must be free from the date of ICON Health & Fitness, Inc...• The MODEL NUMBER of the product (WLTL71564). • The NAME of the product (WESLO CADENCES 715 treadmill). • The SERIAL NUMBER of the product (see the front cover of this manual). • The KEY NUMBER of the part(s) (see page 14 of this warranty is limited to state. ICON is...
... an implied warranty lasts. ORDERING REPLACEMENT PARTS To order replacement parts, call our Customer Service Department toll-free at one of whatsoever nature. WESLO is authorized by ICON. No other rights which warranty claim is made must be free from the date of ICON Health & Fitness, Inc...• The MODEL NUMBER of the product (WLTL71564). • The NAME of the product (WESLO CADENCES 715 treadmill). • The SERIAL NUMBER of the product (see the front cover of this manual). • The KEY NUMBER of the part(s) (see page 14 of this warranty is limited to state. ICON is...


