

English Manual
Page 1
Hoffman Estates, IL 60179 CAUTION Read all precautions and instructions in the space above for future reference. Keep this equipment. Model No. 831.14922.2 Serial No. Write the serial number in this manual before using this manual for reference. WEIGHT SYSTEM EXERCISER User’'s Manual Serial Number Decal (under the seat) •• Assembly •• Operation •• Maintenance •• Part List and Drawing Sears, Roebuck and Co.
Hoffman Estates, IL 60179 CAUTION Read all precautions and instructions in the space above for future reference. Keep this equipment. Model No. 831.14922.2 Serial No. Write the serial number in this manual before using this manual for reference. WEIGHT SYSTEM EXERCISER User’'s Manual Serial Number Decal (under the seat) •• Assembly •• Operation •• Maintenance •• Part List and Drawing Sears, Roebuck and Co.

English Manual
Page 2
... replacement decal. TABLE OF CONTENTS WARNING DECAL PLACEMENT 2 IMPORTANT PRECAUTIONS 3 BEFORE YOU BEGIN 4 PART IDENTIFICATION CHART 5 ASSEMBLY 6 ADJUSTMENT 21 WEIGHT RESISTANCE CHART 23 CABLE DIAGRAM 24 MAINTENANCE 25 EXERCISE GUIDELINES 26 PART LIST 29 EXPLODED DRAWING 30 ORDERING REPLACEMENT PARTS Back Cover 90 DAY FULL WARRANTY Back Cover WARNING DECAL PLACEMENT This drawing...
... replacement decal. TABLE OF CONTENTS WARNING DECAL PLACEMENT 2 IMPORTANT PRECAUTIONS 3 BEFORE YOU BEGIN 4 PART IDENTIFICATION CHART 5 ASSEMBLY 6 ADJUSTMENT 21 WEIGHT RESISTANCE CHART 23 CABLE DIAGRAM 24 MAINTENANCE 25 EXERCISE GUIDELINES 26 PART LIST 29 EXPLODED DRAWING 30 ORDERING REPLACEMENT PARTS Back Cover 90 DAY FULL WARRANTY Back Cover WARNING DECAL PLACEMENT This drawing...
English Manual
Page 3
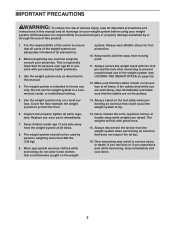
...stop immediately and make sure that all users of the weight system are adequately informed of all precautions. 2. Inspect and properly tighten all parts regularly. Wear appropriate exercise clothes while exercising; It is especially important for home use of the weight system (see LOCKING THE WEIGHT STACK ... does not require the lat bar. 16. Over exercising may result in serious injury or death. Always disconnect the lat bar from moving parts. 11. Use the weight system only on page 23). 12. Replace any exercise program, consult your weight system. Never release the arms...
...stop immediately and make sure that all users of the weight system are adequately informed of all precautions. 2. Inspect and properly tighten all parts regularly. Wear appropriate exercise clothes while exercising; It is especially important for home use of the weight system (see LOCKING THE WEIGHT STACK ... does not require the lat bar. 16. Over exercising may result in serious injury or death. Always disconnect the lat bar from moving parts. 11. Use the weight system only on page 23). 12. Replace any exercise program, consult your weight system. Never release the arms...

English Manual
Page 4
... cardiovascular system, the weight system will help us . Before reading further, please review the drawing below and familiarize yourself with the parts that are shown on the front cover of the serial number decal are labeled. they do not correspond to right and left side...this manual. If you want. The model number and the location of this manual carefully before contacting us assist you for selecting the versatile WEIDER PRO® 6900 weight system. Whether your goal is to a person sitting on the drawings in . (196 cm) High Pulley Station Arm Backrest Curl Pad...
... cardiovascular system, the weight system will help us . Before reading further, please review the drawing below and familiarize yourself with the parts that are shown on the front cover of the serial number decal are labeled. they do not correspond to right and left side...this manual. If you want. The model number and the location of this manual carefully before contacting us assist you for selecting the versatile WEIDER PRO® 6900 weight system. Whether your goal is to a person sitting on the drawings in . (196 cm) High Pulley Station Arm Backrest Curl Pad...

English Manual
Page 5
IMPORTANT: If you cannot find a part in the hardware kit, check to identify small parts used in parentheses by each drawing is missing, please call 1-877992-5999. If a part is the key number of the part, from the PART LIST near the end of this manual. PART IDENTIFICATION CHART Refer to the drawings ...below to see if it has been preassembled. To avoid damaging parts, do not use power tools for assembly. 13mm ...
IMPORTANT: If you cannot find a part in the hardware kit, check to identify small parts used in parentheses by each drawing is missing, please call 1-877992-5999. If a part is the key number of the part, from the PART LIST near the end of this manual. PART IDENTIFICATION CHART Refer to the drawings ...below to see if it has been preassembled. To avoid damaging parts, do not use power tools for assembly. 13mm ...
English Manual
Page 6
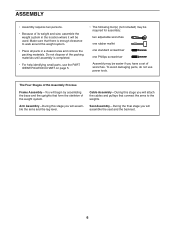
... and pulleys that form the skeleton of the weight system. Make sure that there is completed. •• For help identifying small parts, use power tools. The Four Stages of the Assembly Process Frame Assembly—-You will begin by assembling the base and the uprights ...;• Because of its weight and size, assemble the weight system in a cleared area and remove the packing materials. To avoid damaging parts, do not use the PART IDENTIFICATION CHART on page 5. •• The following tool(s) (not included) may be required for assembly: two adjustable wrenches one rubber...
... and pulleys that form the skeleton of the weight system. Make sure that there is completed. •• For help identifying small parts, use power tools. The Four Stages of the Assembly Process Frame Assembly—-You will begin by assembling the base and the uprights ...;• Because of its weight and size, assemble the weight system in a cleared area and remove the packing materials. To avoid damaging parts, do not use the PART IDENTIFICATION CHART on page 5. •• The following tool(s) (not included) may be required for assembly: two adjustable wrenches one rubber...

English Manual
Page 20
See steps 34 and 35. Make sure that the cables move smoothly, find and correct the problem. The use of the remaining parts will need to attach the Right Shroud (not shown). 35. Tighten the M4.2 x 16mm Self-tapping Screws (49) and the M4 x 12mm Screws (78). 36. ...Attach the Curl Pad (14) to make sure that all parts have been properly tightened. Before using the weight system, pull each cable a few times to the Curl Post (13) 36 with four M4.2 x 16mm Self...
See steps 34 and 35. Make sure that the cables move smoothly, find and correct the problem. The use of the remaining parts will need to attach the Right Shroud (not shown). 35. Tighten the M4.2 x 16mm Self-tapping Screws (49) and the M4 x 12mm Screws (78). 36. ...Attach the Curl Pad (14) to make sure that all parts have been properly tightened. Before using the weight system, pull each cable a few times to the Curl Post (13) 36 with four M4.2 x 16mm Self...

English Manual
Page 21
...55 37 35 21 ADJUSTMENT This section explains how to see the correct form for several exercises. Insert the Weight Pin so that all parts are properly tightened each time the weight system is in the correct starting position for the exercise to find the approximate amount of resistance ...at the high pulley station with two Cable Clips (37). Replace any worn parts immediately. CHANGING THE WEIGHT SETTING To change the setting of the Chain between the Lat Bar (35) and the High Cable (55) with a...
...55 37 35 21 ADJUSTMENT This section explains how to see the correct form for several exercises. Insert the Weight Pin so that all parts are properly tightened each time the weight system is in the correct starting position for the exercise to find the approximate amount of resistance ...at the high pulley station with two Cable Clips (37). Replace any worn parts immediately. CHANGING THE WEIGHT SETTING To change the setting of the Chain between the Lat Bar (35) and the High Cable (55) with a...

English Manual
Page 25
...) to clean the weight system. To clean the weight system, use solvents to the other hole in the U-bracket (45). MAINTENANCE Make sure that all parts are overtightened, the top weight will be replaced, see the back cover of this manual. 25 Replace any worn...
...) to clean the weight system. To clean the weight system, use solvents to the other hole in the U-bracket (45). MAINTENANCE Make sure that all parts are overtightened, the top weight will be replaced, see the back cover of this manual. 25 Replace any worn...

English Manual
Page 26
...least one minute after each set . Cooling Down—-Finish with 5 to 10 minutes of each exercise and move only the appropriate parts of the body. Exercise for 20 to 10 minutes of rest. Never hold your body’'s signals. STAYING MOTIVATED For motivation, keep ...moderate percentage of your workouts, vary the exercises from workout to develop. To achieve good results, make exercise a regular and enjoyable part of their maximum capacity and progressively increase the intensity of resistance that you perform. Begin with the equipment and learn the proper form...
...least one minute after each set . Cooling Down—-Finish with 5 to 10 minutes of each exercise and move only the appropriate parts of the body. Exercise for 20 to 10 minutes of rest. Never hold your body’'s signals. STAYING MOTIVATED For motivation, keep ...moderate percentage of your workouts, vary the exercises from workout to develop. To achieve good results, make exercise a regular and enjoyable part of their maximum capacity and progressively increase the intensity of resistance that you perform. Begin with the equipment and learn the proper form...

English Manual
Page 27
... Speed Strength Date: Aerobic Date: Exercise 1. 2. 3. 4. 5. Lbs. Lbs. Exercise Lbs. Lbs. Scheduling and recording your workouts will help you to make exercise a regular and enjoyable part of this page, and use the copies to schedule and record your life. Sets Reps 2. 7. 3. 8. 4. 9. 5. 10. Sets Reps Exercise 6. 7. 8. 9. 10.
... Speed Strength Date: Aerobic Date: Exercise 1. 2. 3. 4. 5. Lbs. Lbs. Exercise Lbs. Lbs. Scheduling and recording your workouts will help you to make exercise a regular and enjoyable part of this page, and use the copies to schedule and record your life. Sets Reps 2. 7. 3. 8. 4. 9. 5. 10. Sets Reps Exercise 6. 7. 8. 9. 10.

English Manual
Page 29
PART LIST Model No. 831.14922.2 R0912A Key No. Description Key No. Description 1 1 Base 2 1 Stabilizer 3 1 Upright 4 1 Top Frame 5 1 Pivot Frame 6 1 Seat Tube 7 1 Front Leg 8 1 Leg Lever 9 1 ... Thin Inner Cap 95 1 M6 x 38mm Screw * –- For information about ordering replacement parts, see the back cover of this manual. *These parts are subject to change without notice. Qty. User’'s Manual * –- Exercise Guide * –- If a part is missing, please call 1-877-992-5999. 29 Qty. Assembly Tool Note: Specifications are...
PART LIST Model No. 831.14922.2 R0912A Key No. Description Key No. Description 1 1 Base 2 1 Stabilizer 3 1 Upright 4 1 Top Frame 5 1 Pivot Frame 6 1 Seat Tube 7 1 Front Leg 8 1 Leg Lever 9 1 ... Thin Inner Cap 95 1 M6 x 38mm Screw * –- For information about ordering replacement parts, see the back cover of this manual. *These parts are subject to change without notice. Qty. User’'s Manual * –- Exercise Guide * –- If a part is missing, please call 1-877-992-5999. 29 Qty. Assembly Tool Note: Specifications are...

English Manual
Page 32
Sears, Roebuck and Co., Hoffman Estates, IL 60179 Part No. 338274 R0912A Printed in material or workmanship within 90 days of the date of purchase, call 1-800-4-MY-HOME® (1-800-469-4663) to ...
Sears, Roebuck and Co., Hoffman Estates, IL 60179 Part No. 338274 R0912A Printed in material or workmanship within 90 days of the date of purchase, call 1-800-4-MY-HOME® (1-800-469-4663) to ...


