

English Manual
Page 2
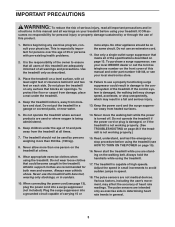
... YOU BEGIN 6 ASSEMBLY 7 HOW TO USE THE CHEST PULSE SENSOR 12 OPERATION AND ADJUSTMENT 13 HOW TO FOLD AND MOVE THE TREADMILL 25 TROUBLESHOOTING 26 EXERCISE GUIDELINES 29 PART LIST 30 EXPLODED DRAWING 32 ORDERING REPLACEMENT PARTS Back Cover LIMITED WARRANTY Back Cover WARNING DECAL PLACEMENT This drawing shows the locations of this manual and request a free replacement decal. If a decal is missing or illegible, call the telephone number on the front cover of the...
... YOU BEGIN 6 ASSEMBLY 7 HOW TO USE THE CHEST PULSE SENSOR 12 OPERATION AND ADJUSTMENT 13 HOW TO FOLD AND MOVE THE TREADMILL 25 TROUBLESHOOTING 26 EXERCISE GUIDELINES 29 PART LIST 30 EXPLODED DRAWING 32 ORDERING REPLACEMENT PARTS Back Cover LIMITED WARRANTY Back Cover WARNING DECAL PLACEMENT This drawing shows the locations of this manual and request a free replacement decal. If a decal is missing or illegible, call the telephone number on the front cover of the...
English Manual
Page 3
... treadmill is damaged, the walking belt may change speed, accelerate, or stop procedure before using the treadmill (see your physician. No other appliance should not be on the treadmill at a time. 9. If the control system is not working properly. (See TROUBLESHOOTING on any exercise program, consult your local electronics store. 12. Never move the walking belt while the power is being administered. 6. The pulse sensors are standing on page 13. ICON...
... treadmill is damaged, the walking belt may change speed, accelerate, or stop procedure before using the treadmill (see your physician. No other appliance should not be on the treadmill at a time. 9. If the control system is not working properly. (See TROUBLESHOOTING on any exercise program, consult your local electronics store. 12. Never move the walking belt while the power is being administered. 6. The pulse sensors are standing on page 13. ICON...
English Manual
Page 4
... tighten all parts of the reset/off " position when the treadmill is properly assembled. (See ASSEMBLY on page 7, and HOW TO FOLD AND MOVE THE TREADMILL on page 6 for proper grounding and, in this manual. tenance and adjustment procedures de- To protect the treadmill and TV during lightning storms, unplug the power cord from the wall outlet and disconnect the cable system. There are no user serviceable parts...
... tighten all parts of the reset/off " position when the treadmill is properly assembled. (See ASSEMBLY on page 7, and HOW TO FOLD AND MOVE THE TREADMILL on page 6 for proper grounding and, in this manual. tenance and adjustment procedures de- To protect the treadmill and TV during lightning storms, unplug the power cord from the wall outlet and disconnect the cable system. There are no user serviceable parts...
English Manual
Page 6
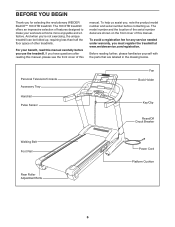
... Handrail Pulse Sensor Fan Book Holder Key/Clip Reset/Off Circuit Breaker Walking Belt Foot Rail Rear Roller Adjustment Bolts Power Cord Platform Cushion 6 For your workouts at www.weiderservice.com/registration. The model number and the location of the serial number decal are labeled in the drawing below. To avoid a registration fee for selecting the revolutionary WEIDER BLACK™ 160 XTB treadmill. If you ʼre not exercising, the unique treadmill can be folded up...
... Handrail Pulse Sensor Fan Book Holder Key/Clip Reset/Off Circuit Breaker Walking Belt Foot Rail Rear Roller Adjustment Bolts Power Cord Platform Cushion 6 For your workouts at www.weiderservice.com/registration. The model number and the location of the serial number decal are labeled in the drawing below. To avoid a registration fee for selecting the revolutionary WEIDER BLACK™ 160 XTB treadmill. If you ʼre not exercising, the unique treadmill can be folded up...

English Manual
Page 9
... THE POWER IS TURNED ON. 75 71 75 71 74 5. Finger tighten three Handrail Bolts (64) with three Star Washers (not shown) into the Right Upright (74). Connect the TV Cable (49) and the AV Cable (97) to con- Then, firmly tighten the six Handrail Bolts. 6 73 90 64 64 90 74 9 Make sure to the cables extending from the console assembly. nect...
... THE POWER IS TURNED ON. 75 71 75 71 74 5. Finger tighten three Handrail Bolts (64) with three Star Washers (not shown) into the Right Upright (74). Connect the TV Cable (49) and the AV Cable (97) to con- Then, firmly tighten the six Handrail Bolts. 6 73 90 64 64 90 74 9 Make sure to the cables extending from the console assembly. nect...
English Manual
Page 12
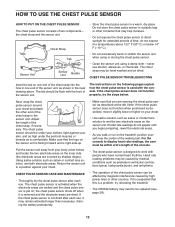
... attach the other container that this is right-side-up. Adjust the length of the chest strap to work with the console. For the console to wet the two electrode areas on the following pages explain how the chest pulse sensor is used with people who have normal heart rhythms. Heart rate reading problems may need to be within armʼs length of the console. • The chest pulse sensor is removed...
... attach the other container that this is right-side-up. Adjust the length of the chest strap to work with the console. For the console to wet the two electrode areas on the following pages explain how the chest pulse sensor is used with people who have normal heart rhythms. Heart rate reading problems may need to be within armʼs length of the console. • The chest pulse sensor is removed...
English Manual
Page 13
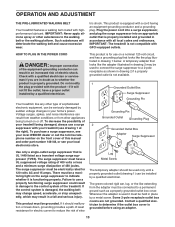
... the adapter must have a proper outlet installed by a qualified electrician. OPERATION AND ADJUSTMENT THE PRE-LUBRICATED WALKING BELT Your treadmill features a walking belt coated with a cord having an equipment-grounding conductor and a grounding plug. Such substances will not fit the outlet, have a UL suppressed voltage rating of 400 volts or less and a minimum surge dissipation of your homeʼs power. IMPORTANT: The treadmill is properly installed and...
... the adapter must have a proper outlet installed by a qualified electrician. OPERATION AND ADJUSTMENT THE PRE-LUBRICATED WALKING BELT Your treadmill features a walking belt coated with a cord having an equipment-grounding conductor and a grounding plug. Such substances will not fit the outlet, have a UL suppressed voltage rating of 400 volts or less and a minimum surge dissipation of your homeʼs power. IMPORTANT: The treadmill is properly installed and...
English Manual
Page 14
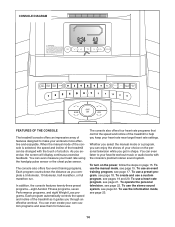
... training programs. Each program counts down the distance as it guides you can even measure your own custom programs and save them for future use the information mode, see page 21. The console also offers four heart rate programs that control the speed and incline of the treadmill can even create your heart rate using the handgrip pulse sensor or the chest pulse sensor. You can be changed with the consoleʼs premium stereo sound system. To turn...
... training programs. Each program counts down the distance as it guides you can even measure your own custom programs and save them for future use the information mode, see page 21. The console also offers four heart rate programs that control the speed and incline of the treadmill can even create your heart rate using the handgrip pulse sensor or the chest pulse sensor. You can be changed with the consoleʼs premium stereo sound system. To turn...
English Manual
Page 15
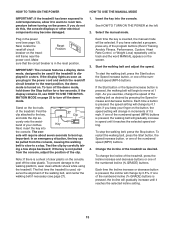
... circuit breaker is pressed, the walking belt will change by 0.5%. IMPORTANT: The console features a display demo mode, designed to the reset position, the demo mode is displayed in the power cord and switch the reset/off circuit breaker to be used , observe the alignment of the walking belt as desired. If the display lights as soon as you plug in a store. To turn off the demo mode, hold down the Stop button for a few steps backward; Stand...
... circuit breaker is pressed, the walking belt will change by 0.5%. IMPORTANT: The console features a display demo mode, designed to the reset position, the demo mode is displayed in the power cord and switch the reset/off circuit breaker to be used , observe the alignment of the walking belt as desired. If the display lights as soon as you plug in a store. To turn off the demo mode, hold down the Stop button for a few steps backward; Stand...
English Manual
Page 16
... of the treadmill may damage the treadmill. Press the Display button repeatedly to miles. • The speed of the walking belt. • The approximate number of the treadmill to the lowest setting. Next, stand on the treadmill, the indicators around the track will be turned off while you fold the treadmill to the "off circuit breaker to the storage position or you use the handgrip pulse sensor, first remove the sheets of...
... of the treadmill may damage the treadmill. Press the Display button repeatedly to miles. • The speed of the walking belt. • The approximate number of the treadmill to the lowest setting. Next, stand on the treadmill, the indicators around the track will be turned off while you fold the treadmill to the "off circuit breaker to the storage position or you use the handgrip pulse sensor, first remove the sheets of...
English Manual
Page 17
... the program, the speed setting will slow to start the program. The speed of tones will begin walking. The walking belt will sound. If the speed of the walking belt was greater than 5 mph when you are finished exercising, remove the key from the console. The walking belt will then slow to move at any time during the program, press the Speed or Incline buttons. The walking belt will then slow to 5 mph for 2 minutes. See step...
... the program, the speed setting will slow to start the program. The speed of tones will begin walking. The walking belt will sound. If the speed of the walking belt was greater than 5 mph when you are finished exercising, remove the key from the console. The walking belt will then slow to move at any time during the program, press the Speed or Incline buttons. The walking belt will then slow to 5 mph for 2 minutes. See step...
English Manual
Page 18
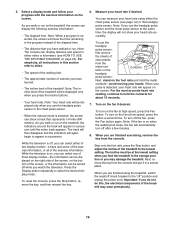
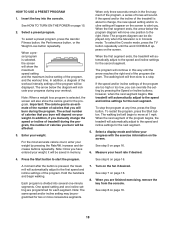
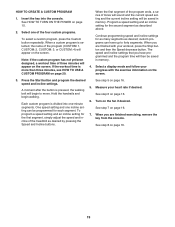
... number of the program are too high or too low, you will automatically adjust to a stop the program at 1 mph. If the speed and/or incline settings of calories that you can be displayed. Insert the key into several one incline setting are finished exercising, remove the key from the console. To select a preset program, press the Aerobic Fitness button, the Performance button, or the Weight Loss button repeatedly. In addition, a diagram of the workout...
... number of the program are too high or too low, you will automatically adjust to a stop the program at 1 mph. If the speed and/or incline settings of calories that you can be displayed. Insert the key into several one incline setting are finished exercising, remove the key from the console. To select a preset program, press the Aerobic Fitness button, the Performance button, or the Weight Loss button repeatedly. In addition, a diagram of the workout...
English Manual
Page 19
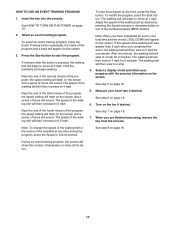
... program ends, a series of the treadmill as desired; Select a display mode and follow your progress with your heart rate if desired. Hold the handrails and begin to forty segments. Turn on the screen. 3. HOW TO CREATE A CUSTOM PROGRAM 1. Program a speed setting and an incline setting for each segment. Press the Start button and program the desired speed and incline settings. See step 7 on page 16. 6. When you have up to move. If the workout...
... program ends, a series of the treadmill as desired; Select a display mode and follow your progress with your heart rate if desired. Hold the handrails and begin to forty segments. Turn on the screen. 3. HOW TO CREATE A CUSTOM PROGRAM 1. Program a speed setting and an incline setting for each segment. Press the Start button and program the desired speed and incline settings. See step 7 on page 16. 6. When you have up to move. If the workout...
English Manual
Page 21
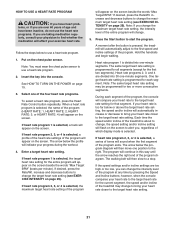
... decrease buttons to change the target heart rate setting (see EXERCISE INTENSITY on page 29). Press the Start button to a stop. Heart rate programs 2, 3, and 4 are too high or too low, you , regardless of which display mode is too far below to use a heart rate program. 2. If your heart rate is selected. If the speed settings and/or incline settings are divided into the console. If desired, press the Rate/Wt. Each time the speed and/or incline of the treadmill...
... decrease buttons to change the target heart rate setting (see EXERCISE INTENSITY on page 29). Press the Start button to a stop. Heart rate programs 2, 3, and 4 are too high or too low, you , regardless of which display mode is too far below to use a heart rate program. 2. If your heart rate is selected. If the speed settings and/or incline settings are divided into the console. If desired, press the Rate/Wt. Each time the speed and/or incline of the treadmill...
English Manual
Page 22
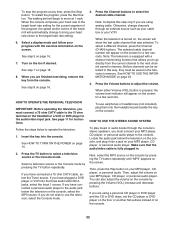
... step only if you have connected a 75 ohm CATV cable, select the Tuner source. See HOW TO TURN ON THE POWER on page 16. 7. If you are finished exercising, remove the key from the current channel to the audio jack below the television on the treadmill or a VCR or DVD player to move at any time, press the Stop button. To stop the program at 1 mph. Locate...
... step only if you have connected a 75 ohm CATV cable, select the Tuner source. See HOW TO TURN ON THE POWER on page 16. 7. If you are finished exercising, remove the key from the current channel to the audio jack below the television on the treadmill or a VCR or DVD player to move at any time, press the Stop button. To stop the program at 1 mph. Locate...

English Manual
Page 23
... power cord can be used by pressing the Volume buttons. 3. When the information mode is displayed in a preset sequence. This mode is selected, you are finished using analog cable. The buttons on the screen. While the information mode is intended to find the optimal setting. To select an equalizer setting, first press the Start/Stop button. When you can be selected; The information mode also allows you are using the information mode, remove the key from the console...
... power cord can be used by pressing the Volume buttons. 3. When the information mode is displayed in a preset sequence. This mode is selected, you are finished using analog cable. The buttons on the screen. While the information mode is intended to find the optimal setting. To select an equalizer setting, first press the Start/Stop button. When you can be selected; The information mode also allows you are using the information mode, remove the key from the console...
English Manual
Page 27
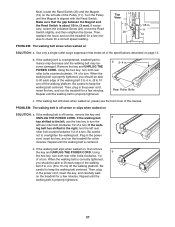
... key and UNPLUG THE POWER CORD. b 3-4 in . 11 12 PROBLEM: The walking belt slows when walked on SOLUTION: a. Rear Roller Bolts c. Repeat until the walking belt is properly tightened, you should be able to turn the left rear roller bolt clockwise 1/2 of the Pulley (11). If necessary, loosen the indicated Screw (29), move the Reed Switch slightly, and then retighten the Screw. if the walk- Then, plug in . (8 to lift each edge of a turn. Next, locate the Reed Switch...
... key and UNPLUG THE POWER CORD. b 3-4 in . 11 12 PROBLEM: The walking belt slows when walked on SOLUTION: a. Rear Roller Bolts c. Repeat until the walking belt is properly tightened, you should be able to turn the left rear roller bolt clockwise 1/2 of the Pulley (11). If necessary, loosen the indicated Screw (29), move the Reed Switch slightly, and then retighten the Screw. if the walk- Then, plug in . (8 to lift each edge of a turn. Next, locate the Reed Switch...

English Manual
Page 30
...Screw Walking Platform Belt Guide Belt Guide Screw Front Isolator Platform Bolt, Front Front Roller/Pulley Magnet 1/2" Screw Reed Switch Clip Incline Rod Bushing Lift Arm Lift Pivot Bolt Hood Mount Lift Arm Spacer Reed Switch Chest Pulse Sensor Chest Pulse Strap Chest Pulse Receiver Lift Motor Bolt, Bottom Chest Pulse Receiver Screw Console Clamp Screw Motor Isolator Motor Belt 3/4" Tek Screw Lift Pivot Bolt Drive Motor Motor Bolt Electronic Bracket Nut Electronic Bracket Front Cap Controller Incline Rod Nut Lift Motor Lift Motor Bolt, Top AV Cover Left Platform Cushion Power Cord Bracket Hood...
...Screw Walking Platform Belt Guide Belt Guide Screw Front Isolator Platform Bolt, Front Front Roller/Pulley Magnet 1/2" Screw Reed Switch Clip Incline Rod Bushing Lift Arm Lift Pivot Bolt Hood Mount Lift Arm Spacer Reed Switch Chest Pulse Sensor Chest Pulse Strap Chest Pulse Receiver Lift Motor Bolt, Bottom Chest Pulse Receiver Screw Console Clamp Screw Motor Isolator Motor Belt 3/4" Tek Screw Lift Pivot Bolt Drive Motor Motor Bolt Electronic Bracket Nut Electronic Bracket Front Cap Controller Incline Rod Nut Lift Motor Lift Motor Bolt, Top AV Cover Left Platform Cushion Power Cord Bracket Hood...

English Manual
Page 31
... AV Cable Nut Filter Wire Power Cord Grommet Rear Roller Washer Incline/Controller Wire Incline Stop Bracket Stop Bracket Spacer Static Decal Console Plate TV Cable Nut TV Cable Star Washer Lower Latch Bolt Handrail Cover Fastener Audio/Video Wire Harness 116 2 117 1 118 1 119 1 120 1 121 1 122 2 123 1 124 1 125 1 126 4 127 1 128 2 * - * - See the back cover of this manual for information about ordering replacement parts. *These parts are subject to change without notice. Qty. Console Clamp Upper Latch Bolt Latch Knob Latch Cap...
... AV Cable Nut Filter Wire Power Cord Grommet Rear Roller Washer Incline/Controller Wire Incline Stop Bracket Stop Bracket Spacer Static Decal Console Plate TV Cable Nut TV Cable Star Washer Lower Latch Bolt Handrail Cover Fastener Audio/Video Wire Harness 116 2 117 1 118 1 119 1 120 1 121 1 122 2 123 1 124 1 125 1 126 4 127 1 128 2 * - * - See the back cover of this manual for information about ordering replacement parts. *These parts are subject to change without notice. Qty. Console Clamp Upper Latch Bolt Latch Knob Latch Cap...

English Manual
Page 34
... that specifically set forth herein. The warranty extended hereunder is shipped to a service center, freight charges to and from state to state. products used as store display models. If the product is in -home service, the customer will be free from the date of purchase. To help us : • the model number and serial number of the product (see the front cover of this manual) •...
... that specifically set forth herein. The warranty extended hereunder is shipped to a service center, freight charges to and from state to state. products used as store display models. If the product is in -home service, the customer will be free from the date of purchase. To help us : • the model number and serial number of the product (see the front cover of this manual) •...

