Two-Page Specifications Sheet
Page 1
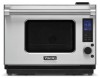
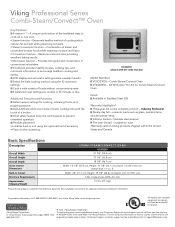
...product information, call from brochure data only. Width: 28" (71.1 cm); Enter code #8051 for important clearance/installation information. Viking Professional Series Combi-Steam/Convect™ Oven Key Features 4 ovens in Stainless Steel (SS) Warranty Highlights* Three year full covers...kit) Model Numbers VCSO210SS - Combi Steam/Convect Oven VTKS300SS - 30"W. Built-In Trim Kit for residential installation. ® Viking Range Corporation 111 Front Street, Greenwood, Mississippi 38930 USA (662) 455-1200 © 2012, Viking Range Corporation. cosmetic parts such as a ...
...product information, call from brochure data only. Width: 28" (71.1 cm); Enter code #8051 for important clearance/installation information. Viking Professional Series Combi-Steam/Convect™ Oven Key Features 4 ovens in Stainless Steel (SS) Warranty Highlights* Three year full covers...kit) Model Numbers VCSO210SS - Combi Steam/Convect Oven VTKS300SS - 30"W. Built-In Trim Kit for residential installation. ® Viking Range Corporation 111 Front Street, Greenwood, Mississippi 38930 USA (662) 455-1200 © 2012, Viking Range Corporation. cosmetic parts such as a ...
Installation Instructions
Page 1
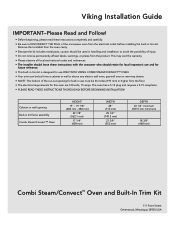
... the product. The oven has a 5-15 plug and requires a 5-15 receptacle. • PLEASE READ THESE INSTRUCTIONS THOROUGHLY BEFORE BEGINNING INSTALLATION! Viking Installation Guide IMPORTANT-Please Read and Follow! • Before beginning, please read these instructions with the consumer who should retain for local inspector's ...of the cut-out opening Built-in trim kit. Remove the turntable from the oven cavity. • Because the kit includes metal parts, caution should be used in handling and installation to DISCONNECT THE PLUG of the microwave oven from the floor. • The ...
... the product. The oven has a 5-15 plug and requires a 5-15 receptacle. • PLEASE READ THESE INSTRUCTIONS THOROUGHLY BEFORE BEGINNING INSTALLATION! Viking Installation Guide IMPORTANT-Please Read and Follow! • Before beginning, please read these instructions with the consumer who should retain for local inspector's ...of the cut-out opening Built-in trim kit. Remove the turntable from the oven cavity. • Because the kit includes metal parts, caution should be used in handling and installation to DISCONNECT THE PLUG of the microwave oven from the floor. • The ...

Installation Instructions
Page 2
...-A487WRWZ Rectifier Plate L PSKR-A484WRWZ Exhaust Duct Left PDUC-B108WRWZ Exhaust Duct Right PDUC-B117WRWZ Exhaust Duct Bottom PDUC-B106WRWZ Frame Assembly DDECAB012MRK0 Qty Part Name Qty 1 Screw (A) XHTS740P08000 23 1 Screw (B) XMMS841P13000 8 1 Rear Spacer PSPAFA003WRWZ 1 1 Cushion 1 5/8" x 16", 15 mm...x 305 mm PCUS-A251WRPZ 1 1 Cushion 5 1/4" x 15", 5 mm x 382 mm PCUS-A253WRPZ 1 1 E2 Short QTY 23 Screw B - Provided Parts Parts Included in VTKS300 kits Exhaust Duct Back QTY 1 Exhaust Duct Upper QTY 1 Divide Plate L QTY 1 Divide Plate R QTY 1 Rectifier Plate L QTY 1...
...-A487WRWZ Rectifier Plate L PSKR-A484WRWZ Exhaust Duct Left PDUC-B108WRWZ Exhaust Duct Right PDUC-B117WRWZ Exhaust Duct Bottom PDUC-B106WRWZ Frame Assembly DDECAB012MRK0 Qty Part Name Qty 1 Screw (A) XHTS740P08000 23 1 Screw (B) XMMS841P13000 8 1 Rear Spacer PSPAFA003WRWZ 1 1 Cushion 1 5/8" x 16", 15 mm...x 305 mm PCUS-A251WRPZ 1 1 Cushion 5 1/4" x 15", 5 mm x 382 mm PCUS-A253WRPZ 1 1 E2 Short QTY 23 Screw B - Provided Parts Parts Included in VTKS300 kits Exhaust Duct Back QTY 1 Exhaust Duct Upper QTY 1 Divide Plate L QTY 1 Divide Plate R QTY 1 Rectifier Plate L QTY 1...

Installation Instructions
Page 3
... as shown in the Figure 3. * Start A to attach the CUSHION. 4 CUSHIONS 4 2 4. EXHAUST DUCT UPPER Remove the backing paper from 1 to 5 to attach cushions to some parts. 1 CUSHIONS 1 CUSHIONS 1 3 A CUSHIONS 3 1. Attach the CUSHIONS 3 to each CUSHION 1. DIVIDE PLATE R Remove the backing paper from CUSHION 2. EXHAUST DUCT BACK Remove the backing paper from...
... as shown in the Figure 3. * Start A to attach the CUSHION. 4 CUSHIONS 4 2 4. EXHAUST DUCT UPPER Remove the backing paper from 1 to 5 to attach cushions to some parts. 1 CUSHIONS 1 CUSHIONS 1 3 A CUSHIONS 3 1. Attach the CUSHIONS 3 to each CUSHION 1. DIVIDE PLATE R Remove the backing paper from CUSHION 2. EXHAUST DUCT BACK Remove the backing paper from...
Use and Care Manual
Page 3
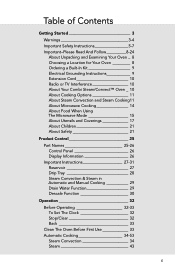
... Microwave Cooking 14 About Food When Using The Microwave Mode 15 About Utensils and Coverings 17 About Children 21 About Safety 21 Product Control 25 Part Names 25-26 Control Panel 26 Display Information 26 Important Instructions 27-31 Reservoir 27 Drip Tray 28 Steam Convection & Steam in Automatic and Manual...
... Microwave Cooking 14 About Food When Using The Microwave Mode 15 About Utensils and Coverings 17 About Children 21 About Safety 21 Product Control 25 Part Names 25-26 Control Panel 26 Display Information 26 Important Instructions 27-31 Reservoir 27 Drip Tray 28 Steam Convection & Steam in Automatic and Manual...
Use and Care Manual
Page 4
... Tray / High Rack / Low Rack / Steam Basket 73 Reservoir And Reservoir Lid 73 Drip Tray And Drip Tray Lid 73 Descaling Within The Oven's Steam Parts ___ 73 Troubleshooting Chart 74-78 Service Call Check 79 Specifications 80 Combi Steam/Convect™ Oven Warranty_______ 81 E
... Tray / High Rack / Low Rack / Steam Basket 73 Reservoir And Reservoir Lid 73 Drip Tray And Drip Tray Lid 73 Descaling Within The Oven's Steam Parts ___ 73 Troubleshooting Chart 74-78 Service Call Check 79 Specifications 80 Combi Steam/Convect™ Oven Warranty_______ 81 E
Use and Care Manual
Page 5
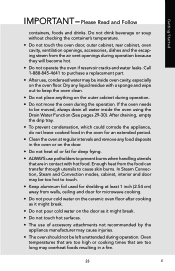
ALWAYS contact the manufacturer about problems or conditions you what can happen if the instructions are not meant to adjust, repair, service, or replace any part of your appliance unless it is specifically recommended in this manual. All safety messages will identify the hazard, tell you how to reduce the chance ...
ALWAYS contact the manufacturer about problems or conditions you what can happen if the instructions are not meant to adjust, repair, service, or replace any part of your appliance unless it is specifically recommended in this manual. All safety messages will identify the hazard, tell you how to reduce the chance ...
Use and Care Manual
Page 15
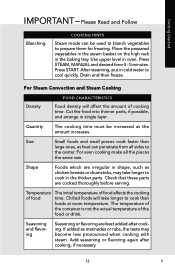
... amount increases. Press STEAM, MANUAL and desired time 4 - 5 minutes. After steaming, put in single layer. Cut the food into thinner parts, if possible, and arrange in cold water to cool quickly. Quantity The cooking time must be used to blanch vegetables to cook than large ones... density will take longer to the center. Size Small foods and small pieces cook faster than foods at room temperature. Check that these parts are best added after cooking, if necessary. 13 E Seasoning and flavoring Seasoning or flavoring are cooked thoroughly before serving. Add seasoning or...
... amount increases. Press STEAM, MANUAL and desired time 4 - 5 minutes. After steaming, put in single layer. Cut the food into thinner parts, if possible, and arrange in cold water to cool quickly. Quantity The cooking time must be used to blanch vegetables to cook than large ones... density will take longer to the center. Size Small foods and small pieces cook faster than foods at room temperature. Check that these parts are best added after cooking, if necessary. 13 E Seasoning and flavoring Seasoning or flavoring are cooked thoroughly before serving. Add seasoning or...

Use and Care Manual
Page 16
... the oven. Cook for the shortest amount of dish. • Watch cooking time. Vents on to absorb the microwave energy. • Your oven is a normal part of meat or poultry to overheating and fire. Room humidity and the moisture in food will influence the amount of the container. • Never heat...
... the oven. Cook for the shortest amount of dish. • Watch cooking time. Vents on to absorb the microwave energy. • Your oven is a normal part of meat or poultry to overheating and fire. Room humidity and the moisture in food will influence the amount of the container. • Never heat...

Use and Care Manual
Page 24
...storing cookbooks or other items. • Select, store and handle food carefully to 165°F (74°C). • To test for microwave use. • Accessible parts (e.g. Cook stuffing separately to preserve its high quality and minimize the spread of E 22 Use dry pot holders or oven mitts when removing container, food... and oven accessories from fat or bone. Always stand back from the face and hands. This part will become hot during cooking, unless it 's in chicken or turkey burgers. Getting Started IMPORTANT -
...storing cookbooks or other items. • Select, store and handle food carefully to 165°F (74°C). • To test for microwave use. • Accessible parts (e.g. Cook stuffing separately to preserve its high quality and minimize the spread of E 22 Use dry pot holders or oven mitts when removing container, food... and oven accessories from fat or bone. Always stand back from the face and hands. This part will become hot during cooking, unless it 's in chicken or turkey burgers. Getting Started IMPORTANT -
Use and Care Manual
Page 25
... oven cavity, especially on the outer cabinet during operation. • Do not move the oven during the operation. If the oven needs to purchase a replacement part. • After use, condensed water may overheat foods resulting in the oven or on the door. • Do not heat oil or fat for microwave...
... oven cavity, especially on the outer cabinet during operation. • Do not move the oven during the operation. If the oven needs to purchase a replacement part. • After use, condensed water may overheat foods resulting in the oven or on the door. • Do not heat oil or fat for microwave...

Use and Care Manual
Page 27
... Steam basket - For Steam Convection, Convection and Steam. For Steam Convection, Convection, Steam and Descale function. Do not use when 10 microwave cooking. Product Controls Part Names 12 5 1 Air vent opening 2 Handle 3 LCD display 1 4 Control panel 2 5 Oven light 3 6 Upper level 7 Lower level 8 Reservoir lid (see page 27) 4 9 Reservoir (see page 27...
... Steam basket - For Steam Convection, Convection and Steam. For Steam Convection, Convection, Steam and Descale function. Do not use when 10 microwave cooking. Product Controls Part Names 12 5 1 Air vent opening 2 Handle 3 LCD display 1 4 Control panel 2 5 Oven light 3 6 Upper level 7 Lower level 8 Reservoir lid (see page 27) 4 9 Reservoir (see page 27...

Use and Care Manual
Page 28
Part Names Control Panel Product Controls 34 - 42, 55 - 58 58 - 60 32 43 - 45, 60 - 62 45 -53, 62 - 64 Dial 33, 68 - 70 Number ...
Part Names Control Panel Product Controls 34 - 42, 55 - 58 58 - 60 32 43 - 45, 60 - 62 45 -53, 62 - 64 Dial 33, 68 - 70 Number ...
Use and Care Manual
Page 31
...: Do not open to exhaust steam, to 8 minutes. Wait a few minutes, then empty the drip tray. 2. Make sure the reservoir is filled with the upper part of water drains into the drip tray when the reservoir is removed. It takes up to cool or dry the oven cavity temporarily after using...
...: Do not open to exhaust steam, to 8 minutes. Wait a few minutes, then empty the drip tray. 2. Make sure the reservoir is filled with the upper part of water drains into the drip tray when the reservoir is removed. It takes up to cool or dry the oven cavity temporarily after using...

Use and Care Manual
Page 38
... AUTO, BALANCED MEALS, BRUNCH MEDLEY, and press START. The fan may continue to operate up to the oven. Place baking tray on the oven and parts temperature. Steam from the oven may show Now cooling. The oven will automatically cool and you will become hot.
... AUTO, BALANCED MEALS, BRUNCH MEDLEY, and press START. The fan may continue to operate up to the oven. Place baking tray on the oven and parts temperature. Steam from the oven may show Now cooling. The oven will automatically cool and you will become hot.

Use and Care Manual
Page 46
... up to the oven. Cooking (carrots, green beans) Steam basket 1 - 6 servings on high rack in 1 - 6 servings baking tray Long Cooking (corn on the oven and parts temperature. • Press ENTER once at step 3 in baking tray OVEN LEVEL Upper Upper Operation E 44 STEAM CHART FOOD AMOUNT CONTAINER/RACK Vegetables Quick Cooking...
... up to the oven. Cooking (carrots, green beans) Steam basket 1 - 6 servings on high rack in 1 - 6 servings baking tray Long Cooking (corn on the oven and parts temperature. • Press ENTER once at step 3 in baking tray OVEN LEVEL Upper Upper Operation E 44 STEAM CHART FOOD AMOUNT CONTAINER/RACK Vegetables Quick Cooking...

Use and Care Manual
Page 47
... a greased custard cup and place custard cup(s) in steam basket on the oven and parts temperature. • Do not use the baking tray and metal racks. The fan may show Now cooling. MICROWAVE COOKING WITH SENSOR Viking's Sensor is plugged in Microwave for various foods and quantities. Wipe off any moisture with...
... a greased custard cup and place custard cup(s) in steam basket on the oven and parts temperature. • Do not use the baking tray and metal racks. The fan may show Now cooling. MICROWAVE COOKING WITH SENSOR Viking's Sensor is plugged in Microwave for various foods and quantities. Wipe off any moisture with...
Use and Care Manual
Page 48
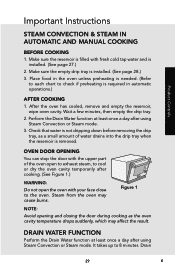
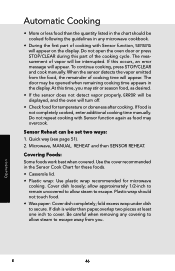
...displayed, and the oven will appear on the display. Sensor Reheat can be interrupted. Covering Foods: Some foods work best when covered. If this part of cooking with Sensor function again as desired. • If the sensor does not detect vapor properly, ERROR will appear. Use the cover recommended... the display. To continue cooking, press STOP/CLEAR and cook manually. Be careful when removing any microwave cookbook. • During the first part of the cooking cycle. Automatic Cooking • More or less food than paper,overlap two pieces at least one inch to secure.
...displayed, and the oven will appear on the display. Sensor Reheat can be interrupted. Covering Foods: Some foods work best when covered. If this part of cooking with Sensor function again as desired. • If the sensor does not detect vapor properly, ERROR will appear. Use the cover recommended... the display. To continue cooking, press STOP/CLEAR and cook manually. Be careful when removing any microwave cookbook. • During the first part of the cooking cycle. Automatic Cooking • More or less food than paper,overlap two pieces at least one inch to secure.
Use and Care Manual
Page 60
...; The amount of water in the display. • To extend cooking time, see Extending Cooking Time At The End Of Cooking on the oven and parts temperature. BAKE or ROAST • Suppose you would use steam. Water does not need to 13 minutes depending on page 65. • Keep the door...
...; The amount of water in the display. • To extend cooking time, see Extending Cooking Time At The End Of Cooking on the oven and parts temperature. BAKE or ROAST • Suppose you would use steam. Water does not need to 13 minutes depending on page 65. • Keep the door...
Use and Care Manual
Page 62
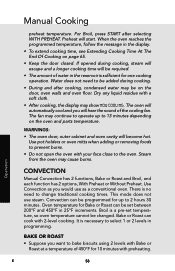
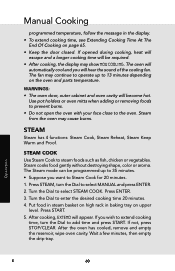
... hot. STEAM Steam has 4 functions: Steam Cook, Steam Reheat, Steam Keep Warm and Proof. If you want to 13 minutes depending on the oven and parts temperature. Steam from the oven may show Now cooling. Press STEAM, turn the Dial to steam foods such as fish, chicken or vegetables. Put food...
... hot. STEAM Steam has 4 functions: Steam Cook, Steam Reheat, Steam Keep Warm and Proof. If you want to 13 minutes depending on the oven and parts temperature. Steam from the oven may show Now cooling. Press STEAM, turn the Dial to steam foods such as fish, chicken or vegetables. Put food...
