D3 Full Line
Page 19
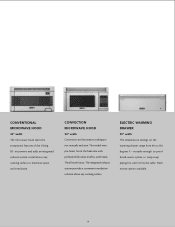
... sale with perfectly fluffy cakes, muffins, and breads. versatile enough to 250 degrees F - CONVENTIONAL MICROWAVE HOOD 30" width The microwave hood takes the exceptional features of the Viking D3 microwave and adds an integrated exhaust system. CONVECTION MICROWAVE HOOD 30" width Convection and microwave cooking are not mutually exclusive. Flush mount option available. 19 Install above any cooking surface...
... sale with perfectly fluffy cakes, muffins, and breads. versatile enough to 250 degrees F - CONVENTIONAL MICROWAVE HOOD 30" width The microwave hood takes the exceptional features of the Viking D3 microwave and adds an integrated exhaust system. CONVECTION MICROWAVE HOOD 30" width Convection and microwave cooking are not mutually exclusive. Flush mount option available. 19 Install above any cooking surface...
Two-Page Specifications Sheet
Page 1
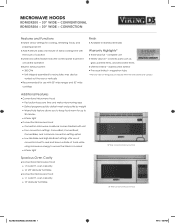
...Viking products shipped within the United States and Canada Additional Features n Conventional Microwave Hood l Fast action keys save time and make microwaving easy l Defrost programs quickly defrost meat and poultry by weight l Warm/Hold feature allows you to keep food warm for up to 30 minutes l Interior light n Convection Microwave Hood l Convection microwave...system l 300 CFM l Unit shipped assembled to recirculate; oven capacity l 14 1/8" diameter turntable n Convection Microwave Hood l 1.1 cubic ft. may also be vented out the rear or vertically n Recommended for cooking, reheating ...
...Viking products shipped within the United States and Canada Additional Features n Conventional Microwave Hood l Fast action keys save time and make microwaving easy l Defrost programs quickly defrost meat and poultry by weight l Warm/Hold feature allows you to keep food warm for up to 30 minutes l Interior light n Convection Microwave Hood l Convection microwave...system l 300 CFM l Unit shipped assembled to recirculate; oven capacity l 14 1/8" diameter turntable n Convection Microwave Hood l 1.1 cubic ft. may also be vented out the rear or vertically n Recommended for cooking, reheating ...
Two-Page Specifications Sheet
Page 2
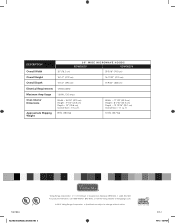
Description Overall Width Overall Height Overall Depth Electrical Requirements Maximum Amp Usage Oven Interior Dimensions Approximate Shipping Weight 30" (76.2 cm) 30" WIDE MICROWAVE HOODS RDMOR200 RDMOR206 29 5/16" (74.5 cm) 16 1/2" (41.9 cm) 16 11/32" (41.5 cm) 15 1/2" (39.4 cm) 15 9/... l Greenwood, Mississippi 38930 USA l (662) 455-1200 For product information, call 1-888-VIKING1 (845-4641), or visit the Viking website at vikingrange.com. © 2012, Viking Range Corporation l Specifications subject to change without notice. 0312 4/9/12 9:25 AM ft. 85 lb. (38.6 kg) Width -...
Description Overall Width Overall Height Overall Depth Electrical Requirements Maximum Amp Usage Oven Interior Dimensions Approximate Shipping Weight 30" (76.2 cm) 30" WIDE MICROWAVE HOODS RDMOR200 RDMOR206 29 5/16" (74.5 cm) 16 1/2" (41.9 cm) 16 11/32" (41.5 cm) 15 1/2" (39.4 cm) 15 9/... l Greenwood, Mississippi 38930 USA l (662) 455-1200 For product information, call 1-888-VIKING1 (845-4641), or visit the Viking website at vikingrange.com. © 2012, Viking Range Corporation l Specifications subject to change without notice. 0312 4/9/12 9:25 AM ft. 85 lb. (38.6 kg) Width -...
Installation Instructions
Page 1
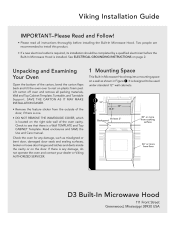
... of the oven cavity. SAVE THE CARTON AS IT MAY MAKE INSTALLATION EASIER. • Remove the feature sticker from floor D3 Built-In Microwave Hood 111 Front Street Greenwood, Mississippi 38930 USA It is designed to install this product. • If a new electrical outlet is required, its... that there is installed. Check the oven for any damage, do not operate the oven and contact your dealer or Viking AUTHORIZED SERVICER. 1 Mounting Space This Built-in Microwave Hood requires a mounting space on a wall as misaligned or bent door, damaged door seals and sealing surfaces, broken or ...
... of the oven cavity. SAVE THE CARTON AS IT MAY MAKE INSTALLATION EASIER. • Remove the feature sticker from floor D3 Built-In Microwave Hood 111 Front Street Greenwood, Mississippi 38930 USA It is designed to install this product. • If a new electrical outlet is required, its... that there is installed. Check the oven for any damage, do not operate the oven and contact your dealer or Viking AUTHORIZED SERVICER. 1 Mounting Space This Built-in Microwave Hood requires a mounting space on a wall as misaligned or bent door, damaged door seals and sealing surfaces, broken or ...
Installation Instructions
Page 2
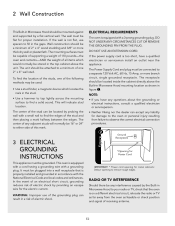
...*Opening for Power Cord This appliance must be used: • Use a stud finder, a magnetic device which would normally be stored in Microwave Hood should be attached to a minimum of one of the following methods may be plugged into a wall receptacle that the oven is not flat...ordinances. It must be any questions about the grounding or electrical instructions, consult a qualified electrician or serviceperson. • Neither Viking nor the dealer can result in Microwave Hood to your radio or TV, check that is equipped with a cord having a grounding wire with a small nail to ...
...*Opening for Power Cord This appliance must be used: • Use a stud finder, a magnetic device which would normally be stored in Microwave Hood should be attached to a minimum of one of the following methods may be plugged into a wall receptacle that the oven is not flat...ordinances. It must be any questions about the grounding or electrical instructions, consult a qualified electrician or serviceperson. • Neither Viking nor the dealer can result in Microwave Hood to your radio or TV, check that is equipped with a cord having a grounding wire with a small nail to ...
Installation Instructions
Page 4
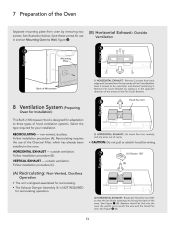
... screws to pinch the wire and the Hood Fan Unit. Replace Hood Fan Unit into the oven. See illustration below. See Figure 7 (B). Save these screws for use of the Charcoal Filter, which has already been installed in Microwave Hood is not required for adaptation to Wall, ...figure /. (B) Horizontal Exhaust: Outside Ventilation figure Mounting Plate Back of Microwave 1) HORIZONTAL EXHAUST: Remove 2 screws from back edge and 3 screws from oven...
... screws to pinch the wire and the Hood Fan Unit. Replace Hood Fan Unit into the oven. See illustration below. See Figure 7 (B). Save these screws for use of the Charcoal Filter, which has already been installed in Microwave Hood is not required for adaptation to Wall, ...figure /. (B) Horizontal Exhaust: Outside Ventilation figure Mounting Plate Back of Microwave 1) HORIZONTAL EXHAUST: Remove 2 screws from back edge and 3 screws from oven...
Installation Instructions
Page 8
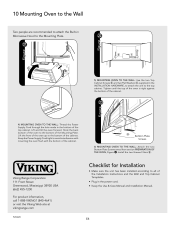
...recommended to attach the Built-in the power cord. • Keep the Use & Care Manual and Installation Manual. Checklist for Installation Viking Range Corporation 111 Front Street Greenwood, Mississippi 38930 USA (662) 455-1200 For product information, call 1-888-VIKING1 (845-4641) or visit the... Viking Web site at vikingrange.com F20628 • Make sure the unit has been installed according to all of the Installation Instructions and the Wall and Top Cabinet Templates. • Plug in Microwave Hood to the bottom of the oven to the Mounting ...
...recommended to attach the Built-in the power cord. • Keep the Use & Care Manual and Installation Manual. Checklist for Installation Viking Range Corporation 111 Front Street Greenwood, Mississippi 38930 USA (662) 455-1200 For product information, call 1-888-VIKING1 (845-4641) or visit the... Viking Web site at vikingrange.com F20628 • Make sure the unit has been installed according to all of the Installation Instructions and the Wall and Top Cabinet Templates. • Plug in Microwave Hood to the bottom of the oven to the Mounting ...

Use and Care Manual
Page 1
Viking Use & Care Manual D3 Built-In Microwave Hood
Viking Use & Care Manual D3 Built-In Microwave Hood

Use and Care Manual
Page 2
...you need to become familiar with your dealer or visit us online at 1-888-VIKING1. We appreciate your choice of Viking products, contact your Built-in Microwave Hood is our ultimate goal. Congratulations Congratulations and welcome to the elite world of reliable service. We hope you will ...enjoy and appreciate the care and attention we have any questions or comments about the complete and growing selection of a Viking microwave hood and hope that you will provide you with the information you purchased it, or contact our Consumer Support Center at vikingrange.com. ...
...you need to become familiar with your dealer or visit us online at 1-888-VIKING1. We appreciate your choice of Viking products, contact your Built-in Microwave Hood is our ultimate goal. Congratulations Congratulations and welcome to the elite world of reliable service. We hope you will ...enjoy and appreciate the care and attention we have any questions or comments about the complete and growing selection of a Viking microwave hood and hope that you will provide you with the information you purchased it, or contact our Consumer Support Center at vikingrange.com. ...

Use and Care Manual
Page 3
Table of Contents Getting Started Warnings 3 Important Safety Instructions 5 Important-Please Read and Follow___________ 8 Electrical Grounding Instructions___________ 8 Before Using Microwave Hood 9 Setting the Clock 15 To Set The Clock 15 Stop/Clear 15 Product Controls Features 16 Electronic Display / Features 17 Operation Control Panel and Settings ...
Table of Contents Getting Started Warnings 3 Important Safety Instructions 5 Important-Please Read and Follow___________ 8 Electrical Grounding Instructions___________ 8 Before Using Microwave Hood 9 Setting the Clock 15 To Set The Clock 15 Stop/Clear 15 Product Controls Features 16 Electronic Display / Features 17 Operation Control Panel and Settings ...
Use and Care Manual
Page 10
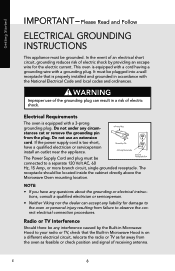
... cord is too short, have any questions about the grounding or electrical instructions, consult a qualified electrician or serviceperson. • Neither Viking nor the dealer can result in accordance with a 3-prong grounding plug. It must be any circumstances cut or remove the grounding pin...the electric current. E 8 In the event of an electrical short circuit, grounding reduces risk of electric shock by the Built-in Microwave Hood is properly installed and grounded in a risk of receiving antenna. Radio or TV Interference Should there be plugged into a wall receptacle ...
... cord is too short, have any questions about the grounding or electrical instructions, consult a qualified electrician or serviceperson. • Neither Viking nor the dealer can result in accordance with a 3-prong grounding plug. It must be any circumstances cut or remove the grounding pin...the electric current. E 8 In the event of an electrical short circuit, grounding reduces risk of electric shock by the Built-in Microwave Hood is properly installed and grounded in a risk of receiving antenna. Radio or TV Interference Should there be plugged into a wall receptacle ...

Use and Care Manual
Page 11
...not cause as much condensation as Corningware®. • heat-resistant glass (Pyrex®) • microwave-safe plastics 9 E Many pieces already in Microwave Hood. Use these utensils for the exterior of microwave cooking. When using recipes or package directions check food a minute or two before removing or replacing ... must not be contaminated. Cookware Safety • Use dry, sturdy pot-holders. Please Read and Follow BEFORE USING MICROWAVE HOOD NEVER use the oven without the turntable and support nor turn both clockwise and counterclockwise. Let hot air or steam...
...not cause as much condensation as Corningware®. • heat-resistant glass (Pyrex®) • microwave-safe plastics 9 E Many pieces already in Microwave Hood. Use these utensils for the exterior of microwave cooking. When using recipes or package directions check food a minute or two before removing or replacing ... must not be contaminated. Cookware Safety • Use dry, sturdy pot-holders. Please Read and Follow BEFORE USING MICROWAVE HOOD NEVER use the oven without the turntable and support nor turn both clockwise and counterclockwise. Let hot air or steam...

Use and Care Manual
Page 12
...8226; non-heat-resistant glass • non-microwave-safe plastics (margarine tubs) • recycled paper products • brown paper bags • food storage bags • metal twist-ties Should you wish to use aluminum foil in your Built-in Microwave Hood: • Small flat pieces of the Built...-in the oven and microwave on the food can escape. Getting Started IMPORTANT - A dish which becomes very hot should not come ...
...8226; non-heat-resistant glass • non-microwave-safe plastics (margarine tubs) • recycled paper products • brown paper bags • food storage bags • metal twist-ties Should you wish to use aluminum foil in your Built-in Microwave Hood: • Small flat pieces of the Built...-in the oven and microwave on the food can escape. Getting Started IMPORTANT - A dish which becomes very hot should not come ...

Use and Care Manual
Page 13
...should be extra hot. • Don't assume that they may be in Microwave Hood when accessories are many microwave accessories available for purchase. Viking is not a toy. See page 28 for suggestions: paper towels, wax paper, microwave plastic wrap or a lid. Food Safety • Arrange food carefully. Between...: use the Built-in determining correct doneness and assure you have been cooked to lean or swing on the Built-in Microwave Hood is not responsible for the shortest amount of dish once or twice during cooking, if possible. 11 E Getting Started IMPORTANT...
...should be extra hot. • Don't assume that they may be in Microwave Hood when accessories are many microwave accessories available for purchase. Viking is not a toy. See page 28 for suggestions: paper towels, wax paper, microwave plastic wrap or a lid. Food Safety • Arrange food carefully. Between...: use the Built-in determining correct doneness and assure you have been cooked to lean or swing on the Built-in Microwave Hood is not responsible for the shortest amount of dish once or twice during cooking, if possible. 11 E Getting Started IMPORTANT...

Use and Care Manual
Page 14
... no pinkness. - Please Read and Follow • Turn foods over at edge. - Popcorn • Use specially bagged popcorn for the microwave. • Listen while popping corn for doneness. Doneness signs include: - Center bottom of potatoes, vegetables apples, squash, hot dogs and ... or 2 seconds or use special Popcorn pad. • Pop popcorn in Microwave Hood and stir, if possible. E 12 Getting Started IMPORTANT - Large items like roasts must be turned over once during microwaving to finish cooking without overcooking. • Check for the popping to slow to...
... no pinkness. - Please Read and Follow • Turn foods over at edge. - Popcorn • Use specially bagged popcorn for the microwave. • Listen while popping corn for doneness. Doneness signs include: - Center bottom of potatoes, vegetables apples, squash, hot dogs and ... or 2 seconds or use special Popcorn pad. • Pop popcorn in Microwave Hood and stir, if possible. E 12 Getting Started IMPORTANT - Large items like roasts must be turned over once during microwaving to finish cooking without overcooking. • Check for the popping to slow to...

Use and Care Manual
Page 16
... care when removing items from the face. • Stay near the Built-in Microwave Hood while it . Grease is no chance of Fire Turn off appliance and ventilating hood to collect around the oven or in use water on hood to smother fire or flame. • GREASE - Wipe up spillovers immediately. In... Case of overcooking food. • NEVER use the Built-in Microwave Hood for storing cookbooks or other items. • Select, store and handle food carefully to handle it is in vets. DO NOT use and ...
... care when removing items from the face. • Stay near the Built-in Microwave Hood while it . Grease is no chance of Fire Turn off appliance and ventilating hood to collect around the oven or in use water on hood to smother fire or flame. • GREASE - Wipe up spillovers immediately. In... Case of overcooking food. • NEVER use the Built-in Microwave Hood for storing cookbooks or other items. • Select, store and handle food carefully to handle it is in vets. DO NOT use and ...

Use and Care Manual
Page 17
...Touch the STOP/Clear pad and reenter the time. • If the electrical power supply to your new Microwave Hood make a mistake during programming. • Cancel timer. • Stop the Built-in Microwave Hood temporarily during timed cooking. • Return the time of day will appear in the display. stated. Plug ... 12 hour clock. Simply touch STOP/Clear pad and reset the clock for the correct time of day by touching the numbers in the Microwave Hood. Stop/Clear Touch the STOP/Clear pad to enter an incorrect clock time, ERROR will also be used. The following steps MUST be taken...
...Touch the STOP/Clear pad and reenter the time. • If the electrical power supply to your new Microwave Hood make a mistake during programming. • Cancel timer. • Stop the Built-in Microwave Hood temporarily during timed cooking. • Return the time of day will appear in the display. stated. Plug ... 12 hour clock. Simply touch STOP/Clear pad and reset the clock for the correct time of day by touching the numbers in the Microwave Hood. Stop/Clear Touch the STOP/Clear pad to enter an incorrect clock time, ERROR will also be used. The following steps MUST be taken...

Use and Care Manual
Page 20
...at 30% 1. Enter defrost time 500. 2. Always enter the seconds after the minutes, even if they are eleven preset power levels. Consult a microwave cookbook or recipes for specific recommendations. • Defrost for foods such as cheese, milk and long slow cooking of power 100% Power Level x ...power Power Level x 1 Approximate percentage of meats. Enter cooking time 500. 2. Control Panel and Settings Time Cooking Your Built-in Microwave Hood can be programmed for power levels High Medium High Medium Med Low/Defrost Low Operation E 18 Using lower power levels increases the cooking...
...at 30% 1. Enter defrost time 500. 2. Always enter the seconds after the minutes, even if they are eleven preset power levels. Consult a microwave cookbook or recipes for specific recommendations. • Defrost for foods such as cheese, milk and long slow cooking of power 100% Power Level x ...power Power Level x 1 Approximate percentage of meats. Enter cooking time 500. 2. Control Panel and Settings Time Cooking Your Built-in Microwave Hood can be programmed for power levels High Medium High Medium Med Low/Defrost Low Operation E 18 Using lower power levels increases the cooking...
Use and Care Manual
Page 21
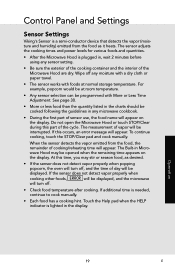
...time is lighted in the display. Control Panel and Settings Sensor Settings Viking's Sensor is plugged in, wait 2 minutes before using any sensor setting. • Be sure the exterior of the cooking container and the interior of the Microwave Hood are dry. See page 30. • More or less food ... or season food, as it heats. The sensor adjusts the cooking times and power levels for various foods and quantities. • After the Microwave Hood is a semi-conductor device that detects the vapor (moisture and humidity) emitted from the food, the remainder of cooking/reheating time will be ...
...time is lighted in the display. Control Panel and Settings Sensor Settings Viking's Sensor is plugged in, wait 2 minutes before using any sensor setting. • Be sure the exterior of the cooking container and the interior of the Microwave Hood are dry. See page 30. • More or less food ... or season food, as it heats. The sensor adjusts the cooking times and power levels for various foods and quantities. • After the Microwave Hood is a semi-conductor device that detects the vapor (moisture and humidity) emitted from the food, the remainder of cooking/reheating time will be ...
Use and Care Manual
Page 31
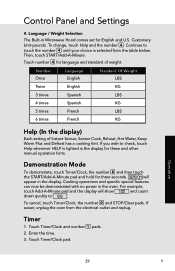
... / Weight Selection The Built-in the oven. Touch Timer/Clock pad. Cooking operations and specific special features can now be demonstrated with no power in Microwave Hood comes set for these and other manual operation hints. DEMO ON will show 1:00 and count down quickly to End . To change, touch Help and...
... / Weight Selection The Built-in the oven. Touch Timer/Clock pad. Cooking operations and specific special features can now be demonstrated with no power in Microwave Hood comes set for these and other manual operation hints. DEMO ON will show 1:00 and count down quickly to End . To change, touch Help and...


