ViewSonic LD-STND-003 Support and Manuals
Get Help and Manuals for this ViewSonic item
View All Support Options Below
Free ViewSonic LD-STND-003 manuals!
Problems with ViewSonic LD-STND-003?
Ask a Question
Free ViewSonic LD-STND-003 manuals!
Problems with ViewSonic LD-STND-003?
Ask a Question
Popular ViewSonic LD-STND-003 Manual Pages
Quick Start Guide - Page 1

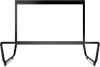
Floor Stand (LD-STND-003)
Compatible with LD108-121 All-in-one Direct View LED Display
Quick Start Guide
Guide de démarrage rapide Schnellstartanleitung Guía rápida de inicio Hızlı Başlangıç Kılavuzu Aan de slag
Quick Start Guide - Page 2

ENGLISH
Floor Stand Installation
The floor stand is an optional accessory. Component List
Letter Item
Quantity Description
A
1
Hex Tool (Allen wrench)
B
8
M6 x 80mm Bolt
C
1
Left Support
D
1
Bottom Cross Beam
E
1
Right Support
F
1
Top Cross Beam
2
Follow below instructions to assemble and install your LED Display onto the stand.
Quick Start Guide - Page 3

Always unlock the wheels before moving. Failure to be used with other models may result in
CAUTION • This Stand is to comply with this
stand with ViewSonic Direct View LD108-121 only.
Using this caution may cause instability and injury. TIPPING HAZARD! • DO NOT roll the stand over cable, uneven, dirty...
Quick Start Guide - Page 4

ENGLISH
Assembling the Floor Stand
1 2 1. Connect the Right Support "E" with the Bottom Cross Beam with two (2) M6 x 80mm bolts "B" and using an Allen wrench "A". D
B A
C
2. Connect the Left Support "C" to the Bottom Cross Beam "D" with two (2) M6 x 80mm
2bolts.
3
E
F
4
A
4
4
Quick Start Guide - Page 5

Connect the Top Cross Beam "F" to the Left and Right Supports with an Allen wrench.
5 Ensure all bolts are tightened properly with four (4) M6 x 80mm bolts.
3
E
F
4
A
4 4. ENGLISH
2 3.
Quick Start Guide - Page 6

... System Control Box panel.
NOTE: Use caution as the System Control Box panel is on the Bottom Cross Beam and secure it with wires attached.
2. Install two (2) additional screws (M6x10mm) to the Floor Base
1. Ensure the main system control board is separated into two pieces with six (6) M6x10mm screws.
3. NOTE: Screws...
Quick Start Guide - Page 7

Carefully lift a Cabinet up onto the Floor Stand, securing the Mounting Bracket into the support channel of the two (2) Middle Cabinets are positioned as shown below:
2. The bottom of the Cabinet will rest on the rear of the Top Cross Beam. Ensure the two (2) Mounting Brackets on the Bottom Cross Beam.
7 ENGLISH
Installing the Middle Cabinets
1.
Quick Start Guide - Page 8

ENGLISH
3
3.
Secure the Cabinet to the Support with the hex tool. Push the Locking Bolt. Lock each Hook with an Allen wrench in order to securely connect each cabinet. 8 Push each Locking ...
Quick Start Guide - Page 9

...eight (8) Hooks between each Hook with the provided screws (M6x-
10mm). ENGLISH
Installing the Left and Right Cabinet
1. Secure the Left and Right Cabinet to the Support with the hex tool to securely connect the
Left and Right Cabinet to the Middle... Right Cabinet up onto the Floor Stand, securing the Mounting Bracket into the support channel of the Cabinet will rest on the Bottom Cross Beam.
Quick Start Guide - Page 12

...properly aligned with the 12 provided screws (KM3x6mm). then secure it with the System Control Box; Begin by installing the Right Cover onto the System Control Box. USB
USB
USB
HDMI
HDMI
HDMI
AUDIO
USB-B
LAN
OUT
2...USB-B
LAN
OUT
2
1
OUT
STAND-BY INPUT BRIGHTNESS
4.
ENGLISH
Installing System Control Box Covers
There are placed in the accessory box of the LED Display. 12
Quick Start Guide - Page 13

Once all of the Covers are secured, your LED Display is ready to power on. All rights reserved.
13 ENGLISH
6.
RS232
USB
USB
USB
HDMI
HDMI
HDMI
AUDIO
USB-B
LAN
OUT
2
1
OUT
STAND-BY INPUT BRIGHTNESS
LD108-121_QSG_1a_ENG_20201109 Copyright © 2021 ViewSonic Corporation. Repeat the above steps for the Middle and Left Cover.
Quick Start Guide - Page 15

繁體中文
808.7 mm 31.84 in
2420.95 mm 95.31 in
1200 mm 47.24 in
56 mm 2.205 in
35 mm 1.378 in
1468.45 mm 57.81 in
2123.19 mm 83.59 in
注意
ViewSonic Direct View LD108-121
3
Quick Start Guide - Page 25

繁體中文
3 LED
RS232
USB
USB
USB
HDMI
HDMI
HDMI
AUDIO
USB-B
LAN
OUT
2
1
OUT
STAND-BY INPUT BRIGHTNESS
LD108-121_QSG_1a_TCH_20210107 2021 ViewSonic Corpora�on
13
Quick Start Guide - Page 27

简体中文
808.7 mm 31.84 in
2420.95 mm 95.31 in
1200 mm 47.24 in
56 mm 2.205 in
35 mm 1.378 in
1468.45 mm 57.81 in
2123.19 mm 83.59 in
小心
ViewSonic Direct View LD108-121
3
Quick Start Guide - Page 37

简体中文
3
RS232
USB
USB
USB
HDMI
HDMI
HDMI
AUDIO
USB-B
LAN
OUT
2
1
OUT
STAND-BY INPUT BRIGHTNESS
LD108-121_QSG_1a_SCH_20210107 2021 ViewSonic Corpora�on
13
ViewSonic LD-STND-003 Reviews
We have not received any reviews for ViewSonic yet.