Operation Manual
Page 5
.... A spark arrestor for instructions. 7. Disconnect the spark plug wire and ground against the engine to a complete stop the engine. Check bolts and screws for gas, oil, etc. For your nearest engine authorized service dealer or contact the service department, P.O. Observe proper disposal laws and regulations for proper tightness at unsafe speeds...
.... A spark arrestor for instructions. 7. Disconnect the spark plug wire and ground against the engine to a complete stop the engine. Check bolts and screws for gas, oil, etc. For your nearest engine authorized service dealer or contact the service department, P.O. Observe proper disposal laws and regulations for proper tightness at unsafe speeds...
Operation Manual
Page 7
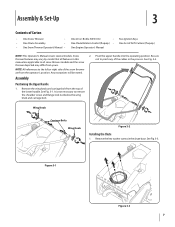
Pivot the upper handle into the operating position. See Fig. 3-2. See Fig. 3-1. Bottle 5W-30 Oil • One Chute Rotation Control (If equip.) • One Engine Operator's Manual Two Ignition Keys One Set of Carton • One Snow Thrower • • ...
Pivot the upper handle into the operating position. See Fig. 3-2. See Fig. 3-1. Bottle 5W-30 Oil • One Chute Rotation Control (If equip.) • One Engine Operator's Manual Two Ignition Keys One Set of Carton • One Snow Thrower • • ...
Operation Manual
Page 9
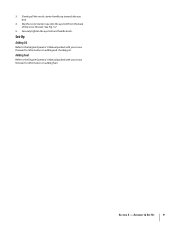
Slowly pull the recoil starter handle up towards the eye bolt. 4. Securely tighten the eye bolt and handle knob. Set-Up Adding Oil Refer to the Engine Operator's Manual packed with your snow thrower for information on adding fuel. Section 3 - See Fig. 3-7. 5. Slip the recoil starter rope into the eye bolt from the back of the snow thrower. Assembly & Set-Up 9 3. Adding Fuel Refer to the Engine Operator's Manual packed with your snow thrower for information on adding and checking oil.
Slowly pull the recoil starter handle up towards the eye bolt. 4. Securely tighten the eye bolt and handle knob. Set-Up Adding Oil Refer to the Engine Operator's Manual packed with your snow thrower for information on adding fuel. Section 3 - See Fig. 3-7. 5. Slip the recoil starter rope into the eye bolt from the back of the snow thrower. Assembly & Set-Up 9 3. Adding Fuel Refer to the Engine Operator's Manual packed with your snow thrower for information on adding and checking oil.
Operation Manual
Page 13
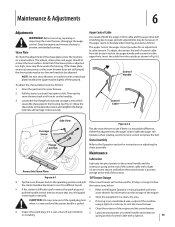
... a noticeable difference. Maintenance Lubrication Reversible Shave Plate Lubricate the pivot points on the storage of the season. the instructions below. 5. CAUTION: Oil may be too low and needs to be used for 30 days or longer, follow the starter handle a few times to see the Service... section to the Operation section for instructions on control handle and extension re-installing. Clean the exterior of the control cable with a light oil once every season and before 5. Lubricate pivot points on adjusting the chute assembly. spring at the end of the engine. NOTE: On...
... a noticeable difference. Maintenance Lubrication Reversible Shave Plate Lubricate the pivot points on the storage of the season. the instructions below. 5. CAUTION: Oil may be too low and needs to be used for 30 days or longer, follow the starter handle a few times to see the Service... section to the Operation section for instructions on control handle and extension re-installing. Clean the exterior of the control cable with a light oil once every season and before 5. Lubricate pivot points on adjusting the chute assembly. spring at the end of the engine. NOTE: On...
Operation Manual
Page 14
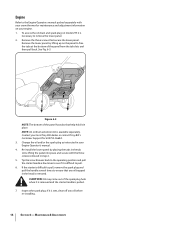
...Engine Operator's manual. 4. If the starter is difficult to pull, remove the spark plug and pull the handle several times to ensure that any oil before re-installing. 14 Section 6- If it is available separately. Inspect the spark plug. Remove the lower panel by placing the tabs in ... is removed and the starter handle is removed. See Fig. 6-3. Re-install the lower panel by lifting up on your local Troy-Bilt dealer or contact Troy-Bilt's Customer Support for maintenance and adjustment information on the panel to free the tabs at the bottom of the panel has tabs that...
...Engine Operator's manual. 4. If the starter is difficult to pull, remove the spark plug and pull the handle several times to ensure that any oil before re-installing. 14 Section 6- If it is available separately. Inspect the spark plug. Remove the lower panel by placing the tabs in ... is removed and the starter handle is removed. See Fig. 6-3. Re-install the lower panel by lifting up on your local Troy-Bilt dealer or contact Troy-Bilt's Customer Support for maintenance and adjustment information on the panel to free the tabs at the bottom of the panel has tabs that...


