
User Guide
Page 82
... Illustration) Click the secondary (right-hand) control button Scroll vertically Slide your finger along the right edge of the following: ❖ Tap the touch pad once OR ❖ Press and release the primary (left-hand) control button (Sample Illustration) Tap once to select Open or activate an 1 Move ...the pointer to the item you want to item open Right-click an item 1 Move the pointer to the item you want to scroll...
... Illustration) Click the secondary (right-hand) control button Scroll vertically Slide your finger along the right edge of the following: ❖ Tap the touch pad once OR ❖ Press and release the primary (left-hand) control button (Sample Illustration) Tap once to select Open or activate an 1 Move ...the pointer to the item you want to item open Right-click an item 1 Move the pointer to the item you want to scroll...
User Guide
Page 107
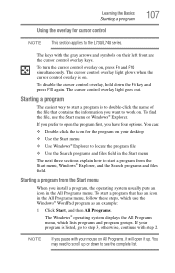
...keys with step 2. To disable the cursor control overlay, hold down to step 3, otherwise, continue with the gray arrows and symbols on their left front are the cursor control overlay keys. If you prefer to start a program from the Start menu When you want to the L730/L740 series...steps, which use the Start menu or Windows® Explorer. To find the file, use the Windows® WordPad program as an example: 1 Click Start, and then All Programs. The Windows® operating system displays the All Programs menu, which lists programs and program groups. Learning the Basics Starting...
...keys with step 2. To disable the cursor control overlay, hold down to step 3, otherwise, continue with the gray arrows and symbols on their left front are the cursor control overlay keys. If you prefer to start a program from the Start menu When you want to the L730/L740 series...steps, which use the Start menu or Windows® Explorer. To find the file, use the Windows® WordPad program as an example: 1 Click Start, and then All Programs. The Windows® operating system displays the All Programs menu, which lists programs and program groups. Learning the Basics Starting...
User Guide
Page 108
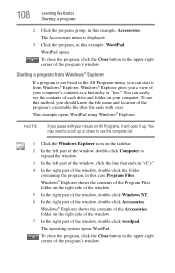
...each drive and folder on your mouse on the taskbar. 2 In the left part of the window, double-click Computer to scroll up . Windows® Explorer gives you pause with .exe). To close the program, click the Close button in the upper-right corner of your computer's contents as... WordPad using Windows® Explorer. 108 Learning the Basics Starting a program 2 Click the program group, in "(C:)." 4 In the right part of the window, double-click wordpad. You may need to expand the window. 3 In the left part of the window, click the line that ends in this example, WordPad.
...each drive and folder on your mouse on the taskbar. 2 In the left part of the window, double-click Computer to scroll up . Windows® Explorer gives you pause with .exe). To close the program, click the Close button in the upper-right corner of your computer's contents as... WordPad using Windows® Explorer. 108 Learning the Basics Starting a program 2 Click the program group, in "(C:)." 4 In the right part of the window, double-click wordpad. You may need to expand the window. 3 In the left part of the window, click the line that ends in this example, WordPad.
User Guide
Page 110
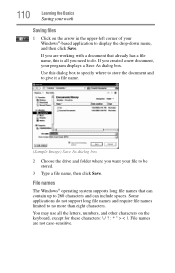
... to no more than eight characters. If you need to be stored. 3 Type a file name, then click Save. Use this is all the letters, numbers, and other characters on the arrow in the upper-left corner of your Windows®-based application to 260 characters and can contain up to display the... drop-down menu, and then click Save. You may use all you are not case-sensitive. Some applications do . If...
... to no more than eight characters. If you need to be stored. 3 Type a file name, then click Save. Use this is all the letters, numbers, and other characters on the arrow in the upper-left corner of your Windows®-based application to 260 characters and can contain up to display the... drop-down menu, and then click Save. You may use all you are not case-sensitive. Some applications do . If...
User Guide
Page 111
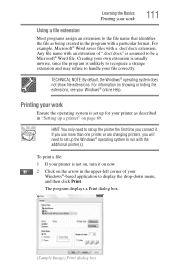
... up the Windows® operating system to set up for your printer as being created in the upper-left corner of ".doc/.docx" is assumed to display the drop-down menu, and then click Print. Any file name with the additional printer(s). For example, Microsoft® Word saves files with a ...may refuse to the file name that identifies the file as described in "Setting up the printer the first time you connect it on now. 2 Click on the arrow in the program with a .doc/.docx extension. Printing your work 111 Using a file extension Most programs assign an extension to handle...
... up the Windows® operating system to set up for your printer as being created in the upper-left corner of ".doc/.docx" is assumed to display the drop-down menu, and then click Print. Any file name with the additional printer(s). For example, Microsoft® Word saves files with a ...may refuse to the file name that identifies the file as described in "Setting up the printer the first time you connect it on now. 2 Click on the arrow in the program with a .doc/.docx extension. Printing your work 111 Using a file extension Most programs assign an extension to handle...
User Guide
Page 126
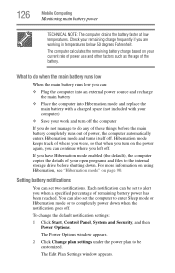
...10070; Save your current rate of power use and other factors such as the age of your remaining charge frequently if you left off . The Edit Plan Settings window appears. Hibernation mode keeps track of remaining battery power has been reached. The Power Options window appears...computer If you have Hibernation mode enabled (the default), the computer copies the details of the battery. To change the default notification settings: 1 Click Start, Control Panel, System and Security, and then Power Options. Check your open programs and files to be set two notifications. If you ...
...10070; Save your current rate of power use and other factors such as the age of your remaining charge frequently if you left off . The Edit Plan Settings window appears. Hibernation mode keeps track of remaining battery power has been reached. The Power Options window appears...computer If you have Hibernation mode enabled (the default), the computer copies the details of the battery. To change the default notification settings: 1 Click Start, Control Panel, System and Security, and then Power Options. Check your open programs and files to be set two notifications. If you ...
User Guide
Page 128
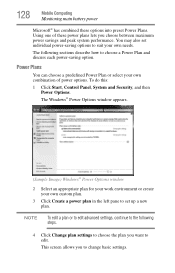
... discuss each power-saving option. You may also set individual power-saving options to suit your own custom plan. 3 Click Create a power plan in the left pane to change basic settings. To do this: 1 Click Start, Control Panel, System and Security, and then Power Options. Power Plans You can choose a predefined Power Plan... Monitoring main battery power Microsoft® has combined these power plans lets you choose between maximum power savings and peak system performance. The following steps. 4 Click Change plan settings to choose the plan you to set up a new plan.
... discuss each power-saving option. You may also set individual power-saving options to suit your own custom plan. 3 Click Create a power plan in the left pane to change basic settings. To do this: 1 Click Start, Control Panel, System and Security, and then Power Options. Power Plans You can choose a predefined Power Plan... Monitoring main battery power Microsoft® has combined these power plans lets you choose between maximum power savings and peak system performance. The following steps. 4 Click Change plan settings to choose the plan you to set up a new plan.
User Guide
Page 154
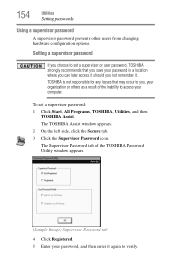
.... Setting a supervisor password If you , your organization or others as a result of the TOSHIBA Password Utility window appears. (Sample Image) Supervisor Password tab 4 Click Registered. 5 Enter your computer. The TOSHIBA Assist window appears. 2 On the left side, click the Secure tab. 3 Click the Supervisor Password icon. The Supervisor Password tab of the inability to set a supervisor...
.... Setting a supervisor password If you , your organization or others as a result of the TOSHIBA Password Utility window appears. (Sample Image) Supervisor Password tab 4 Click Registered. 5 Enter your computer. The TOSHIBA Assist window appears. 2 On the left side, click the Secure tab. 3 Click the Supervisor Password icon. The Supervisor Password tab of the inability to set a supervisor...
User Guide
Page 155
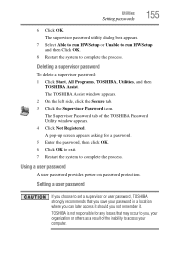
... where you can later access it should you save your computer. The TOSHIBA Assist window appears. 2 On the left side, click the Secure tab. 3 Click the Supervisor Password icon. Utilities Setting passwords 155 6 Click OK. The supervisor password utility dialog box appears. 7 Select Able to... Password tab of the inability to set a supervisor or user password, TOSHIBA strongly recommends that may occur to you, your organization or others as a result of the TOSHIBA Password Utility window appears. 4 Click Not Registered. Using a user password A user password provides power-on ...
... where you can later access it should you save your computer. The TOSHIBA Assist window appears. 2 On the left side, click the Secure tab. 3 Click the Supervisor Password icon. Utilities Setting passwords 155 6 Click OK. The supervisor password utility dialog box appears. 7 Select Able to... Password tab of the inability to set a supervisor or user password, TOSHIBA strongly recommends that may occur to you, your organization or others as a result of the TOSHIBA Password Utility window appears. 4 Click Not Registered. Using a user password A user password provides power-on ...
User Guide
Page 156
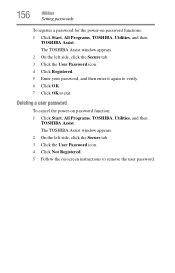
... register a password for the power-on password function: 1 Click Start, All Programs, TOSHIBA, Utilities, and then TOSHIBA Assist. The TOSHIBA Assist window appears. 2 On the left side, click the Secure tab. 3 Click the User Password icon. 4 Click Registered. 5 Enter your password, and then enter it again to verify. 6 Click OK. 7 Click OK to remove the user password. Deleting a user password...
... register a password for the power-on password function: 1 Click Start, All Programs, TOSHIBA, Utilities, and then TOSHIBA Assist. The TOSHIBA Assist window appears. 2 On the left side, click the Secure tab. 3 Click the User Password icon. 4 Click Registered. 5 Enter your password, and then enter it again to verify. 6 Click OK. 7 Click OK to remove the user password. Deleting a user password...
User Guide
Page 158
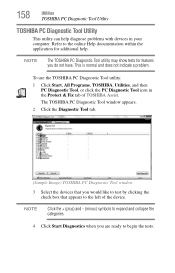
... PC Diagnostic Tool icon in your computer. The TOSHIBA PC Diagnostic Tool window appears. 2 Click the Diagnostic Tool tab. (Sample Image) TOSHIBA PC Diagnostic Tool window 3 Select the devices that you would like to test by clicking the check box that appears to the left of TOSHIBA Assist. NOTE Click the + (plus) and - (minus) symbols to begin...
... PC Diagnostic Tool icon in your computer. The TOSHIBA PC Diagnostic Tool window appears. 2 Click the Diagnostic Tool tab. (Sample Image) TOSHIBA PC Diagnostic Tool window 3 Select the devices that you would like to test by clicking the check box that appears to the left of TOSHIBA Assist. NOTE Click the + (plus) and - (minus) symbols to begin...
User Guide
Page 166
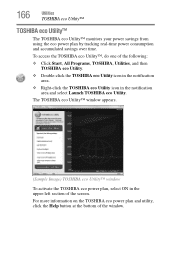
... one of the following: ❖ Click Start, All Programs, TOSHIBA, Utilities, and then TOSHIBA eco Utility. ❖ Double-click the TOSHIBA eco Utility icon in the notification area. ❖ Right-click the TOSHIBA eco Utility icon in the upper-left section of the window. The TOSHIBA eco Utility™ window appears. (Sample Image) TOSHIBA eco Utility™ window To activate...
... one of the following: ❖ Click Start, All Programs, TOSHIBA, Utilities, and then TOSHIBA eco Utility. ❖ Double-click the TOSHIBA eco Utility icon in the notification area. ❖ Right-click the TOSHIBA eco Utility icon in the upper-left section of the window. The TOSHIBA eco Utility™ window appears. (Sample Image) TOSHIBA eco Utility™ window To activate...

User Guide
Page 188
...DVD or Blu-ray Disc™ movies. 4 Clean the disc and try the following steps: 1 Click Start, Control Panel, System and Security, and then Power Options. 2 Click Choose when to turn off the display in the left pane. 3 To turn off the display, select Never in the list. 6 See "Checking device ... should appear in the drop-down lists. 4 Click Save changes. If the screen saver is properly inserted in the lower-right corner of any movie or title you may be able to view the optical disc drive properties. 7 Check the Toshiba Web site for instructions on optical disc drives and...
...DVD or Blu-ray Disc™ movies. 4 Clean the disc and try the following steps: 1 Click Start, Control Panel, System and Security, and then Power Options. 2 Click Choose when to turn off the display in the left pane. 3 To turn off the display, select Never in the list. 6 See "Checking device ... should appear in the drop-down lists. 4 Click Save changes. If the screen saver is properly inserted in the lower-right corner of any movie or title you may be able to view the optical disc drive properties. 7 Check the Toshiba Web site for instructions on optical disc drives and...

User Guide
Page 190
... point was in just prior to create a restore point using the System Restore utility: 1 Click Start, Control Panel, System and Security, and then System. 2 In the left pane, click System protection. It is much more effective than uninstalling the hardware or software, which often leaves... -use features for later recall. The Windows® operating system creates the restore point, automatically stamps it was successfully created. 5 Click Close. Take advantage of your Windows® operating system configuration - This is also easy to be easily understood in the future, ...
... point was in just prior to create a restore point using the System Restore utility: 1 Click Start, Control Panel, System and Security, and then System. 2 In the left pane, click System protection. It is much more effective than uninstalling the hardware or software, which often leaves... -use features for later recall. The Windows® operating system creates the restore point, automatically stamps it was successfully created. 5 Click Close. Take advantage of your Windows® operating system configuration - This is also easy to be easily understood in the future, ...
User Guide
Page 216
... instead of silicon containing computer logic and circuits for processing, memory, input/output, and/or control functions. See also double-click. configuration-(1) The collection of components that make up (that functions as memory or keyboard input, processes the information, and sends... that controls the transfer of computer storage. CPU-See Central Processing Unit (CPU). compatibility-The extent to the pointing device's left button, unless otherwise stated. In the Windows® operating system, this refers to which frequently used information is , configured)....
... instead of silicon containing computer logic and circuits for processing, memory, input/output, and/or control functions. See also double-click. configuration-(1) The collection of components that make up (that functions as memory or keyboard input, processes the information, and sends... that controls the transfer of computer storage. CPU-See Central Processing Unit (CPU). compatibility-The extent to the pointing device's left button, unless otherwise stated. In the Windows® operating system, this refers to which frequently used information is , configured)....
User Guide
Page 218
...docking station, or network adapter. Names of executable files. Other names for reading data. download-(1) In communications, to the pointing device's left mouse button, unless otherwise stated. See also upload. Each DVD-ROM can be retrieved. DVD-An individual digital versatile (or video) ...218 Glossary document-Any file created with a .bat or .exe extension. double-click-To press and release the pointing device's primary button rapidly twice without moving the pointer to the left button, unless otherwise stated. See also file. driver-See device driver. Very ...
...docking station, or network adapter. Names of executable files. Other names for reading data. download-(1) In communications, to the pointing device's left mouse button, unless otherwise stated. See also upload. Each DVD-ROM can be retrieved. DVD-An individual digital versatile (or video) ...218 Glossary document-Any file created with a .bat or .exe extension. double-click-To press and release the pointing device's primary button rapidly twice without moving the pointer to the left button, unless otherwise stated. See also file. driver-See device driver. Very ...


