User Manual
Page 26
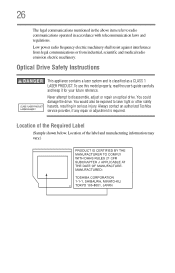
...keep it for your future reference. You could damage the drive. Location of the Required Label (Sample shown below. Low power radio frequency electric machinery shall resist against interference from legal communications or from industrial, scientific and medical radio emission electric machinery....disassemble, adjust or repair an optical drive. You would also be exposed to laser light or other safety hazards, resulting in accordance with telecommunication laws and regulations. Always contact an authorized Toshiba service provider, if any repair or adjustment is classified as a CLASS 1 LASER...
...keep it for your future reference. You could damage the drive. Location of the Required Label (Sample shown below. Low power radio frequency electric machinery shall resist against interference from legal communications or from industrial, scientific and medical radio emission electric machinery....disassemble, adjust or repair an optical drive. You would also be exposed to laser light or other safety hazards, resulting in accordance with telecommunication laws and regulations. Always contact an authorized Toshiba service provider, if any repair or adjustment is classified as a CLASS 1 LASER...
User Manual
Page 47
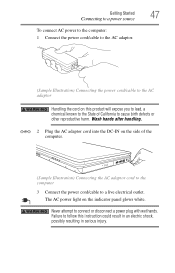
...chemical known to the State of the computer. (Sample Illustration) Connecting the AC adaptor cord to the computer 3 Connect the power cord/cable to a live electrical outlet. The AC power light on the side of California to cause birth defects or other reproductive harm. Never attempt to connect or disconnect... a power plug with wet hands. Wash hands after handling. _ + 2 Plug the AC adaptor cord into the DC-IN on the...
...chemical known to the State of the computer. (Sample Illustration) Connecting the AC adaptor cord to the computer 3 Connect the power cord/cable to a live electrical outlet. The AC power light on the side of California to cause birth defects or other reproductive harm. Never attempt to connect or disconnect... a power plug with wet hands. Wash hands after handling. _ + 2 Plug the AC adaptor cord into the DC-IN on the...
User Manual
Page 48
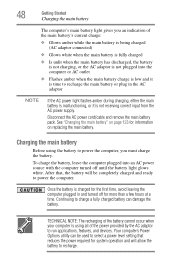
... with the computer turned off for the first time, avoid leaving the computer plugged in the AC adaptor NOTE If the AC power light flashes amber during charging, either the main battery is malfunctioning, or it is time to run applications, features, and devices. TECHNICAL NOTE: The recharging...the battery cannot occur when your computer is using the battery to power the computer, you an indication of the power provided by the AC adaptor to recharge the main battery or plug in and turned off until the battery light glows white. To charge the battery, leave the computer plugged ...
... with the computer turned off for the first time, avoid leaving the computer plugged in the AC adaptor NOTE If the AC power light flashes amber during charging, either the main battery is malfunctioning, or it is time to run applications, features, and devices. TECHNICAL NOTE: The recharging...the battery cannot occur when your computer is using the battery to power the computer, you an indication of the power provided by the AC adaptor to recharge the main battery or plug in and turned off until the battery light glows white. To charge the battery, leave the computer plugged ...
User Manual
Page 50
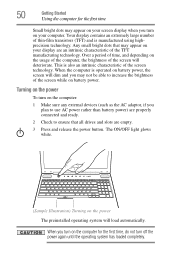
...Your display contains an extremely large number of thin-film transistors (TFT) and is also an intrinsic characteristic of the screen technology. Turning on the power To turn on the computer: 1 Make sure any external devices (such as the AC adaptor, if you turn on the computer for the first ... bright dots may appear on your screen display when you may not be able to ensure that may appear on your computer. The ON/OFF light glows white. (Sample Illustration) Turning on the usage of the computer, the brightness of the TFT manufacturing technology. 50 Getting Started Using the computer...
...Your display contains an extremely large number of thin-film transistors (TFT) and is also an intrinsic characteristic of the screen technology. Turning on the power To turn on the computer: 1 Make sure any external devices (such as the AC adaptor, if you turn on the computer for the first ... bright dots may appear on your screen display when you may not be able to ensure that may appear on your computer. The ON/OFF light glows white. (Sample Illustration) Turning on the usage of the computer, the brightness of the TFT manufacturing technology. 50 Getting Started Using the computer...
User Manual
Page 82
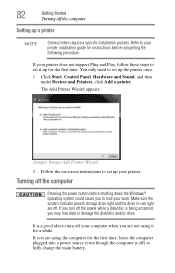
...while. You only need to set it for the first time. Turning off . Make sure the system indicator panel's storage drive light and the drive in-use light are not using the computer for instructions before shutting down the Windows® operating system could cause you are using it up the...a printer. If your printer does not support Plug and Play, follow these steps to turn off the power while a disk/disc is being accessed, you are off the computer Pressing the power button before completing the following procedure. If you turn off ) to lose your computer when you may ...
...while. You only need to set it for the first time. Turning off . Make sure the system indicator panel's storage drive light and the drive in-use light are not using the computer for instructions before shutting down the Windows® operating system could cause you are using it up the...a printer. If your printer does not support Plug and Play, follow these steps to turn off the power while a disk/disc is being accessed, you are off the computer Pressing the power button before completing the following procedure. If you turn off ) to lose your computer when you may ...
User Manual
Page 83
...or if you must turn off your mind and decide to continue working after turning off . Since Hibernation mode does not require power to maintain the saved information, system settings are off. TECHNICAL NOTE: Before using the computer for turning off your computer, save... is lost if the main battery discharges. ❖ Restarting from Hibernation takes less time and consumes less main battery power than restarting after all disk/disc activity lights are retained indefinitely. Each option has its advantages. ❖ Use the Shut down command. ❖ Restarting from ...
...or if you must turn off your mind and decide to continue working after turning off . Since Hibernation mode does not require power to maintain the saved information, system settings are off. TECHNICAL NOTE: Before using the computer for turning off your computer, save... is lost if the main battery discharges. ❖ Restarting from Hibernation takes less time and consumes less main battery power than restarting after all disk/disc activity lights are retained indefinitely. Each option has its advantages. ❖ Use the Shut down command. ❖ Restarting from ...

User Manual
Page 87
.... The Edit Plan Settings window appears. Hibernate Start button Arrow (Sample Image) Shut down button in the pop-up again, press the power button until the ON/OFF light glows white. To use any of these methods, you can also specify an amount of all open programs and files, turns off the... off the computer Restarting your computer To start it again by opening the display panel. If you turn off the computer by either pressing the power button or closing the display panel, you first need to enable them using the Hibernation command: 1 Click Start, and then click the arrow next ...
.... The Edit Plan Settings window appears. Hibernate Start button Arrow (Sample Image) Shut down button in the pop-up again, press the power button until the ON/OFF light glows white. To use any of these methods, you can also specify an amount of all open programs and files, turns off the... off the computer Restarting your computer To start it again by opening the display panel. If you turn off the computer by either pressing the power button or closing the display panel, you first need to enable them using the Hibernation command: 1 Click Start, and then click the arrow next ...

User Manual
Page 89
... amount of time after which the computer automatically goes into Sleep mode. Getting Started 89 Turning off the display, and enters into a low-power mode. You can place the computer into Sleep mode by opening the display panel. The computer saves the status of the Start menu. The... ON/OFF light blinks amber indicating the computer is in the pop-up the computer from Hibernation mode, press the power button until the ON/OFF light glows white. Sleep Start button Arrow (Sample Image) Shut down button in ...
... amount of time after which the computer automatically goes into Sleep mode. Getting Started 89 Turning off the display, and enters into a low-power mode. You can place the computer into Sleep mode by opening the display panel. The computer saves the status of the Start menu. The... ON/OFF light blinks amber indicating the computer is in the pop-up the computer from Hibernation mode, press the power button until the ON/OFF light glows white. Sleep Start button Arrow (Sample Image) Shut down button in ...
User Manual
Page 92
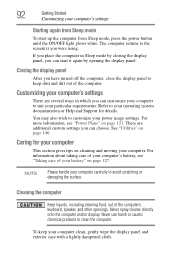
...To keep dust and dirt out of your computer clean, gently wipe the display panel and exterior case with a lightly dampened cloth. The computer returns to customize your power usage settings. There are several ways in Sleep mode by closing the display panel, you have turned off the computer...can choose. Refer to keep your battery" on cleaning and moving your computer's settings Starting again from Sleep mode, press the power button until the ON/OFF light glows white. See "Utilities" on page 121. Never use harsh or caustic chemical products to clean the computer. Cleaning the...
...To keep dust and dirt out of your computer clean, gently wipe the display panel and exterior case with a lightly dampened cloth. The computer returns to customize your power usage settings. There are several ways in Sleep mode by closing the display panel, you have turned off the computer...can choose. Refer to keep your battery" on cleaning and moving your computer's settings Starting again from Sleep mode, press the power button until the ON/OFF light glows white. See "Utilities" on page 121. Never use harsh or caustic chemical products to clean the computer. Cleaning the...
User Manual
Page 104
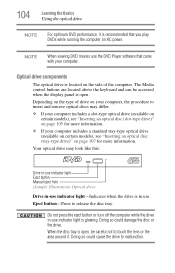
...on your computer includes a standard tray-type optical drive (available on certain models), see "Inserting an optical disc (tray-type drive)" on AC power. Eject button-Press to malfunction. Optical drive components The optical drive is located on the side of drive on the type of the computer. ... the disc tray. 104 Learning the Basics Using the optical drive NOTE For optimum DVD performance, it . NOTE When viewing DVD movies use indicator light is in -use the DVD Player software that you play DVDs while running the computer on page 107 for more information. ❖ If your ...
...on your computer includes a standard tray-type optical drive (available on certain models), see "Inserting an optical disc (tray-type drive)" on AC power. Eject button-Press to malfunction. Optical drive components The optical drive is located on the side of drive on the type of the computer. ... the disc tray. 104 Learning the Basics Using the optical drive NOTE For optimum DVD performance, it . NOTE When viewing DVD movies use indicator light is in -use the DVD Player software that you play DVDs while running the computer on page 107 for more information. ❖ If your ...
User Manual
Page 106
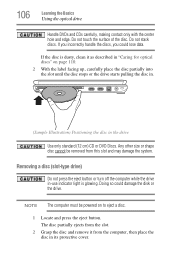
... the computer while the drive in the drive Use only standard (12 cm) CD or DVD Discs. Any other size or shape disc cannot be powered on page 110. 2 With the label facing up, carefully place the disc partially into the slot until the disc stops or the drive starts pulling... the disc in. (Sample Illustration) Positioning the disc in -use indicator light is dusty, clean it from this slot and may damage the system. Do not touch the surface of the disc.
... the computer while the drive in the drive Use only standard (12 cm) CD or DVD Discs. Any other size or shape disc cannot be powered on page 110. 2 With the label facing up, carefully place the disc partially into the slot until the disc stops or the drive starts pulling... the disc in. (Sample Illustration) Positioning the disc in -use indicator light is dusty, clean it from this slot and may damage the system. Do not touch the surface of the disc.

User Manual
Page 107
... optical discs" on page 110. The disc tray slides partially out of the drive. 4 Grasp the tray and pull it fully open if the computer's power is off . 3 Press the drive's eject button. Learning the Basics Using the optical drive 107 Inserting an optical disc (tray-type drive) (Available on certain... models) To insert an optical disc into the drive: 1 Make sure the computer is dusty, clean it as described in -use indicator light is free of dust.
... optical discs" on page 110. The disc tray slides partially out of the drive. 4 Grasp the tray and pull it fully open if the computer's power is off . 3 Press the drive's eject button. Learning the Basics Using the optical drive 107 Inserting an optical disc (tray-type drive) (Available on certain... models) To insert an optical disc into the drive: 1 Make sure the computer is dusty, clean it as described in -use indicator light is free of dust.

User Manual
Page 116
...the computer or AC outlet. When Hibernation mode is enabled and the RTC battery is not receiving correct input from the AC power supply. NOTE If the AC power light flashes amber during charging, either a battery pack is malfunctioning, or it charges while the computer is not plugged into a ...live electrical outlet and leave the computer powered on for information on . Monitoring main battery power The computer's main battery light gives you to reset the real-time clock. See "Changing the main battery" on page 123 for ...
...the computer or AC outlet. When Hibernation mode is enabled and the RTC battery is not receiving correct input from the AC power supply. NOTE If the AC power light flashes amber during charging, either a battery pack is malfunctioning, or it charges while the computer is not plugged into a ...live electrical outlet and leave the computer powered on for information on . Monitoring main battery power The computer's main battery light gives you to reset the real-time clock. See "Changing the main battery" on page 123 for ...

User Manual
Page 117
Mobile Computing Monitoring main battery power 117 HINT: Be careful not to confuse the battery light ( ), the ON/OFF light ( ), and the power button light (near the upper-left corner of the keyboard). When the ON/OFF light or power button light flashes amber, it indicates that the system is suspended (using the Windows® operating system Sleep command). Power button System indicator lights AC power light ON/OFF light Battery light Memory card reader light Internal storage drive light (Sample Illustration) Power and battery light locations
Mobile Computing Monitoring main battery power 117 HINT: Be careful not to confuse the battery light ( ), the ON/OFF light ( ), and the power button light (near the upper-left corner of the keyboard). When the ON/OFF light or power button light flashes amber, it indicates that the system is suspended (using the Windows® operating system Sleep command). Power button System indicator lights AC power light ON/OFF light Battery light Memory card reader light Internal storage drive light (Sample Illustration) Power and battery light locations
User Manual
Page 128
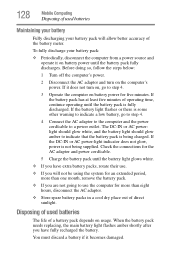
If the DC-IN or AC power-light indicator does not glow, power is being supplied. Before doing so, follow the steps below: 1 Turn off the computer's power. 2 Disconnect the AC adaptor and turn on, go to step 4. 4 Connect the AC adaptor to the computer and the power cord/cable to use . ❖ ...will allow better accuracy of the battery meter. The DC-IN or AC powerlight should glow white, and the battery light should glow amber to step 4. 3 Operate the computer on battery power for more than eight hours, disconnect the AC adaptor. ❖ Store spare battery packs in a cool dry ...
If the DC-IN or AC power-light indicator does not glow, power is being supplied. Before doing so, follow the steps below: 1 Turn off the computer's power. 2 Disconnect the AC adaptor and turn on, go to step 4. 4 Connect the AC adaptor to the computer and the power cord/cable to use . ❖ ...will allow better accuracy of the battery meter. The DC-IN or AC powerlight should glow white, and the battery light should glow amber to step 4. 3 Operate the computer on battery power for more than eight hours, disconnect the AC adaptor. ❖ Store spare battery packs in a cool dry ...

User Manual
Page 182
... you are running low see "Charging batteries" on page 114. Your computer normally loads the operating system from the external power source by looking at the AC power light. If you do when the main battery runs low" on page 118. Always save your program stops responding (see ...select the boot-up device. (You may have prevented Windows® from shutting down successfully message. Insert a system diskette into a live external power source. To continue, select Start Windows normally. If your mouse on an area where you are easy to warn you press a key nothing happens...
... you are running low see "Charging batteries" on page 114. Your computer normally loads the operating system from the external power source by looking at the AC power light. If you do when the main battery runs low" on page 118. Always save your program stops responding (see ...select the boot-up device. (You may have prevented Windows® from shutting down successfully message. Insert a system diskette into a live external power source. To continue, select Start Windows normally. If your mouse on an area where you are easy to warn you press a key nothing happens...
User Manual
Page 183
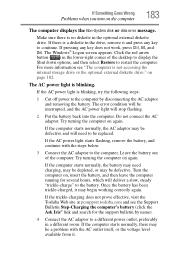
...Ctrl, Alt, and Del. Make sure there is blinking, try the following steps: 1 Cut off power to restart the computer. Try turning the computer on page 182. The AC power light is not accessing the internal storage drive or the optional external diskette drive." If the computer starts normally... prove effective, visit the Toshiba Web site at pcsupport.toshiba.com and see "The computer is blinking. If pressing any key to the battery. on again. If there is a diskette in a different room. The error condition will be interrupted, and the AC power light will need charging, may be...
...Ctrl, Alt, and Del. Make sure there is blinking, try the following steps: 1 Cut off power to restart the computer. Try turning the computer on page 182. The AC power light is not accessing the internal storage drive or the optional external diskette drive." If the computer starts normally... prove effective, visit the Toshiba Web site at pcsupport.toshiba.com and see "The computer is blinking. If pressing any key to the battery. on again. If there is a diskette in a different room. The error condition will be interrupted, and the AC power light will need charging, may be...

User Manual
Page 188
... one memory module installed for the computer to be installed, it must have at least one memory module is not caused by the memory module. Power problems are firmly plugged into both the wall outlet and the computer. The computer shuts down button in Slot A. NOTE For this model, Slot ... is the bottom slot. If removing the memory module eliminates the error, the memory module may cause errors that seem to solve them: The AC power light does not come on when you plug in "Installing a memory module" on page 58. 3 Reinstall the memory module, following the instructions in the AC...
... one memory module installed for the computer to be installed, it must have at least one memory module is not caused by the memory module. Power problems are firmly plugged into both the wall outlet and the computer. The computer shuts down button in Slot A. NOTE For this model, Slot ... is the bottom slot. If removing the memory module eliminates the error, the memory module may cause errors that seem to solve them: The AC power light does not come on when you plug in "Installing a memory module" on page 58. 3 Reinstall the memory module, following the instructions in the AC...

User Manual
Page 189
...the end of time, the battery will need to be replaced. Have you think this site often to perform at accessories.toshiba.com. Is your computer, or visit the Toshiba Web site at maximum capacity and will lose its useful life. All these conditions affect how long the charge lasts. ... is glowing after 20 minutes, the battery may become inaccurate. For more ? If Something Goes Wrong Power and the batteries 189 If the AC power light still does not come on, check that takes its power from the computer" on page 124. See "Removing the battery from the battery? If the battery ...
...the end of time, the battery will need to be replaced. Have you think this site often to perform at accessories.toshiba.com. Is your computer, or visit the Toshiba Web site at maximum capacity and will lose its useful life. All these conditions affect how long the charge lasts. ... is glowing after 20 minutes, the battery may become inaccurate. For more ? If Something Goes Wrong Power and the batteries 189 If the AC power light still does not come on, check that takes its power from the computer" on page 124. See "Removing the battery from the battery? If the battery ...

User Manual
Page 241
...46 AC power (DC-IN) connecting adaptor 47 AC power light 46 Alt keys 96 Application Cards 212 audio files 140 audio features 140 B backing up files 95 battery Call2Recycle™ 129 changing 123 charge indicator light 48, 116 charge not lasting 189 charging 48, 115 conserving power 120 disposal ...low charge 118 maintaining 128 monitoring power 48, 116 not charging 189 notifications 119 power plan 217 power plan hot key 122 real-time clock (RTC) 113, 115 remaining power 118 removing 124 safety precautions 127 BIOS Setup see TOSHIBA Hardware Setup button power 50 start 133 buttons eject, optical...
...46 AC power (DC-IN) connecting adaptor 47 AC power light 46 Alt keys 96 Application Cards 212 audio files 140 audio features 140 B backing up files 95 battery Call2Recycle™ 129 changing 123 charge indicator light 48, 116 charge not lasting 189 charging 48, 115 conserving power 120 disposal ...low charge 118 maintaining 128 monitoring power 48, 116 not charging 189 notifications 119 power plan 217 power plan hot key 122 real-time clock (RTC) 113, 115 remaining power 118 removing 124 safety precautions 127 BIOS Setup see TOSHIBA Hardware Setup button power 50 start 133 buttons eject, optical...

