User Guide
Page 13
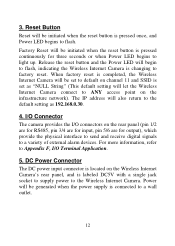
...reset button is pressed continuously for output), which provide the physical interface to send and receive digital signals to the default setting as "NULL String" (This default setting will begin to flash, indicating the Wireless Internet Camera is completed, the Wireless Internet Camera will be set ...to default on the rear panel (pin 1/2 are for RS485, pin 3/4 are for input, pin 5/6 are for three seconds or when Power LED begins to a wall outlet. 12 I/O Connector The camera provides the I /O Terminal Application. 5. The IP address will be generated when the ...
...reset button is pressed continuously for output), which provide the physical interface to send and receive digital signals to the default setting as "NULL String" (This default setting will begin to flash, indicating the Wireless Internet Camera is completed, the Wireless Internet Camera will be set ...to default on the rear panel (pin 1/2 are for RS485, pin 3/4 are for input, pin 5/6 are for three seconds or when Power LED begins to a wall outlet. 12 I/O Connector The camera provides the I /O Terminal Application. 5. The IP address will be generated when the ...

User Guide
Page 21
... The Wireless Internet Camera must correspond with a web browser. NOTE: The computer's IP address must be helpful in setting up the Wireless Internet Camera.) From the web browser, enter the default IP address 192.168.0.30 in the Address bar and then press [Enter] to communicate. 20 The Welcome screen is shown... on using the camera with the camera's IP address in the same segment for the two devices to access ...
... The Wireless Internet Camera must correspond with a web browser. NOTE: The computer's IP address must be helpful in setting up the Wireless Internet Camera.) From the web browser, enter the default IP address 192.168.0.30 in the Address bar and then press [Enter] to communicate. 20 The Welcome screen is shown... on using the camera with the camera's IP address in the same segment for the two devices to access ...

User Guide
Page 22
Java Mode z System Administration 21 ActiveX Mode z View Image - Enter the default IP address Pre-view area Welcome Screen of the Configuration Utility In the Welcome screen, there are three options to choose to set-up and view your Wireless Internet Camera, including: z View Image -
Java Mode z System Administration 21 ActiveX Mode z View Image - Enter the default IP address Pre-view area Welcome Screen of the Configuration Utility In the Welcome screen, there are three options to choose to set-up and view your Wireless Internet Camera, including: z View Image -

User Guide
Page 30
... the camera's RJ-45 LAN port, click this option and enter the User ID and Password into IP addresses. The default settings are: • IP Address - 192.168.0.30 • Subnet Mask - 255.255.255.0 • Default Gateway - 192.168.0.1 - Obtain IP address automatically via DHCP: If your domain over a changing IP address. Every time when the camera starts up...
... the camera's RJ-45 LAN port, click this option and enter the User ID and Password into IP addresses. The default settings are: • IP Address - 192.168.0.30 • Subnet Mask - 255.255.255.0 • Default Gateway - 192.168.0.1 - Obtain IP address automatically via DHCP: If your domain over a changing IP address. Every time when the camera starts up...

User Guide
Page 38
... set the video frequency: 1.) Set the frame(s) per second, or 2.) Set the time for the FTP server is Port 21, and it's also the default setting. Host Address: The IP Address of the target FTP server. - Password: Enter the user password in this field. - If the FTP server uses a specific port, please confirm the...
... set the video frequency: 1.) Set the frame(s) per second, or 2.) Set the time for the FTP server is Port 21, and it's also the default setting. Host Address: The IP Address of the target FTP server. - Password: Enter the user password in this field. - If the FTP server uses a specific port, please confirm the...

User Guide
Page 59
Enter the camera's IP address and Port. 5. Click the Add Camera button. The camera is added. Click Save, and then click the System Configuration button to return to View Window. Alternately, you can add a camera by entering the its IP address directly: 4. Select the Input IP tab. The selected camera's video will be displayed now. 58 Enter the camera's IP address (default: 192.168.0.30) and Port (default: 80), and then click Add Camera. 6.
Enter the camera's IP address and Port. 5. Click the Add Camera button. The camera is added. Click Save, and then click the System Configuration button to return to View Window. Alternately, you can add a camera by entering the its IP address directly: 4. Select the Input IP tab. The selected camera's video will be displayed now. 58 Enter the camera's IP address (default: 192.168.0.30) and Port (default: 80), and then click Add Camera. 6.

