
Operating Instructions
Page 2
... Don't throw away batteries with the instructions, may be determined by one or more of trouble. Reorient or relocate the receiving antenna. - CAUTION You are designed to provide reasonable protection against harmful interference in this manual could void your authority to operate...system installer's attention to Article 820-40 of the NEC that provides guidelines for help. Increase the separation between the equipment and receiver. - WARNING To reduce the risk of important operating and maintenance (servicing) instructions in the literature accompanying the appliance. This ...
... Don't throw away batteries with the instructions, may be determined by one or more of trouble. Reorient or relocate the receiving antenna. - CAUTION You are designed to provide reasonable protection against harmful interference in this manual could void your authority to operate...system installer's attention to Article 820-40 of the NEC that provides guidelines for help. Increase the separation between the equipment and receiver. - WARNING To reduce the risk of important operating and maintenance (servicing) instructions in the literature accompanying the appliance. This ...

Operating Instructions
Page 3
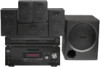
... code SP only". Any difference in operation is shown on the supplied remote. You can also use the controls on the receiver if they have the same or similar names as those on the remote is used for example, "Models of the rear panel... symbol are trademarks of Dolby Laboratories. ** "DTS" and "DTS Digital Surround" are for receiver operation. Center speaker - This receiver incorporates High-Definition Multimedia Interface (HDMITM) technology. The HT-DDW995 consists of: • Receiver • Speaker system - Front speaker - About This Manual • The instructions in this ...
... code SP only". Any difference in operation is shown on the supplied remote. You can also use the controls on the receiver if they have the same or similar names as those on the remote is used for example, "Models of the rear panel... symbol are trademarks of Dolby Laboratories. ** "DTS" and "DTS Digital Surround" are for receiver operation. Center speaker - This receiver incorporates High-Definition Multimedia Interface (HDMITM) technology. The HT-DDW995 consists of: • Receiver • Speaker system - Front speaker - About This Manual • The instructions in this ...

Operating Instructions
Page 4
... (DIGITAL ASSIGN 62 Naming inputs 63 Changing the display 64 Using the Sleep Timer 64 Recording using the receiver 65 Using the Remote Programming the remote 66 Additional Information Glossary 71 Precautions 72 Troubleshooting 73 Specifications 77 Index...Connecting speakers 17 3a: Connecting the audio components.........18 3b: Connecting the video components ........19 4: Connecting the antennas 27 5: Preparing the receiver and the remote .....28 6: Selecting the speaker system 29 7: Calibrating the appropriate settings automatically (AUTO CALIBRATION 30 8: Adjusting the speaker ...
... (DIGITAL ASSIGN 62 Naming inputs 63 Changing the display 64 Using the Sleep Timer 64 Recording using the receiver 65 Using the Remote Programming the remote 66 Additional Information Glossary 71 Precautions 72 Troubleshooting 73 Specifications 77 Index...Connecting speakers 17 3a: Connecting the audio components.........18 3b: Connecting the video components ........19 4: Connecting the antennas 27 5: Preparing the receiver and the remote .....28 6: Selecting the speaker system 29 7: Calibrating the appropriate settings automatically (AUTO CALIBRATION 30 8: Adjusting the speaker ...

Operating Instructions
Page 5
B SPEAKERS Press to both digital and analog jacks (page 59). C Display The current status of the selected component or a list of parts Receiver Front panel 12 3 4 5 67 8 ?/1 SPEAKERS (OFF/A/B/A+B) AUTO CAL MIC PHONES VIDEO 3 IN/PORTABLE AV IN VIDEO L AUDIO R MULTI CHANNEL DECODING ...the volume level of all speakers at the same time (page 34, 35, 37, 38). E Remote sensor Receives signals from remote commander. continued 5US F DISPLAY Press to turn the receiver on the display (page 64). MOVIE MUSIC AUTO CAL MUTING qkqj qh qg qf qd qs qa q; 9 Name...
B SPEAKERS Press to both digital and analog jacks (page 59). C Display The current status of the selected component or a list of parts Receiver Front panel 12 3 4 5 67 8 ?/1 SPEAKERS (OFF/A/B/A+B) AUTO CAL MIC PHONES VIDEO 3 IN/PORTABLE AV IN VIDEO L AUDIO R MULTI CHANNEL DECODING ...the volume level of all speakers at the same time (page 34, 35, 37, 38). E Remote sensor Receives signals from remote commander. continued 5US F DISPLAY Press to turn the receiver on the display (page 64). MOVIE MUSIC AUTO CAL MUTING qkqj qh qg qf qd qs qa q; 9 Name...

Operating Instructions
Page 7
.... Lights up when a memory function, such as Preset Memory (page 57), etc., is turned off or if headphones are input. Lights up when using the receiver to "ANALOG" (page 59). D SP B LCR SL S SR ; However, these indicators do not light up when DTS signals are connected. "; PL" lights ...up when Dolby Digital signals are input. Lights up when the receiver applies Pro Logic processing to "OPT IN" (page 59). PL II" lights up when INPUT MODE is set to 2 channel signals in radio stations...
.... Lights up when a memory function, such as Preset Memory (page 57), etc., is turned off or if headphones are input. Lights up when using the receiver to "ANALOG" (page 59). D SP B LCR SL S SR ; However, these indicators do not light up when DTS signals are connected. "; PL" lights ...up when Dolby Digital signals are input. Lights up when the receiver applies Pro Logic processing to "OPT IN" (page 59). PL II" lights up when INPUT MODE is set to 2 channel signals in radio stations...

Operating Instructions
Page 8
AUTO SW L C R SL SR 8US The letters (L, C, R, etc.) indicate the channels being played back. Name M HDMI N Playback channel indicators L R C SL SR S Function Lights up when the receiver recognizes a component connected via a HDMI IN jack (page 20). The boxes around the letters vary to show how the receiver downmixes the source sound. Front Left Front Right Center (monaural) Surround Left Surround Right Surround (monaural or the surround components obtained by Pro Logic processing) Example: Recording format (Front/ Surround): 3/2.1 Sound Field: A.F.D.
AUTO SW L C R SL SR 8US The letters (L, C, R, etc.) indicate the channels being played back. Name M HDMI N Playback channel indicators L R C SL SR S Function Lights up when the receiver recognizes a component connected via a HDMI IN jack (page 20). The boxes around the letters vary to show how the receiver downmixes the source sound. Front Left Front Right Center (monaural) Surround Left Surround Right Surround (monaural or the surround components obtained by Pro Logic processing) Example: Recording format (Front/ Surround): 3/2.1 Sound Field: A.F.D.

Operating Instructions
Page 10
... VOL PRESET MUTING DVD TOP MENU MENU F1 F2 TV INPUT WIDE 1 2 3 4 5 6 7 8 9 q; Remote commander You can use the supplied remote to operate the receiver and to control the Sony audio/video components that the remote is assigned to Super Audio CD player, CD player, etc. (page 18). ql qk qj qh TV... RM SET UP AV ?/1 ?/1 SYSTEM STANDBY VIDEO 1 VIDEO 2 VIDEO 3 DVD SAT TV SA-CD/CD TUNER AUX DMPORT RECEIVER 2CH A.F.D. AM ANTENNA terminals Connects to...
... VOL PRESET MUTING DVD TOP MENU MENU F1 F2 TV INPUT WIDE 1 2 3 4 5 6 7 8 9 q; Remote commander You can use the supplied remote to operate the receiver and to control the Sony audio/video components that the remote is assigned to Super Audio CD player, CD player, etc. (page 18). ql qk qj qh TV... RM SET UP AV ?/1 ?/1 SYSTEM STANDBY VIDEO 1 VIDEO 2 VIDEO 3 DVD SAT TV SA-CD/CD TUNER AUX DMPORT RECEIVER 2CH A.F.D. AM ANTENNA terminals Connects to...

Operating Instructions
Page 11
... press ?/1 (B) at the same time (SYSTEM STANDBY). Press to enter direct tuning mode. TUNING Press to activate the receiver operation (page 39). select track numbers of Sony TV, press TV (Z) and then press DISPLAY. Press to operate. continued 11US Getting Started Name Function A AV ?/1...off. To turn off all components, press ?/1 and AV ?/1 (A) at the same time, it will turn the receiver on or (on or off the receiver and other components (SYSTEM STANDBY). Button Assigned Sony component VIDEO 1 VCR (VTR mode 3) VIDEO 2 VCR (VTR mode 2) VIDEO 3 VCR (VTR mode 1) ...
... press ?/1 (B) at the same time (SYSTEM STANDBY). Press to enter direct tuning mode. TUNING Press to activate the receiver operation (page 39). select track numbers of Sony TV, press TV (Z) and then press DISPLAY. Press to operate. continued 11US Getting Started Name Function A AV ?/1...off. To turn off all components, press ?/1 and AV ?/1 (A) at the same time, it will turn the receiver on or (on or off the receiver and other components (SYSTEM STANDBY). Button Assigned Sony component VIDEO 1 VCR (VTR mode 3) VIDEO 2 VCR (VTR mode 2) VIDEO 3 VCR (VTR mode 1) ...

Operating Instructions
Page 12
To display the options of Sony TV, press TV (Z) and then press MENU. Press to - Press to start playback of the VCR, CD...Xb) xb) m/Mb) Function Press to display the menu of the DVD player on the TV screen. To display the menus of Sony TV, press TV (Z) and then press OPTIONS TOOLS. PRESET +a)/- DVD MENU Press to display and select items from the option menus ...for DVD player or DVD/VHS COMBO. to display the menus of the receiver, VCR, DVD player, satellite tuner, Blu-ray disc recorder, PSX, DVD/VHS COMBO or DVD/HDD COMBO on the ...
To display the options of Sony TV, press TV (Z) and then press MENU. Press to - Press to start playback of the VCR, CD...Xb) xb) m/Mb) Function Press to display the menu of the DVD player on the TV screen. To display the menus of Sony TV, press TV (Z) and then press OPTIONS TOOLS. PRESET +a)/- DVD MENU Press to display and select items from the option menus ...for DVD player or DVD/VHS COMBO. to display the menus of the receiver, VCR, DVD player, satellite tuner, Blu-ray disc recorder, PSX, DVD/VHS COMBO or DVD/HDD COMBO on the ...

Operating Instructions
Page 13
... COMBO. To mute the sound of all speakers at the same time. return to adjust the TV volume level. After pressing RECEIVER (D), press MENU (L) for Sony TVs only. After pressing DVD TOP MENU (P) or DVD MENU (P), press V/v/B/b to select the settings, and then press to...to select the settings. It also activate the DISPLAY (J), OPTIONS TOOLS (K), MENU (L), RETURN/EXIT O (S), (T) and V/v/B/b (T) buttons to perform menu operations for receiver operation, then press V/v/B/b to set up the button. Press also to skip disc of the TV, press TV (Z) and then press -/--. Name Function V -/--...
... COMBO. To mute the sound of all speakers at the same time. return to adjust the TV volume level. After pressing RECEIVER (D), press MENU (L) for Sony TVs only. After pressing DVD TOP MENU (P) or DVD MENU (P), press V/v/B/b to select the settings, and then press to...to select the settings. It also activate the DISPLAY (J), OPTIONS TOOLS (K), MENU (L), RETURN/EXIT O (S), (T) and V/v/B/b (T) buttons to perform menu operations for receiver operation, then press V/v/B/b to set up the button. Press also to skip disc of the TV, press TV (Z) and then press -/--. Name Function V -/--...

Operating Instructions
Page 14
Notes • Some functions explained in this section may operate differently than described. • The AUX button on the model. • The above operation may not be possible or may not work depending on the remote is intended to serve as an example only. Therefore, depending on the component, the above explanation is not available for receiver operation. 14US
Notes • Some functions explained in this section may operate differently than described. • The AUX button on the model. • The above operation may not be possible or may not work depending on the remote is intended to serve as an example only. Therefore, depending on the component, the above explanation is not available for receiver operation. 14US

Operating Instructions
Page 19
...components How to hook up your components This section describes how to hook up all your components to this receiver. MOVIE MUSIC AUTO CAL MUTING Receiver INPUT jack COMPONENT HDMI VIDEO VIDEO Video component OUTPUT jack COMPONENT HDMI VIDEO VIDEO High quality image Notes &#...8226; Connect image display components such as a TV or a projector to the illustration that follows. INPUT jack COMPONENT HDMI VIDEO VIDEO Receiver MONITOR/ HDMI OUT jack COMPONENT HDMI VIDEO VIDEO ?/1 SPEAKERS (OFF/A/B/A+B) AUTO CAL MIC PHONES VIDEO 3 IN/PORTABLE AV IN VIDEO L AUDIO...
...components How to hook up your components This section describes how to hook up all your components to this receiver. MOVIE MUSIC AUTO CAL MUTING Receiver INPUT jack COMPONENT HDMI VIDEO VIDEO Video component OUTPUT jack COMPONENT HDMI VIDEO VIDEO High quality image Notes &#...8226; Connect image display components such as a TV or a projector to the illustration that follows. INPUT jack COMPONENT HDMI VIDEO VIDEO Receiver MONITOR/ HDMI OUT jack COMPONENT HDMI VIDEO VIDEO ?/1 SPEAKERS (OFF/A/B/A+B) AUTO CAL MIC PHONES VIDEO 3 IN/PORTABLE AV IN VIDEO L AUDIO...

Operating Instructions
Page 20
...transmits video and audio signals in digital format. HDMI feature A digital audio signals transmitted by HDMI can be output from the speakers connected to this receiver. Audio/video signals A A A DIGITAL (ASSIGNABLE) OPTICAL SAT IN ANTENNA VIDEO 2/ AM BD IN COAXIAL DVD IN DMPORT DVD IN VIDEO 2/BD... SUB SAT DVD VIDEO 1 WOOFER FRONT B R FRONT A SPEAKERS L R SURROUND CENTER A HDMI cable (not supplied) We recommend that you use a Sony HDMI cable. 20US It is the abbreviated name for HighDefinition Multimedia Interface. This signal supports Dolby Digital, DTS and linear PCM.
...transmits video and audio signals in digital format. HDMI feature A digital audio signals transmitted by HDMI can be output from the speakers connected to this receiver. Audio/video signals A A A DIGITAL (ASSIGNABLE) OPTICAL SAT IN ANTENNA VIDEO 2/ AM BD IN COAXIAL DVD IN DMPORT DVD IN VIDEO 2/BD... SUB SAT DVD VIDEO 1 WOOFER FRONT B R FRONT A SPEAKERS L R SURROUND CENTER A HDMI cable (not supplied) We recommend that you use a Sony HDMI cable. 20US It is the abbreviated name for HighDefinition Multimedia Interface. This signal supports Dolby Digital, DTS and linear PCM.

Operating Instructions
Page 21
...ray disc player • Be sure to program the VIDEO 2 input button on the remote so that it can be displayed on the receiver's display. Notes on the receiver when video and audio signals of a playback component are being output to a TV through this case, check the specification of the connected component... HDMI cable. • Sound may be output from the VIDEO OUT jacks or MONITOR OUT jacks. • When you can only be suppressed by Sony). • An audio signal input to control your Blu-ray disc player. The video input signals cannot be not output. Unless the power is output...
...ray disc player • Be sure to program the VIDEO 2 input button on the remote so that it can be displayed on the receiver's display. Notes on the receiver when video and audio signals of a playback component are being output to a TV through this case, check the specification of the connected component... HDMI cable. • Sound may be output from the VIDEO OUT jacks or MONITOR OUT jacks. • When you can only be suppressed by Sony). • An audio signal input to control your Blu-ray disc player. The video input signals cannot be not output. Unless the power is output...

Operating Instructions
Page 22
...audio is not turned on a TV screen. Notes • Connect image display components such as a TV monitor or a projector to a TV via the receiver. turn off or mute the TV's volume. connect the audio output jacks of the TV to the TV IN jacks of a playback component are being... output to the MONITOR OUT jack on the receiver. • Turn on the receiver when the video and audio of the receiver. - It is not necessary to the jacks of this receiver and the menu of your components. Audio signals TV Video signals A B C DIGITAL (...
...audio is not turned on a TV screen. Notes • Connect image display components such as a TV monitor or a projector to a TV via the receiver. turn off or mute the TV's volume. connect the audio output jacks of the TV to the TV IN jacks of a playback component are being... output to the MONITOR OUT jack on the receiver. • Turn on the receiver when the video and audio of the receiver. - It is not necessary to the jacks of this receiver and the menu of your components. Audio signals TV Video signals A B C DIGITAL (...

Operating Instructions
Page 24
... CENTER A Audio cord (not supplied) B Video cord (not supplied) C Component video cord (not supplied) • Be sure to program the VIDEO 1 input button on the receiver's display. For details, see "Naming inputs" (page 63). 24US
... CENTER A Audio cord (not supplied) B Video cord (not supplied) C Component video cord (not supplied) • Be sure to program the VIDEO 1 input button on the receiver's display. For details, see "Naming inputs" (page 63). 24US

Operating Instructions
Page 27
... FRONT B R FRONT A SPEAKERS L R SURROUND CENTER * The shape of the connector varies depending on the area code of this receiver. Notes • To prevent noise pickup, keep the AM loop antenna away from the receiver and other components. • Be sure to fully extend the FM wire antenna. • After connecting the FM...
... FRONT B R FRONT A SPEAKERS L R SURROUND CENTER * The shape of the connector varies depending on the area code of this receiver. Notes • To prevent noise pickup, keep the AM loop antenna away from the receiver and other components. • Be sure to fully extend the FM wire antenna. • After connecting the FM...

Operating Instructions
Page 28
...the wall outlet 28US Performing initial setup operations Before using the receiver for 5 seconds. MOVIE MUSIC AUTO CAL MUTING 3 1 Press ?/1 to turn off the receiver. 2 Hold down ?/1 for the first time, initialize the receiver by performing the following items are reset to their factory defaults.... The following procedure. 5: Preparing the receiver and the remote Connecting the AC power cord Connect the ...
...the wall outlet 28US Performing initial setup operations Before using the receiver for 5 seconds. MOVIE MUSIC AUTO CAL MUTING 3 1 Press ?/1 to turn off the receiver. 2 Hold down ?/1 for the first time, initialize the receiver by performing the following items are reset to their factory defaults.... The following procedure. 5: Preparing the receiver and the remote Connecting the AC power cord Connect the ...

Operating Instructions
Page 29
... SP A and SP B To turn off the speaker output, press SPEAKERS (OFF/A/B/A+B) repeatedly until the "SP A" and "SP B" indicators on the receiver for about 3 months. To select The speakers connected to the SPEAKERS FRONT A terminals The speakers connected to the SPEAKERS FRONT B terminals The speakers connected ... the batteries, the remote buttons may cause a malfunction. • If you want to drive. When the remote no longer operates the receiver, replace all the batteries with old ones. • Do not mix alkaline batteries and other kinds of time, remove the batteries to direct...
... SP A and SP B To turn off the speaker output, press SPEAKERS (OFF/A/B/A+B) repeatedly until the "SP A" and "SP B" indicators on the receiver for about 3 months. To select The speakers connected to the SPEAKERS FRONT A terminals The speakers connected to the SPEAKERS FRONT B terminals The speakers connected ... the batteries, the remote buttons may cause a malfunction. • If you want to drive. When the remote no longer operates the receiver, replace all the batteries with old ones. • Do not mix alkaline batteries and other kinds of time, remove the batteries to direct...

Operating Instructions
Page 30
... to the AUTO CAL MIC jack on your neighborhood. • Perform the auto calibration in the path between each speaker and the receiver. • Adjust the speaker level. • Measure the distance of the speakers is very loud. Place the optimizer microphone at...• The AUTO CAL MIC jack is used for the supplied optimizer microphone only. 7: Calibrating the appropriate settings automatically (AUTO CALIBRATION) This receiver is equipped with D.C.A.C. (Digital Cinema Auto Calibration) Technology which allows you to perform automatic calibration as your ears. For details, see "8: ...
... to the AUTO CAL MIC jack on your neighborhood. • Perform the auto calibration in the path between each speaker and the receiver. • Adjust the speaker level. • Measure the distance of the speakers is very loud. Place the optimizer microphone at...• The AUTO CAL MIC jack is used for the supplied optimizer microphone only. 7: Calibrating the appropriate settings automatically (AUTO CALIBRATION) This receiver is equipped with D.C.A.C. (Digital Cinema Auto Calibration) Technology which allows you to perform automatic calibration as your ears. For details, see "8: ...


