
Instruction Manual
Page 3
...'s recommended cleaning and maintenance instructions; SMEG BUILT-IN ELECTRIC COOKTOP WARRANTY FULL ONE-YEAR WARRANTY For one year warranty, SMEG will provide, free of charge, all labor and in following the manufacturer's installation instructions, as well as any local code or regulation. 5) Damages due to failure in -home service to repair or replace the defective part. This warranty is valid only in the United States of America and Canada and apply...
...'s recommended cleaning and maintenance instructions; SMEG BUILT-IN ELECTRIC COOKTOP WARRANTY FULL ONE-YEAR WARRANTY For one year warranty, SMEG will provide, free of charge, all labor and in following the manufacturer's installation instructions, as well as any local code or regulation. 5) Damages due to failure in -home service to repair or replace the defective part. This warranty is valid only in the United States of America and Canada and apply...
Instruction Manual
Page 4
... only ones which vary from state to locations more than the intended purpose or if used commercially/industrially. 9) Incorrect electric current, voltage or power supply. 10) Improper setting of any control. 11) Replacement of house fuses or resetting of circuit breakers. 12) Wear and tear 13) Any substance, accumulating in any other rights which SMEG will not be responsible for travel and...
... only ones which vary from state to locations more than the intended purpose or if used commercially/industrially. 9) Incorrect electric current, voltage or power supply. 10) Improper setting of any control. 11) Replacement of house fuses or resetting of circuit breakers. 12) Wear and tear 13) Any substance, accumulating in any other rights which SMEG will not be responsible for travel and...

Instruction Manual 1
Page 2
... the model/serial ID plate. Doing so may result in a safe place and pass them on to any future user. WARNING: For your responsibility. Important Safety Instructions WARNING • This appliance is NOT designed for installation in manufactured (mobile) homes or in recreational vehicles (RVs). Improper use of this manual must never be removed. • Proper installation is your...
... the model/serial ID plate. Doing so may result in a safe place and pass them on to any future user. WARNING: For your responsibility. Important Safety Instructions WARNING • This appliance is NOT designed for installation in manufactured (mobile) homes or in recreational vehicles (RVs). Improper use of this manual must never be removed. • Proper installation is your...
Instruction Manual 1
Page 4
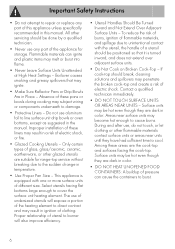
... so that may ignite. • Make Sure Reflector Pans or Drip Bowls Are in the manual. Important Safety Instructions • Do not attempt to repair or replace any part of pressure can ignite and plastic items may melt or burst into flame. • Never Leave Surface Units Unattended at High Heat Settings - Flammable materials can cause the containers to burst. 6 Improper installation of these areas...
... so that may ignite. • Make Sure Reflector Pans or Drip Bowls Are in the manual. Important Safety Instructions • Do not attempt to repair or replace any part of pressure can ignite and plastic items may melt or burst into flame. • Never Leave Surface Units Unattended at High Heat Settings - Flammable materials can cause the containers to burst. 6 Improper installation of these areas...
Instruction Manual 1
Page 5
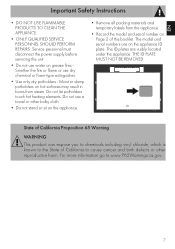
... on the appliance. • Remove all packing materials and temporary labels from steam. EN Important Safety Instructions • DO NOT USE FLAMMABLE PRODUCTS TO CLEAN THE APPLIANCE. • ONLY QUALIFIED SERVICE PERSONNEL SHOULD PERFORM REPAIRS. Moist or damp potholders on hot surfaces may result in burns from the appliance. • Record the model and serial number on Page 2 of California to...
... on the appliance. • Remove all packing materials and temporary labels from steam. EN Important Safety Instructions • DO NOT USE FLAMMABLE PRODUCTS TO CLEAN THE APPLIANCE. • ONLY QUALIFIED SERVICE PERSONNEL SHOULD PERFORM REPAIRS. Moist or damp potholders on hot surfaces may result in burns from the appliance. • Record the model and serial number on Page 2 of California to...

Instruction Manual 1
Page 7
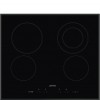
... delimited within the smallest circle or on the glass. The cooking zones are the HIGH-LIGHT type meaning they turn on after a few seconds and the heat is adjustable using the controls on the model. EN Description 1 Description 1.1 General Description The appliance has cooking zones of different diameters and powers depending on the front panel. The location and the heat of the circles etched on both circles...
... delimited within the smallest circle or on the glass. The cooking zones are the HIGH-LIGHT type meaning they turn on after a few seconds and the heat is adjustable using the controls on the model. EN Description 1 Description 1.1 General Description The appliance has cooking zones of different diameters and powers depending on the front panel. The location and the heat of the circles etched on both circles...

Instruction Manual 1
Page 10
... control lock in the presence of children or pets able to surfaces • Do not use the cooktop if an oven installed underneath is undergoing the self-cleaning process. • Use only pans with perfectly flat and smooth bases on the cooktop. • Avoid letting heavy objects fall on the cooktop surface. • In the case of cracks or fractures, switch off the appliance, disconnect the power...
... control lock in the presence of children or pets able to surfaces • Do not use the cooktop if an oven installed underneath is undergoing the self-cleaning process. • Use only pans with perfectly flat and smooth bases on the cooktop. • Avoid letting heavy objects fall on the cooktop surface. • In the case of cracks or fractures, switch off the appliance, disconnect the power...
Instruction Manual 1
Page 11
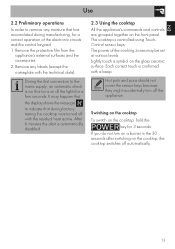
... heat active. Remove any moisture that turns on all the lights for a few seconds. The power of the electronic circuits and the control keypad: 1. EN Use 2.2 Preliminary operations In order to remove any labels (except the nameplate with a beep. Hot pots and pans should not cover the sensor keys because they might accidentally turn on a burner in the 30 seconds after switching on the front panel...
... heat active. Remove any moisture that turns on all the lights for a few seconds. The power of the electronic circuits and the control keypad: 1. EN Use 2.2 Preliminary operations In order to remove any labels (except the nameplate with a beep. Hot pots and pans should not cover the sensor keys because they might accidentally turn on a burner in the 30 seconds after switching on the front panel...

Instruction Manual 1
Page 15
... you must reset its value using the Minus key. If the temperature of the electronic board does not decrease, the device cuts power to indicate you can resume. The display shows the message to all cooking zones (if turned on) and the display shows the error . To stop the beeping, press the key. 4. EN Use Timer (on some models). When...
... you must reset its value using the Minus key. If the temperature of the electronic board does not decrease, the device cuts power to indicate you can resume. The display shows the message to all cooking zones (if turned on) and the display shows the error . To stop the beeping, press the key. 4. EN Use Timer (on some models). When...

Instruction Manual 1
Page 16
... heating elements and keeps the control panel active (useful for one minute after powering the cooktop, press and hold the Plus and Minus keys of the or values. To use the cooktop at maximum power, you must be set this mode, the cooktop's electronics automatically adjust the power level in use the cooktop normally, you to . The cooking zone display shows the number of the setting currently being edited (1 = Automatic control lock...
... heating elements and keeps the control panel active (useful for one minute after powering the cooktop, press and hold the Plus and Minus keys of the or values. To use the cooktop at maximum power, you must be set this mode, the cooktop's electronics automatically adjust the power level in use the cooktop normally, you to . The cooking zone display shows the number of the setting currently being edited (1 = Automatic control lock...

Instruction Manual 1
Page 19
... melt (plastic or aluminum foil) on the surface during cooking. • Always keep the cooktop clean and do not place any objects on the sensor keys. • Do not use cleaning products containing chlorine, ammonia or bleach on the steel parts or those with a clean cloth. and dirt-repellent protective film. Make sure no grains of pans with aluminum bases can change its structure...
... melt (plastic or aluminum foil) on the surface during cooking. • Always keep the cooktop clean and do not place any objects on the sensor keys. • Do not use cleaning products containing chlorine, ammonia or bleach on the steel parts or those with a clean cloth. and dirt-repellent protective film. Make sure no grains of pans with aluminum bases can change its structure...

Instruction Manual 1
Page 20
.... Contact Customer Service. The display shows the message "E2": • Check that no power outages. • Check that the keys are unsatisfactory: • Check if the cooking temperature is a technical defect. The fuses or the thermal-magnetic circuit breaker of the glass. Using aggressive detergents or sliding the base of pans on the surface can form due to remove using common cleaning products. The cooktop smokes: •...
.... Contact Customer Service. The display shows the message "E2": • Check that no power outages. • Check that the keys are unsatisfactory: • Check if the cooking temperature is a technical defect. The fuses or the thermal-magnetic circuit breaker of the glass. Using aggressive detergents or sliding the base of pans on the surface can form due to remove using common cleaning products. The cooktop smokes: •...
Instruction Manual 2
Page 2
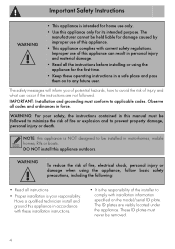
... located under the appliance. Observe all instructions • Proper installation is your safety, the instructions contained in this manual must be installed in force. WARNING: For your responsibility. WARNING To reduce the risk of fire, electrical shock, personal injury or damage when using the appliance for its intended purpose. These ID plates must conform to applicable codes. Important Safety Instructions...
... located under the appliance. Observe all instructions • Proper installation is your safety, the instructions contained in this manual must be installed in force. WARNING: For your responsibility. WARNING To reduce the risk of fire, electrical shock, personal injury or damage when using the appliance for its intended purpose. These ID plates must conform to applicable codes. Important Safety Instructions...

Instruction Manual 2
Page 3
... the Customer Service Center. DO NOT attempt to read the user manual This user manual uses the following reading conventions: Installation Information for heat exhaust. • Test the appliance immediately after installation, following the instructions in this or any other appliance. or latest edition - For example, do not remove adjustable legs, panels, wiring or anti-tip brackets/screws. EN Important Safety Instructions • ELECTRICAL GROUNDING REQUIRED: See the "Electrical Requirements" section...
... the Customer Service Center. DO NOT attempt to read the user manual This user manual uses the following reading conventions: Installation Information for heat exhaust. • Test the appliance immediately after installation, following the instructions in this or any other appliance. or latest edition - For example, do not remove adjustable legs, panels, wiring or anti-tip brackets/screws. EN Important Safety Instructions • ELECTRICAL GROUNDING REQUIRED: See the "Electrical Requirements" section...

Instruction Manual 2
Page 4
... provisions of the electrical system safety regulations. It is connected to the information indicated on the model/serial rating plate. or the CANADIAN ELECTRICAL CODE, C22.11 - 1982 and C22.2 No. 01982 - In case of the installer to or greater than 3mm, located in force. A multi-pole circuit breaker must be available on the model/serial ID plate. If this appliance. See the "Electrical requirements" section. Grounding...
... provisions of the electrical system safety regulations. It is connected to the information indicated on the model/serial rating plate. or the CANADIAN ELECTRICAL CODE, C22.11 - 1982 and C22.2 No. 01982 - In case of the installer to or greater than 3mm, located in force. A multi-pole circuit breaker must be available on the model/serial ID plate. If this appliance. See the "Electrical requirements" section. Grounding...

Instruction Manual 2
Page 5
.... • Copies of the standards listed above may be removed. • If codes permit and a separate ground wire is used, it does not fit in the outlet, have a proper outlet installed by connecting the grounding lead to the requirements of the National Electrical Code, ANSI/NFPA 70 ELECTRICAL CODE (*) - If it is recommended that the power line rating matches the specifications indicated on the ID plate. IMPORTANT...
.... • Copies of the standards listed above may be removed. • If codes permit and a separate ground wire is used, it does not fit in the outlet, have a proper outlet installed by connecting the grounding lead to the requirements of the National Electrical Code, ANSI/NFPA 70 ELECTRICAL CODE (*) - If it is recommended that the power line rating matches the specifications indicated on the ID plate. IMPORTANT...

Instruction Manual 2
Page 6
IMPORTANT: Any local codes or ordinances should be given priority over these instructions. Connect the neutral wire to the branch circuit's neutral conductor in the usual manner: • Disconnect the ground from the neutral at the free end of the cabinet. • Remove the junction box cover, if present. • Install a UL-listed or CSA-approved conduit connector to the junction box. • Route...
IMPORTANT: Any local codes or ordinances should be given priority over these instructions. Connect the neutral wire to the branch circuit's neutral conductor in the usual manner: • Disconnect the ground from the neutral at the free end of the cabinet. • Remove the junction box cover, if present. • Install a UL-listed or CSA-approved conduit connector to the junction box. • Route...

Instruction Manual 2
Page 7
... wire, or, if the connection is made to the diagrams shown in compliance with installation regulations. Installation only / 3-wire branch circuit See diagram. A cable from power supply B junction box C cable from appliance D UL/CSA-listed conduit connector NOTE: Both leads coming out of the ground wire from the appliance to the power supply cable's neutral wire (white wire): • The ground wire must be connected according to aluminum house wiring, use UL-listed...
... wire, or, if the connection is made to the diagrams shown in compliance with installation regulations. Installation only / 3-wire branch circuit See diagram. A cable from power supply B junction box C cable from appliance D UL/CSA-listed conduit connector NOTE: Both leads coming out of the ground wire from the appliance to the power supply cable's neutral wire (white wire): • The ground wire must be connected according to aluminum house wiring, use UL-listed...

Instruction Manual 2
Page 8
... Electrical shock hazard • To eliminate the risk of burns or fire by installing a range hood that projects horizontally a minimum of 5 inches beyond the bottom of the indicated dimensions....heat resistant (>90°C - 194°F). For proper installation, refer to be provided, the risk can be reduced by reaching over heated surface units, cabinet storage space located above the surface units should never be carried out by a competent technician. Installation 1.4 Cutting out the countertop The following operation requires building and/or carpentry work which must be removed...
... Electrical shock hazard • To eliminate the risk of burns or fire by installing a range hood that projects horizontally a minimum of 5 inches beyond the bottom of the indicated dimensions....heat resistant (>90°C - 194°F). For proper installation, refer to be provided, the risk can be reduced by reaching over heated surface units, cabinet storage space located above the surface units should never be carried out by a competent technician. Installation 1.4 Cutting out the countertop The following operation requires building and/or carpentry work which must be removed...

Instruction Manual 2
Page 10
... double-layer, wooden base exposes the user to prevent accidental contact. If installed above an oven, space must be removed using only the appropriate tools. Installation 1.5 Recess Over an undercounter, built-in oven The distance between the bottom of the cooktop and the part of the product installed underneath. On a hollow compartment or drawer If there are other furniture parts (side panels, drawers, etc...
... double-layer, wooden base exposes the user to prevent accidental contact. If installed above an oven, space must be removed using only the appropriate tools. Installation 1.5 Recess Over an undercounter, built-in oven The distance between the bottom of the cooktop and the part of the product installed underneath. On a hollow compartment or drawer If there are other furniture parts (side panels, drawers, etc...