Smeg LSPU8212S Support and Manuals
Get Help and Manuals for this Smeg item

View All Support Options Below
Free Smeg LSPU8212S manuals!
Problems with Smeg LSPU8212S?
Ask a Question
Free Smeg LSPU8212S manuals!
Problems with Smeg LSPU8212S?
Ask a Question
Popular Smeg LSPU8212S Manual Pages
Installation manual - Page 1

... to the water supply 14
5.2.1.1 Connection to the water tap 14
5.2.1.2 Connection to the drain hose 16
5.2.2 Electrical connections and warnings 22
5.3 Commissioning 23
5.3.1 Installation procedure (all models 23
5.3.2 Door panel assembly procedure (fully integrated 25
5.3.3 Door panel assembly procedure (integrated 27
5.3.4 Door screwing procedure 29
5.3.5 Completion of...
Installation manual - Page 3

...INSTALLATION INSTRUCTIONS: for choosing one of our products. DANGER OF ELECTROCUTION.
This manual comprises the following sections: INTRODUCTON: general information about installation of the dishwasher.
Simbols used in this manual...a step-by-step guide to installation of the appliance. To install this dishwasher correctly and safely, please read this manual
DANGER.
This symbol ...
Installation manual - Page 4
...SHALL BE CONSIDERED IMPROPER. INSTALLATION, REPAIRS AND SERVICING MUST BE PERFORMED BY QUALIFIED AND AUTHORIZED TECHNCIANS. LATEST EDITION/PROVINCIAL AND MUNICIPAL CODES AND/OR LOCAL CODES.
THE NAME PLATE FEATURING...WARNINGS
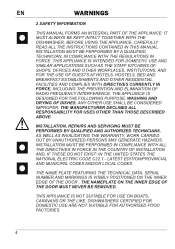
2 SAFETY INFORMATION
THIS MANUAL FORMS AN INTEGRAL PART OF THE APPLIANCE: IT MUST ALWAYS BE KEPT INTACT TOGETHER WITH THE DISHWASHER. INSTALLATION MUST BE PERFORMED IN ...
Installation manual - Page 6

...A SINGLE COMPONENT OF THE APPLIANCE, OR FROM THE USE OF UNORIGINAL SPARE PARTS. DO NOT USE EXTENSION CORDS, ADAPTORS OR SHUNT CONNECTIONS IN ORDER TO...REPAIR THE APPLIANCE. IF THE DISHWASHER FAILS TO OPERATE CORRECTLY, DISCONNECT IT FROM THE ELECTRICAL POWER SUPPLY AND CALL THE NEAREST TECHNICAL SERVICE CENTRE. IMMEDIATELY AFTER INSTALLATION, BRIEFLY TEST THE APPLIANCE FOLLOWING THE INSTRUCTIONS...
Installation manual - Page 8

... for door panel (ref. H fig.2). • 2 adjustment feet (only for some models) (ref. I fig.2); Ÿ 2 nuts (only for some models) (ref. C fig. 2); • 2 hooks for securing the door panel hooks ...fig.2); • 2 screw caps (ref. EN
INSTALLATION INSTRUCTION
3.1 Kit supplied with dishwasher (fully integrated)
The kit supplied with other materials.
8
Installation manual - Page 12

... (ref. Fig. 5
Fig. 6 12 B fig. 6).Leveling is perfectly level (ref. C fig. 6).
Some models are fitted with just one rear foot which can be adjusted with a screw located at least 3 mm (7/64") ... rotate the feet until the dishwasher is perfectly level. EN
INSTALLATION INSTRUCTION
5.1 Leveling
Level the appliance using the relative adjustable feet (e.g.: ref.
Installation manual - Page 13

... allow ease of at least 8 cm (5/32") is installed in the required direction.
Fig.7
Fig.8 13 INSTALLATION INSTRUCTION
EN
5.2 Connections
Install the dishwasher so as these do not guarantee safety. Figure... TAKE GREAT CARE IN ORDER TO REDUCE THE POSSIBILITY OF DAMAGING THE POWER CORD WHEN INSTALLING OR REMOVING THE APPLIANCE. A fig. 8). FIRE HAZARD! The inlet and drain hoses...
Installation manual - Page 14

..., but effi ciency will be slightly impaired. For models fi tted with your sink is too high, fi t a pressure reducer. Recommended temperature: 49°C (120°F), max. 60°C (140°F). If your hands (ref. EN
INSTALLATION INSTRUCTION
5.2.1 Connecting to a sink spray may burst if installed on the same pipes feeding the dishwasher. The...
Installation manual - Page 15

... breakages that the hose is cut the inlet hose (see fig. 10). If the hose is too long, wind it up tidily and place it . INSTALLATION INSTRUCTION
EN
Do not cut , the dishwasher will not work, water will leak and you may be injured.
The cable harness and electrical components must not...
Installation manual - Page 16

... must lie at a maximum height of 4 cm (1-37/64") (ref. EN
INSTALLATION INSTRUCTION
5.2.1.2 Connecting to a drain hose
Insert the relative hose into a drain with a minimum diameter of 85 cm (3-11/32") above the floor. B fig. 11) using the supplied hose support (see fig.12) and must never be used , position the drain...
Installation manual - Page 22

.... FIT THE PLUG INTO A SUITABLE SOCKET, INSTALLED AND GROUNDED IN COMPLIANCE WITH THE LAWS IN FORCE IN THE COUNTRY OF INSTALLATION.
EN
INSTALLATION INSTRUCTION
5.2.2 Electrical connections and warnings
CHECK THAT THE ...TO THE SUPPLY CORD, HAVE IT REPLACED BY THE MANUFACTURER OR AN AUTHORIZED TECHNICAL SERVICE CENTRE. BEFORE MAKING ELECTRICAL CONNECTIONS, DISCONNECT THE MAINS POWER SUPPLY ...
Installation manual - Page 23

... BURNING, WITH CONSEQUENT FIRE HAZARD. IN THE EVENT OF DAMAGE TO THE SUPPLY CORD, HAVE IT REPLACED BY THE MANUFACTURER OR AN AUTHORIZED TECHNICAL SERVICE CENTRE IN ORDER TO AVOID ANY RISK.
5.3
Commissioning
5.3.1 Installation procedure (all models)
Clean the underneath of the washing cycle. This guard protects the worktop from steam and condensation when...
Installation manual - Page 30

... door from opening, mark out the section to remove (see Fig. 34-35), take out the base plate and cut it from opening fully. EN
INSTALLATION INSTRUCTION
5.3.5 Completion of installation (if necessary, for all models)
Make sure the dishwasher door, complete with panel, opens confortably and that the base plate (ref.
Installation manual - Page 32

...Fig.40 32 Type A (the shape of the dishwasher; A Fig.40) . EN
INSTALLATION INSTRUCTION
5.4 Apply the gaskets - the hole in the long side must match the hole in...the gasket to the dishwasher, inserting it in the dishwasher (see ref. Remove the adhesive band on the model)
Before securing the dishwasher to the adjacent units, attach the gaskets to the dishwasher. Make sure the gasket adheres perfectly...
Installation manual - Page 34

...is attached to the outside of the gaskets depends on the gasket (see ref. A Fig.44) . EN
INSTALLATION INSTRUCTION
5.5 Apply the gaskets - Make sure the gasket adheres perfectly to the dishwasher, inserting it in the dishwasher (see... dishwasher.
4 4
34
Fig.44 Remove the adhesive band on the model)
Before securing the dishwasher to the adjacent units, attach the gaskets to the sides.
Smeg LSPU8212S Reviews
We have not received any reviews for Smeg yet.