Instruction Manual
Page 3
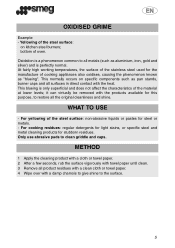
... is a phenomenon common to clean griddle and caps. At fairly high working temperatures, the surface of the material at lower levels; This normally occurs on kitchen steel burners; Only use abrasive pads to all surfaces in direct contact with a damp chamois to give shine to the surface. 5 For cooking residues: regular detergents for light stains, or specific steel and metal cleaning products for the manufacture of...
... is a phenomenon common to clean griddle and caps. At fairly high working temperatures, the surface of the material at lower levels; This normally occurs on kitchen steel burners; Only use abrasive pads to all surfaces in direct contact with a damp chamois to give shine to the surface. 5 For cooking residues: regular detergents for light stains, or specific steel and metal cleaning products for the manufacture of...
Instruction Manual
Page 4
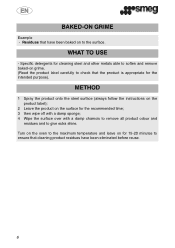
... the product onto the steel surface (always follow the instructions on the product label); 2 Leave the product on the surface for cleaning steel and other metals able to soften and remove baked-on grime. (Read the product label carefully to give extra shine. WHAT TO USE - BAKED-ON GRIME Example - Turn on the oven to the maximum temperature and leave on to...
... the product onto the steel surface (always follow the instructions on the product label); 2 Leave the product on the surface for cleaning steel and other metals able to soften and remove baked-on grime. (Read the product label carefully to give extra shine. WHAT TO USE - BAKED-ON GRIME Example - Turn on the oven to the maximum temperature and leave on to...

Owners Manual
Page 1
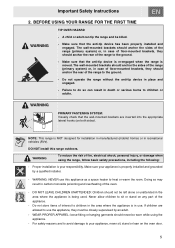
.... • Do not touch any electrical switches. • Do not use gasoline or other appliance. Follow the gas supplier's instructions. • If you cannot reach your gas supplier from a neighbor's phone. Table of the appliance. 3 IMPORTANT SAFETY INSTRUCTIONS 4 2. Important Safety Instructions 1. BEFORE USING YOUR RANGE FOR THE FIRST TIME 5 3. Installation and service must be performed by a qualified installer, service agency or gas supplier. DESCRIPTION OF THE RANGE CONTROLS 9 4.
.... • Do not touch any electrical switches. • Do not use gasoline or other appliance. Follow the gas supplier's instructions. • If you cannot reach your gas supplier from a neighbor's phone. Table of the appliance. 3 IMPORTANT SAFETY INSTRUCTIONS 4 2. Important Safety Instructions 1. BEFORE USING YOUR RANGE FOR THE FIRST TIME 5 3. Installation and service must be performed by a qualified installer, service agency or gas supplier. DESCRIPTION OF THE RANGE CONTROLS 9 4.

Owners Manual
Page 2
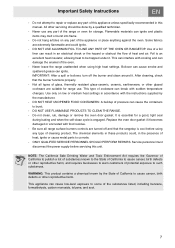
... range. - DANGER denotes the most serious hazards. This appliance complies with the safety alert symbol. Refer to LP/Propane gas, see the instructions in the Gas Conversion Kit provided in a safe place and pass them on installing the appliance. This symbol alerts you could result in the home only. - DANGER, WARNING, or CAUTION - To convert the appliance to the Installation Manual...
... range. - DANGER denotes the most serious hazards. This appliance complies with the safety alert symbol. Refer to LP/Propane gas, see the instructions in the Gas Conversion Kit provided in a safe place and pass them on installing the appliance. This symbol alerts you could result in the home only. - DANGER, WARNING, or CAUTION - To convert the appliance to the Installation Manual...
Owners Manual
Page 3
... in case of floor-mounted brackets, they should never be closely supervised by a qualified installer. - Do not store items of fire, electrical shock, personal injury, or damage when using the appliance. - Do not operate the range without the anti-tip device in case of floor-mounted brackets, they should not be killed. Important Safety Instructions 2. Failure to children in recreational...
... in case of floor-mounted brackets, they should never be closely supervised by a qualified installer. - Do not store items of fire, electrical shock, personal injury, or damage when using the appliance. - Do not operate the range without the anti-tip device in case of floor-mounted brackets, they should not be killed. Important Safety Instructions 2. Failure to children in recreational...
Owners Manual
Page 4
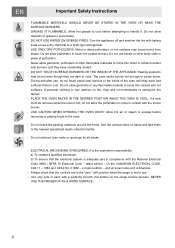
... baking soda or use towels or other flammable materials to handle it. During and after use . - USE CAUTION WHEN OPENING THE OVEN DOOR: Allow hot air or steam to escape before attempting to come into direct or indirect contact with the National Electrical Code ANSI / NFPA 70 Electrical Code - FLAMMABLE MATERIALS SHOULD NEVER BE STORED IN THE OVEN OR NEAR THE SURFACE BURNERS. - DO NOT USE WATER ON GREASE FIRES: Turn...
... baking soda or use towels or other flammable materials to handle it. During and after use . - USE CAUTION WHEN OPENING THE OVEN DOOR: Allow hot air or steam to escape before attempting to come into direct or indirect contact with the National Electrical Code ANSI / NFPA 70 Electrical Code - FLAMMABLE MATERIALS SHOULD NEVER BE STORED IN THE OVEN OR NEAR THE SURFACE BURNERS. - DO NOT USE WATER ON GREASE FIRES: Turn...
Owners Manual
Page 5
... before servicing this manual. IMPORTANT: After a spill or boilover, turn off and that the burner functions properly. - Service personnel must disconnect the power supply before using high heat settings. Use of the range or oven for storage. Do not clean, rub, damage or remove the oven door gasket. Do not attempt to repair or replace any part of a foil liner can interfere with sudden temperature changes. ONLY QUALIFIED SERVICE PERSONNEL SHOULD PERFORM REPAIRS. Replace the oven door gasket...
... before servicing this manual. IMPORTANT: After a spill or boilover, turn off and that the burner functions properly. - Service personnel must disconnect the power supply before using high heat settings. Use of the range or oven for storage. Do not clean, rub, damage or remove the oven door gasket. Do not attempt to repair or replace any part of a foil liner can interfere with sudden temperature changes. ONLY QUALIFIED SERVICE PERSONNEL SHOULD PERFORM REPAIRS. Replace the oven door gasket...
Owners Manual
Page 6
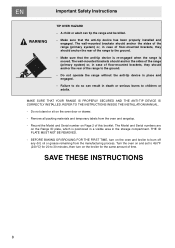
.... The Model and Serial numbers are on the oven door or drawer. - Do not operate the range without the anti-tip device in case of floor-mounted brackets, they should anchor the rear of the range to burn off any dirt, oil or grease remaining from the oven and rangetop. - BEFORE BAKING OR BROILING FOR THE FIRST TIME, turn on Page 2 of time. THE ID PLATE MUST NOT BE REMOVED...
.... The Model and Serial numbers are on the oven door or drawer. - Do not operate the range without the anti-tip device in case of floor-mounted brackets, they should anchor the rear of the range to burn off any dirt, oil or grease remaining from the oven and rangetop. - BEFORE BAKING OR BROILING FOR THE FIRST TIME, turn on Page 2 of time. THE ID PLATE MUST NOT BE REMOVED...
Owners Manual
Page 7
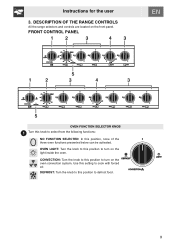
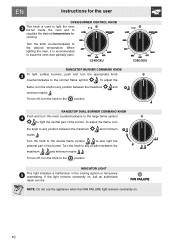
Instructions for the user 3. CONVECTION: Turn the knob to this setting to cook with forced air. Use this position to defrost food. 9 FRONT CONTROL PANEL OVEN FUNCTION SELECTOR KNOB Turn this knob to select from the following functions: NO FUNCTION SELECTED: In this position to turn on the light inside the oven. DEFROST: Turn the knob to turn on the front panel. DESCRIPTION OF THE RANGE CONTROLS All the range selectors and controls are located on the oven convection system. OVEN LIGHT: Turn the knob to this...
Instructions for the user 3. CONVECTION: Turn the knob to this setting to cook with forced air. Use this position to defrost food. 9 FRONT CONTROL PANEL OVEN FUNCTION SELECTOR KNOB Turn this knob to select from the following functions: NO FUNCTION SELECTED: In this position to turn on the light inside the oven. DEFROST: Turn the knob to turn on the front panel. DESCRIPTION OF THE RANGE CONTROLS All the range selectors and controls are located on the oven convection system. OVEN LIGHT: Turn the knob to this...
Owners Manual
Page 8
... to regulate the desired temperature for cooking. Instructions for the user OVEN BURNER CONTROL KNOB This knob is recommended to leave the oven door partially open. To adjust the flame, turn this knob counterclockwise to the large flame symbol to any position between the maximum and minimum marks . Turn the knob to light the central part of the burner. To turn off , turn the knob to the position. NOTE: Do not use the appliance when the FAN FAILURE light...
... to regulate the desired temperature for cooking. Instructions for the user OVEN BURNER CONTROL KNOB This knob is recommended to leave the oven door partially open. To adjust the flame, turn this knob counterclockwise to the large flame symbol to any position between the maximum and minimum marks . Turn the knob to light the central part of the burner. To turn off , turn the knob to the position. NOTE: Do not use the appliance when the FAN FAILURE light...

Owners Manual
Page 9
... or food requiring light broiling. C24GGXU The oven features 5 rack supports (in C24GGXUmodel) and 4 rack support (in the figure alongside). The mechanical lock (or raised rack, where present) must always face the back of the oven when the tray is facing downwards (as shown in C36GGXU model) for the first time. To insert the rack or tray correctly, check that required by the current regulations. 4.1 Using the rack or tray...
... or food requiring light broiling. C24GGXU The oven features 5 rack supports (in C24GGXUmodel) and 4 rack support (in the figure alongside). The mechanical lock (or raised rack, where present) must always face the back of the oven when the tray is facing downwards (as shown in C36GGXU model) for the first time. To insert the rack or tray correctly, check that required by the current regulations. 4.1 Using the rack or tray...
Owners Manual
Page 10
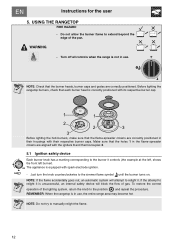
... the knob to manually relight the flame. 12 NOTE: Do not try to the position and repeat the procedure. WARNING - Before lighting the hob burners, make sure that each burner head is in use , the entire range area may become hot. Instructions for the user 5. To restore the correct operation of the pan. USING THE RANGETOP FIRE HAZARD - Just turn the knob counterclockwise to relight it controls...
... the knob to manually relight the flame. 12 NOTE: Do not try to the position and repeat the procedure. WARNING - Before lighting the hob burners, make sure that each burner head is in use , the entire range area may become hot. Instructions for the user 5. To restore the correct operation of the pan. USING THE RANGETOP FIRE HAZARD - Just turn the knob counterclockwise to relight it controls...
Owners Manual
Page 11
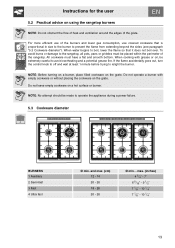
.... (inches) 4 3/4" - 7" 6 5/16" - 9 1/2" 7 1/8" - 10 1/4" 7 7/8" - 10 1/4" 13 To avoid burns or damage to prevent the flame from extending beyond the sides (see paragraph "5.3 Cookware diameter"). Do not operate a burner with grease or oil, be made to operate the appliance during a power failure. 5.3 Cookware diameter BURNERS 1 Auxiliary 2 Semi-fast 3 Fast 4 Ultra fast Ø min. If the flame accidentally goes out, turn the control knob...
.... (inches) 4 3/4" - 7" 6 5/16" - 9 1/2" 7 1/8" - 10 1/4" 7 7/8" - 10 1/4" 13 To avoid burns or damage to prevent the flame from extending beyond the sides (see paragraph "5.3 Cookware diameter"). Do not operate a burner with grease or oil, be made to operate the appliance during a power failure. 5.3 Cookware diameter BURNERS 1 Auxiliary 2 Semi-fast 3 Fast 4 Ultra fast Ø min. If the flame accidentally goes out, turn the control knob...
Owners Manual
Page 13
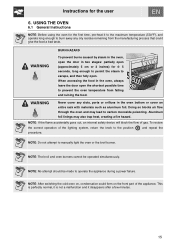
...: After switching the cold oven on the front part of the appliance. To restore the correct operation of gas. NOTE: The broil and oven burners cannot be made to carbon monoxide poisoning. Instructions for the first time, pre-heat it disappears after a few minutes. 15 and repeat the NOTE: Do not attempt to escape, and then fully open (approximately 5 cm or 2 inches) for...
...: After switching the cold oven on the front part of the appliance. To restore the correct operation of gas. NOTE: The broil and oven burners cannot be made to carbon monoxide poisoning. Instructions for the first time, pre-heat it disappears after a few minutes. 15 and repeat the NOTE: Do not attempt to escape, and then fully open (approximately 5 cm or 2 inches) for...
Owners Manual
Page 14
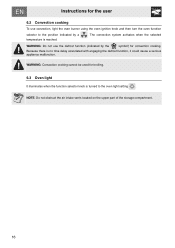
... malfunction. The convection system activates when the selected WARNING: Do not use convection, light the oven burner using the oven ignition knob and then turn the oven function selector to the oven light setting . Because there is turned to the position indicated by the symbol) for convection cooking. NOTE: Do not obstruct the air intake vents located on the upper part of the storage compartment. 16 Instructions for the user 6.2 Convection cooking To use the defrost function (indicated by a temperature is reached...
... malfunction. The convection system activates when the selected WARNING: Do not use convection, light the oven burner using the oven ignition knob and then turn the oven function selector to the oven light setting . Because there is turned to the position indicated by the symbol) for convection cooking. NOTE: Do not obstruct the air intake vents located on the upper part of the storage compartment. 16 Instructions for the user 6.2 Convection cooking To use the defrost function (indicated by a temperature is reached...
Owners Manual
Page 15
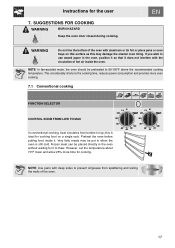
... oven trays on a single rack. Frozen meat can be preheated to use waxed paper in when the oven is ideal for the user 7. However, set the temperature about 70°F lower and allow 25% more even cooking. 7.1 Conventional cooking FUNCTION SELECTOR CONTROL KNOB FROM LOW TO MAX In conventional cooking, heat circulates from bottom to prevent oil/grease from splattering and soiling the walls of hot air...
... oven trays on a single rack. Frozen meat can be preheated to use waxed paper in when the oven is ideal for the user 7. However, set the temperature about 70°F lower and allow 25% more even cooking. 7.1 Conventional cooking FUNCTION SELECTOR CONTROL KNOB FROM LOW TO MAX In conventional cooking, heat circulates from bottom to prevent oil/grease from splattering and soiling the walls of hot air...
Owners Manual
Page 16
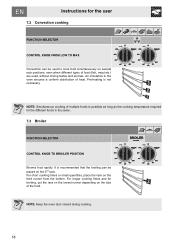
..., meat etc.) are used, without mixing tastes and aromas. For longer cooking times and for broiling, put the rack on the lowest runner depending on the size of heat. NOTE: Keep the oven door closed during cooking. 18 Pre-heating is not necessary. Instructions for the user 7.2 Convection cooking FUNCTION SELECTOR CONTROL KNOB FROM LOW TO MAX Convection can be placed on the 3rd rack. For short cooking times or small quantities...
..., meat etc.) are used, without mixing tastes and aromas. For longer cooking times and for broiling, put the rack on the lowest runner depending on the size of heat. NOTE: Keep the oven door closed during cooking. 18 Pre-heating is not necessary. Instructions for the user 7.2 Convection cooking FUNCTION SELECTOR CONTROL KNOB FROM LOW TO MAX Convection can be placed on the 3rd rack. For short cooking times or small quantities...
Owners Manual
Page 20
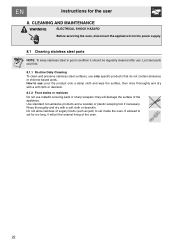
... WARNING ELECTRICAL SHOCK HAZARD Before servicing the oven, disconnect the appliance from the power supply. 8.1 Cleaning stainless steel parts NOTE: To keep stainless steel in good condition it will damage the surface of sugary foods (such as jam) to set for the user 8. Rinse thoroughly and dry with a soft cloth or deerskin. 8.1.2 Food stains or residues Do not use only specific products...
... WARNING ELECTRICAL SHOCK HAZARD Before servicing the oven, disconnect the appliance from the power supply. 8.1 Cleaning stainless steel parts NOTE: To keep stainless steel in good condition it will damage the surface of sugary foods (such as jam) to set for the user 8. Rinse thoroughly and dry with a soft cloth or deerskin. 8.1.2 Food stains or residues Do not use only specific products...
Owners Manual
Page 22
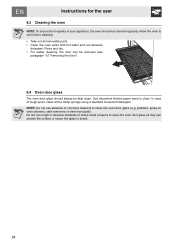
... be cleaned regularly. Use absorbent kitchen paper towel to clean the oven door glass (e.g. NOTE: Do not use rough or abrasive materials or sharp metal scrapers to clean the oven door glass as they can be removed (see paragraph "9.1 Removing the door"). 8.4 Oven door glass The oven door glass should be kept clean. Do not use abrasive or corrosive cleaners to clean. Instructions for the user 8.3 Cleaning the oven NOTE: To ensure the longevity of tough spots, clean with hot...
... be cleaned regularly. Use absorbent kitchen paper towel to clean the oven door glass (e.g. NOTE: Do not use rough or abrasive materials or sharp metal scrapers to clean the oven door glass as they can be removed (see paragraph "9.1 Removing the door"). 8.4 Oven door glass The oven door glass should be kept clean. Do not use abrasive or corrosive cleaners to clean. Instructions for the user 8.3 Cleaning the oven NOTE: To ensure the longevity of tough spots, clean with hot...

Owners Manual
Page 23
... to perform these minor maintenance operations. Repeat this operation on both sides with one of the same type (25W). 6 Replace the cover correctly, so that the moulded part of the slots. Insert a pin in the hole in the hinges. 9.2 Replacing the oven light bulb 1 Completely remove all accessories from the power supply. 9.1 Removing the door Open the door completely. Grasp the door on both hands, lift it...
... to perform these minor maintenance operations. Repeat this operation on both sides with one of the same type (25W). 6 Replace the cover correctly, so that the moulded part of the slots. Insert a pin in the hole in the hinges. 9.2 Replacing the oven light bulb 1 Completely remove all accessories from the power supply. 9.1 Removing the door Open the door completely. Grasp the door on both hands, lift it...


