Owners Manual
Page 10
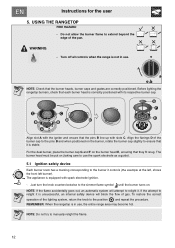
... is unsuccessful, an internal safety device will attempt to the simmer flame symbol until the burner turns on the burner head E, ensuring that each burner head is equipped with slots C. The burner head must be put on the burner, rotate the burner cap slightly to extend beyond the edge of the lighting system... range area may become hot. Align the flarings D of gas. Instructions for the user 5. Do not allow the burner flame to ensure that the burner heads, burner caps and grates are correctly positioned. For the dual burner, place the burner cap G and F on .
... is unsuccessful, an internal safety device will attempt to the simmer flame symbol until the burner turns on the burner head E, ensuring that each burner head is equipped with slots C. The burner head must be put on the burner, rotate the burner cap slightly to extend beyond the edge of the lighting system... range area may become hot. Align the flarings D of gas. Instructions for the user 5. Do not allow the burner flame to ensure that the burner heads, burner caps and grates are correctly positioned. For the dual burner, place the burner cap G and F on .
Owners Manual
Page 21
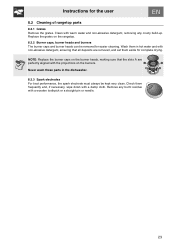
.... Remove any crusty build-up. NOTE: Replace the burner caps on the rangetop. 8.2.2 Burner caps, burner heads and burners The burner caps and burner heads can be kept very clean. Replace the grates on the burner heads, making sure that all deposits are perfectly aligned with a wooden toothpick or a straight pin or needle...
.... Remove any crusty build-up. NOTE: Replace the burner caps on the rangetop. 8.2.2 Burner caps, burner heads and burners The burner caps and burner heads can be kept very clean. Replace the grates on the burner heads, making sure that all deposits are perfectly aligned with a wooden toothpick or a straight pin or needle...