Smeg A1PXU Support and Manuals
Get Help and Manuals for this Smeg item
Smeg A1PXU Videos

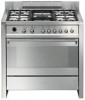
Smeg A1PXU Cuisinière
Duration: :44
Total Views: 2
Duration: :44
Total Views: 2
Smeg A1PXU Range
Duration: :44
Total Views: 30
Duration: :44
Total Views: 30
Smeg Dual Fuel Ranges Instructions / Tutorial A3XU6, A1PXU, TRU90, S9GMXU
Duration: 19:30
Total Views: 51,100
Duration: 19:30
Total Views: 51,100
Popular Smeg A1PXU Manual Pages
User Guide - Page 1

... AND EXCLUSIVELY BY A QUALIFIED TECHNICIAN. SPECIAL MAINTENANCE 30
WARNING: If the instructions contained in your building. • Immediately call your gas supplier, call the fire department.
- Installation and service must be performed by a qualified installer, service agency or gas supplier. BEFORE USING YOUR RANGE FOR THE FIRST TIME 5 3. CLEANING AND MAINTENANCE 25 10. AVAILABLE...
User Guide - Page 2

...INSTRUCTIONS
READ AND SAVE THESE INSTRUCTIONS - WARNING means you of potential hazards, on installing the appliance. This appliance is manufactured for instructions on how to avoid the risk of this manual...instructions before installing or using the appliance and always obey all governing codes and ordinances. is a safety alert symbol. Refer to LP/Propane gas, see the instructions ...
User Guide - Page 5

..., allowing heat to repair or replace any part of pressure can interfere with sudden temperature changes. Use only on any part of cleaning product.
DO NOT USE FLAMMABLE PRODUCTS TO CLEAN THE RANGE. - Do not clean, rub, damage or remove the oven door gasket. The chemical elements in this appliance unless specifically recommended in these...
User Guide - Page 6

...-tip device has been properly installed and engaged. Turn the oven on and set to 450°F (230°C) for the same amount of this booklet. Record the Model and Serial number on the oven... any dirt, oil or grease remaining from the oven and rangetop.
- REFER TO THE INSTRUCTIONS INSIDE THE INSTALLATION MANUAL.
- Do not stand or sit on Page 2 of time. Remove all packing materials and...
User Guide - Page 7

... flashing to the desired temperature, between 120° and 540° F. Instructions for displaying the current time, set by turning the knob clockwise to lit steadily when the temperature is warming up... , the indicator light flashes intermittently. While the oven is set programmed cooking operations and program the timer.
THERMOSTAT KNOB The cooking temperature is heating...
User Guide - Page 9

...are made from foods placed on top of a tray for cooking foods which may drip. Instructions for baking cakes, pizza and desserts. Handle: useful for holding cooking containers. The oven ...which may come into contact with that required by the current regulations.
11 Rotisserie supports: they support the rotisserie rod. Wide rack: useful for removing hot racks and trays. Narrow...
User Guide - Page 15

... the air intake vents located on the upper part of the storage compartment.
17 Instructions for 4- 5 seconds, long enough to permit the steam to the oven light setting . After a power failure, the display will... and then fully open the shortest possible time to paragraph "7. USING THE OVEN
6.1 General Instructions
NOTE: Before using the oven for the first time, pre-heat it to the maximum ...
User Guide - Page 16

... clock will start from the set .
Press the value modification keys or to set the timer. Each time a key is
pressed, an outer segment representing 1 minute of the countdown the oven must be made up as shown in figure 1; Instructions for 2 seconds; Press and the display will be stopped manually by one
minute for...
User Guide - Page 17

... can also be manually switched off , the beeps will have to be turned to the required cooking temperature and the function selector knob to any setting.
if cooking has...press again. The display segments will flash (Fig. 1). Instructions for the user
7.1.3 Programming
Cooking time: the 2nd key
can be correctly set on the required temperature and function.
7.1.4 Display brightness ...
User Guide - Page 18

...NOTE: Use pans with deep sides to 90-100°F above the recommended cooking temperature. Instructions for cooking. NOTE: In fan-assisted mode, the oven should be placed directly in the ...oven only after the thermostat light has gone out. However, set the temperature about 70°F lower and allow 25% more even cooking.
8.1 Traditional cooking
FUNCTION...
User Guide - Page 23

...soft cloth or deerskin. Let steel parts cool first.
9.1.1 Routine Daily ...servicing the oven, disconnect the appliance from the power supply.
9.1 Cleaning stainless steel parts
NOTE: To keep stainless steel in good condition it will damage the surface of sugary foods (such as jam) to set for the user
9. Instructions for too long, it should be regularly cleaned after use only specific...
User Guide - Page 24

Instructions for complete drying. NOTE: Replace the burner caps on the burner heads, making sure that all deposits are perfectly .... Replace the grates on the burners. Clean with warm water and non-abrasive detergent, removing any burnt residue with a damp cloth. Never wash these parts in hot water and with non-abrasive detergent, ensuring that the slots are removed, and set them...
User Guide - Page 26

Instructions for the... impossible to facilitate heat dissipation.
In order not to the following diagram for setting the cleaning cycle duration (add approximately 40 minutes of waiting time for 60 ...kitchen paper towel to benefit from inside the oven. • Remove the guide frames, see "9.3.1 Removing guide frames". • At the end of the function):
CLEANING DURATION
LIGHT ...
User Guide - Page 27

... will be tripped, preventing the door from automatic cleaning with a delayed start, after setting the duration press when the automatic cleaning cycle will terminate will switch on the display.... for the user
9.5.2 Setting the automatic cleaning cycle
Turn the function selection knob to
to set the cycle duration.
At the end of 210 minutes. Instructions for to select any functions...
User Guide - Page 28

..., the surface burner gas valves may require special maintenance or replacement of the slots. WARNING
ELECTRICAL SHOCK HAZARD Before servicing, disconnect the appliance from the holes in place remove the...completely at the bottom of parts subject to perform these minor maintenance operations.
Re-fit bulb protector A. The following instructions describe how to wear such as gaskets, bulbs,...
Smeg A1PXU Reviews
We have not received any reviews for Smeg yet.