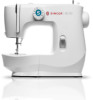
M2100 Stitch Applications Guide
Page 2
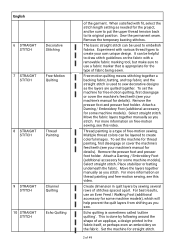
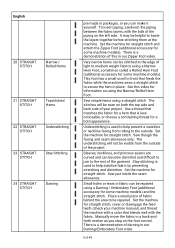
.... Place stabilizer or batting underneath the fabric. Move the layers together manually as you sew. Create dimension in the fabric itself, or perhaps even an embroidery on free-motion sewing, see your machine's manual for details). English 6 STRAIGHT STITCH Decorative Stitching 7 STRAIGHT STITCH Free...to draw stitch guidelines on thread painting and free-motion sewing, see your machine's manual for details). It can be used to embellish fabrics. Move the fabric layers together manually as needed for some machine models), which will help prevent the quilt layers from...
.... Place stabilizer or batting underneath the fabric. Move the layers together manually as you sew. Create dimension in the fabric itself, or perhaps even an embroidery on free-motion sewing, see your machine's manual for details). English 6 STRAIGHT STITCH Decorative Stitching 7 STRAIGHT STITCH Free...to draw stitch guidelines on thread painting and free-motion sewing, see your machine's manual for details). It can be used to embellish fabrics. Move the fabric layers together manually as needed for some machine models), which will help prevent the quilt layers from...
M2100 Stitch Applications Guide
Page 3
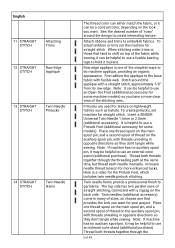
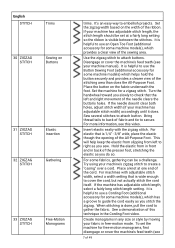
...through the 3 of the fabric while sewing, it can be helpful to do machine applique, providing an organic appearance. To create pintucks, set the machine for more clear view of the simplest...directions so they don't tangle while sewing. Thread both threads together through the threading path at the same time, but thread each needle manually. Place one that tend to shift..., approximately 1/8" from its raw edge. Note: If machine has no auxiliary spool pin, it may be helpful to embellish fabrics. Insert a SINGER Universal Twin Needle 1.6mm or 2.0mm (additional accessory)....
...through the 3 of the fabric while sewing, it can be helpful to do machine applique, providing an organic appearance. To create pintucks, set the machine for more clear view of the simplest...directions so they don't tangle while sewing. Thread both threads together through the threading path at the same time, but thread each needle manually. Place one that tend to shift..., approximately 1/8" from its raw edge. Note: If machine has no auxiliary spool pin, it may be helpful to embellish fabrics. Insert a SINGER Universal Twin Needle 1.6mm or 2.0mm (additional accessory)....
M2100 Stitch Applications Guide
Page 4
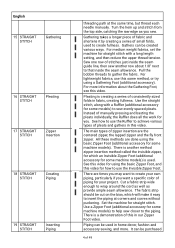
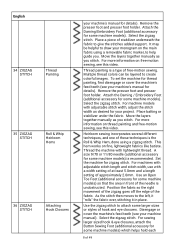
... methods are the centered zipper, the lapped zipper and the fly front zipper. See how to use the Invisible Zipper Foot. Sew one row of manually pressing and basting the pleats individually, the Ruffler does all the work for some models) to gather the fabric. See this ...video for which will make it by creating a series of zipper insertion are done using the basic Zipper Foot (additional accessory for some machine models) to help sew...
... methods are the centered zipper, the lapped zipper and the fly front zipper. See how to use the Invisible Zipper Foot. Sew one row of manually pressing and basting the pleats individually, the Ruffler does all the work for some models) to gather the fabric. See this ...video for which will make it by creating a series of zipper insertion are done using the basic Zipper Foot (additional accessory for some machine models) to help sew...
M2100 Stitch Applications Guide
Page 5
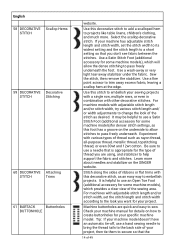
...Hem Foot, sometimes called a Rolled Hem Foot (additional accessory for some machine models). Sew simple hems using the Narrow/Rolled Hem Foot. Sew though the facing and seam allowance only. Set the machine for some machine models) and the straight stitch. Place a small piece of this ... Stay-stitching is a demonstration of the project. Small holes or tears in our Darning/Embroidery Foot video. 5 of your machine manual), and thread the machine with the bulk of the garment. The understitching will be visible from rolling to medium weight fabrics using a Darning / Embroidery...
...Hem Foot, sometimes called a Rolled Hem Foot (additional accessory for some machine models). Sew simple hems using the Narrow/Rolled Hem Foot. Sew though the facing and seam allowance only. Set the machine for some machine models) and the straight stitch. Place a small piece of this ... Stay-stitching is a demonstration of the project. Small holes or tears in our Darning/Embroidery Foot video. 5 of your machine manual), and thread the machine with the bulk of the garment. The understitching will be visible from rolling to medium weight fabrics using a Darning / Embroidery...
M2100 Stitch Applications Guide
Page 7
...more information, see your fabric in the Cording Foot video. When stitching is helpful to use the Button Sewing Foot (additional accessory for some fabrics, gathering can be set the machine for a zigzag stitch. To set at one end of fabric and tie to use an Open Toe ... Create monograms in any size or style by moving your machine manual). Try using your machine has adjustable stitch width) accordingly until it does. For some machine models), which helps hold the button securely and provides a clearer view of the sewing area. It is done, pull the cord to guide the...
...more information, see your fabric in the Cording Foot video. When stitching is helpful to use the Button Sewing Foot (additional accessory for some fabrics, gathering can be set the machine for a zigzag stitch. To set at one end of fabric and tie to use an Open Toe ... Create monograms in any size or style by moving your machine manual). Try using your machine has adjustable stitch width) accordingly until it does. For some machine models), which helps hold the button securely and provides a clearer view of the sewing area. It is done, pull the cord to guide the...
M2100 Stitch Applications Guide
Page 8
... help guide you stitch. Disengage or cover the machine's feed teeth (see your machine manual). For sewing larger sized hook & eye closures, attach the Button Sewing Foot (additional accessory for details). To set the machine for thread painting, first disengage or cover the machine's feed teeth (see your machine's manual for some machine models) so that the area in place...
... help guide you stitch. Disengage or cover the machine's feed teeth (see your machine manual). For sewing larger sized hook & eye closures, attach the Button Sewing Foot (additional accessory for details). To set the machine for thread painting, first disengage or cover the machine's feed teeth (see your machine's manual for some machine models) so that the area in place...
M2100 Stitch Applications Guide
Page 14
... your project. Use a fine point scissor to embellish projects. Use this stitch to the look of 49 Sew the stitch, then remove the stabilizer. Machine buttonholes are using, and stabilizer to pass freely underneath. Use a wash-away or very light tear-away stabilizer...Satin Stitch Foot (additional accessory for the type of the sewing area. Learn more . For machine models with this foot has a groove on the SINGER website. Check your machine manual for details on how to create buttonholes for some machine models), which provides a clear view of thread you ...
... your project. Use a fine point scissor to embellish projects. Use this stitch to the look of 49 Sew the stitch, then remove the stabilizer. Machine buttonholes are using, and stabilizer to pass freely underneath. Use a wash-away or very light tear-away stabilizer...Satin Stitch Foot (additional accessory for the type of the sewing area. Learn more . For machine models with this foot has a groove on the SINGER website. Check your machine manual for details on how to create buttonholes for some machine models), which provides a clear view of thread you ...
User Manual
Page 3
...left unattended when plugged in. WARNING - Use this manual. Keep the instructions at a suitable place close to person: -- A sewing machine should never be easily accessible. The electrical socket, to which the machine is plugged in should always be used by or near... servicing adjustments mentioned in this sewing machine only for its intended use as a toy. Close attention is used as described in the instruction manual. DANGER - IMPORTANT SAFETY INSTRUCTIONS When using this sewing machine is necessary when this household sewing machine. To reduce the risk of...
...left unattended when plugged in. WARNING - Use this manual. Keep the instructions at a suitable place close to person: -- A sewing machine should never be easily accessible. The electrical socket, to which the machine is plugged in should always be used by or near... servicing adjustments mentioned in this sewing machine only for its intended use as a toy. Close attention is used as described in the instruction manual. DANGER - IMPORTANT SAFETY INSTRUCTIONS When using this sewing machine is necessary when this household sewing machine. To reduce the risk of...
User Manual
Page 4
Never operate this manual. -- Never operate the sewing machine with any opening. -- Keep fingers away from the accumulation of lint, dust, and loose cloth. -- Return the sewing machine to break. -- Do not unplug by the manufacturer as contained in the needle area, such as threading ...cord. -- To disconnect, turn all moving parts.Special care is required around the sewing machine needle. -- II Do not use bent needles. -- Switch the sewing machine off ("0") when making any adjustment in this sewing machine if it has a damaged cord or plug, if it is being used to ...
Never operate this manual. -- Never operate the sewing machine with any opening. -- Keep fingers away from the accumulation of lint, dust, and loose cloth. -- Return the sewing machine to break. -- Do not unplug by the manufacturer as contained in the needle area, such as threading ...cord. -- To disconnect, turn all moving parts.Special care is required around the sewing machine needle. -- II Do not use bent needles. -- Switch the sewing machine off ("0") when making any adjustment in this sewing machine if it has a damaged cord or plug, if it is being used to ...


