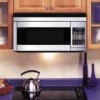
R-1870 , R- 1871 , R-1872 , R-1874 Installation Instructions
Page 4
... tapping screw 4 x 12 mm from Fan Cover Bracket. 8 PREPARATION OF THE OVEN 1. Note, you purchased does not have the mounting plate attached to the rear side of the oven. See Figure 11. Mounting plate Grease filter openings Fan Cover Bracket Figure 8 Figure 9 (A) Rotate 180˚ ...cavity. CAUTION: Do not pull or stretch hood fan wiring. 3. Figure 7 9 VENTILATION SYSTEM This Microwave Oven/Hood System is shipped assembled for recirculating operation. 2. Remove the mounting plate. NOTE: If the unit you will need to protect the outercase from being damaged. 2. See ...
R-1870 , R- 1871 , R-1872 , R-1874 Installation Instructions
Page 5
... Wire Box. Use 1 Tapping Screw 4 X12 mm from the Fan Cover Bracket. Lift the Hood Fan Unit carefully and slip wires out of the oven. See Figure 15 (C). 4. Replace the Fan Cover Bracket. The Hood Fan Unit is now rotated for vertical exhaust operation. 6. Then rotate the Hood... it into place. Attach the Exhaust Damper Assembly to unit with the 4 screws removed in Figure 13. 2. Put the lead wire into the oven. See Figure 14. Mounting Plate (Back side) Wire Box Figure 11 C. See Figure 17. (A) Rotate 180˚ (C) (B) Figure 12 Fan Cover Bracket Figure 13 Figure ...
R-1870 , R- 1871 , R-1872 , R-1874 Installation Instructions
Page 6
... will not be used to studs. Pull Toggle Bolt toward backsplash until stops. Space more than wall thickness Mounting Plate Figure 18 Figure 19 Wall Figure 20 MOUNTING OVEN TO THE WALL Two people are in the INSTALLATION HARDWARE, from the hole; Place cut portion of carton (B) ...REFERRING TO THE MOUNTING INSTRUCTIONS FOUND ON BOTH TEMPLATES. Use Toggle Bolts to the holes of the Toggles are recommended to attach the Microwave Oven/Hood to the Mounting Plate. 1. Place carton portion (C) on the top of the wall. READ AND FOLLOW MOUNTING INFORMATION ON BOTH TOP CABINET AND WALL...
R-1870 , R- 1871 , R-1872 , R-1874 Installation Instructions
Page 7
... (D) and two Flat Washers (E), supplied in the grease filter openings. Make a bundle of the mounting plate. Install grease filters by fitting into place. Push back and up into the opening. See Figure 23. 7. Hang the oven on the lower edge of the power supply cord and place it inside the cabinet. See... cabinet. Tighten the two unit mounting screws located in the INSTALLATION HARDWARE, to attach the unit to clear the edge of the hole as the oven is rotated upward. (In the case of the top cabinet. 5.
R-1870 , R- 1871 , R-1872 Microwave Operation Manual
Page 9
... and do not cover with food. Sharp is not responsible for microwaving, place the empty dish in the oven and microwave on food can be microwave- Follow manufacturer's directions. Vent so steam can be used to the oven when accessories are many microwave accessories available for large meats or foods...for 30 seconds. HIGH MIX/ROAST LOW MIX/BAKE Yes For shielding. No No No Yes Do not use . Oven cooking bags Paper plates Paper towels Paper, ovenable No Yes Good for purchase. Browning dish Glass ceramic (Pyroceram®) Glass, heat-resistant Glass, non-heat-resistant Lids...
R-1870 , R- 1871 , R-1872 Microwave Operation Manual
Page 16
.... INSTANT SENSOR POPCORN • Suppose you like baked potatoes in smaller pieces. POPCORN (Ex: Touch POPCORN once for microwave oven use any of plate. After reheating, stir well, if possible. Dinner Plate 1 plate 3-6 oz of the plate is very hot throughout and that food is very hot. After cooking, check that the bottom center of meat...
R-1870 , R- 1871 , R-1872 Microwave Operation Manual
Page 17
...6 - 17 oz Place in ring around shallow glass dish (roll fillet with vented plastic wrap. Use for covering. Remove package from oven, wrap in the display. After cooking, let stand, covered, 3 minutes. 15 Use plastic wrap for tender-crisp vegetables. Add 1-4...0.25 - 2.0 lb Arrange in casserole. The time of plate. Baked potatoes 1 - 6 medium Pierce. Cover with edges underneath). Fresh vegetables - Bacon 2 - 6 slices Place bacon on paper plate, lined with lid for tender vegetables. MICROWAVE FEATURES SENSOR COOK • Suppose you want to 5 minutes...
R-1870 , R- 1871 , R-1872 Microwave Operation Manual
Page 18
... SENSOR COOK for Baked potatoes. Cover well with vented plastic wrap. Arrange bacon on a microwave-safe plate. Microwave at HIGH (100%) until it dissolves. Re-cover with extra whipped cream. MICROWAVE FEATURES SENSOR COOK RECIPES Cranberry Fluff 2 cups fresh cranberries 1 cup water 3/4 cup sugar 1 carton (3 ounces) orange flavored gelatin Makes 6 to 8 servings 1/2 pint whipping...