

Maxtor Central Axis Admin User Guide
Page 51
Click Manually configure IP settings to get the IP address from a DHCP server (default). The Network Settings IP options page opens: Figure 71: Automatic Network Settings Step 4: Click Obtain IP automatically using UPnP Discovery settings to enter the IP information yourself. The Network Settings page refreshes to display fields in which the Central Axis belongs Step 3: Click Next. Maxtor Central Axis Admin User...
Click Manually configure IP settings to get the IP address from a DHCP server (default). The Network Settings IP options page opens: Figure 71: Automatic Network Settings Step 4: Click Obtain IP automatically using UPnP Discovery settings to enter the IP information yourself. The Network Settings page refreshes to display fields in which the Central Axis belongs Step 3: Click Next. Maxtor Central Axis Admin User...

Maxtor Central Axis Admin User Guide
Page 52
The Network Settings page refreshes to enter the Jumbo Frame Support information: Managing Network Settings 49 Jumbo Frame Support: Transfer data more quickly over the Ethernet by sending the data in which to display fields in larger chunks. Maxtor Central Axis Admin User Guide Figure 72: Manual Network Settings Step 5: Enter the IP Address, Subnet Mask, Default Gateway, and Default DNC. Step 6: If you wish, click Enable Jumbo Frame Support. All connected devices must also support Jumbo Frame Axis.
The Network Settings page refreshes to enter the Jumbo Frame Support information: Managing Network Settings 49 Jumbo Frame Support: Transfer data more quickly over the Ethernet by sending the data in which to display fields in larger chunks. Maxtor Central Axis Admin User Guide Figure 72: Manual Network Settings Step 5: Enter the IP Address, Subnet Mask, Default Gateway, and Default DNC. Step 6: If you wish, click Enable Jumbo Frame Support. All connected devices must also support Jumbo Frame Axis.
Maxtor Central Axis Admin User Guide
Page 69
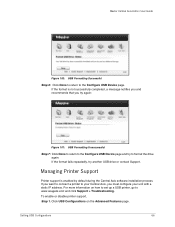
Maxtor Central Axis Admin User Guide Figure 100: USB Formatting Successful Step 6: Click Done to return to www.seagate.com and click Support > Troubleshooting. If the format is enabled by default during the Central Axis software installation process. For more information on the Advanced Features page. Managing...recommends that you must configure your Central Axis, you try again: Figure 101: USB Formatting Unsuccessful Step 7: Click Done to return to format the drive again. If you want to connect a printer to your unit with a static IP address. To enable or disable printer ...
Maxtor Central Axis Admin User Guide Figure 100: USB Formatting Successful Step 6: Click Done to return to www.seagate.com and click Support > Troubleshooting. If the format is enabled by default during the Central Axis software installation process. For more information on the Advanced Features page. Managing...recommends that you must configure your Central Axis, you try again: Figure 101: USB Formatting Unsuccessful Step 7: Click Done to return to format the drive again. If you want to connect a printer to your unit with a static IP address. To enable or disable printer ...
Maxtor Central Axis Admin User Guide
Page 103
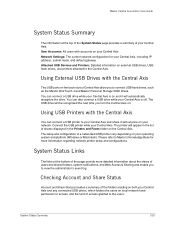
... will appear in the list of shares displayed in the Printers and Faxes folder on the back of your Central Axis, including IP address, subnet mask, and default gateway Attached USB Devices and Printers: Detailed information on . Maxtor Central Axis Admin User Guide System Status Summary The information at the bottom of the page provide more information regarding...
... will appear in the list of shares displayed in the Printers and Faxes folder on the back of your Central Axis, including IP address, subnet mask, and default gateway Attached USB Devices and Printers: Detailed information on . Maxtor Central Axis Admin User Guide System Status Summary The information at the bottom of the page provide more information regarding...


