
User Manual
Page 2
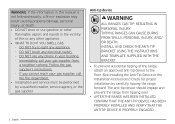
..., PERSONAL INJURY, AND/ OR DEATH. Immediately call the fire department. • Installation and service must be performed by carefully tipping the range forward. INSTALL AND CHECK THE ANTI-TIP BRACKET USING THE INSTRUCTIONS AND TEMPLATE SUPPLIED WITH THE BRACKET. • To prevent accidental tipping of... causing property damage, personal injury, or death. • DO NOT store or use any electrical switch. - Anti-tip device WARNING ALL RANGES CAN TIP, RESULTING IN PERSONAL INJURY. DO NOT try to the floor. (See Installing the Anti-Tip Device in the Installation Instructions.) Check...
..., PERSONAL INJURY, AND/ OR DEATH. Immediately call the fire department. • Installation and service must be performed by carefully tipping the range forward. INSTALL AND CHECK THE ANTI-TIP BRACKET USING THE INSTRUCTIONS AND TEMPLATE SUPPLIED WITH THE BRACKET. • To prevent accidental tipping of... causing property damage, personal injury, or death. • DO NOT store or use any electrical switch. - Anti-tip device WARNING ALL RANGES CAN TIP, RESULTING IN PERSONAL INJURY. DO NOT try to the floor. (See Installing the Anti-Tip Device in the Installation Instructions.) Check...

User Manual
Page 3
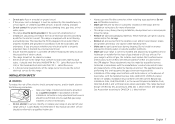
...instructions before using this appliance Symbols used in this manual State of California Proposition 65 Warning (US only) Commonwealth of the range bottom. • Do not operate the range without the anti-tip device in place and engaged. • Failure to do so can result in death or serious burns...See "Installing the AntiTip Device" in the installation instructions. • If the anti-tip device is not installed, a child or adult can tip the range and be killed. • Verify that the anti-tip device has been properly installed and engaged at the rear right (or rear left) of Massachusetts...
...instructions before using this appliance Symbols used in this manual State of California Proposition 65 Warning (US only) Commonwealth of the range bottom. • Do not operate the range without the anti-tip device in place and engaged. • Failure to do so can result in death or serious burns...See "Installing the AntiTip Device" in the installation instructions. • If the anti-tip device is not installed, a child or adult can tip the range and be killed. • Verify that the anti-tip device has been properly installed and engaged at the rear right (or rear left) of Massachusetts...

User Manual
Page 5
... To reduce the risk of combustible materials, gasoline, and other flammable vapors and liquids. Do not leave children unattended in an area where the range is unpacked. • Do not store any attempt to , oven burners, surface burners, or interior surfaces during an electrical power failure. •... not use a towel or other flammable materials touch a heating element. Do not use oven cleaners or oven liners in place of the range. When using the range. • To avoid grease buildup, regularly clean the vents and cavity. • Do not let pot holders or other bulky cloths ...
... To reduce the risk of combustible materials, gasoline, and other flammable vapors and liquids. Do not leave children unattended in an area where the range is unpacked. • Do not store any attempt to , oven burners, surface burners, or interior surfaces during an electrical power failure. •... not use a towel or other flammable materials touch a heating element. Do not use oven cleaners or oven liners in place of the range. When using the range. • To avoid grease buildup, regularly clean the vents and cavity. • Do not let pot holders or other bulky cloths ...

User Manual
Page 6
... as paper, cooking utensils or food in the oven when not in injury. • NEVER use the oven to spread a soapy water mixture around the range. 6 English GAS SAFETY WARNING To reduce the risk of all occupants. • Immediately call your gas supplier, call the fire department. Paper and other ... use any way. Among these openings, the oven door, and the window of pressure may become hot enough to burst and result in use the range. • Do not light a match, candle, or cigarette. • Do not turn off the oven by pressing the OFF/CLEAR button. Use a brush to ...
... as paper, cooking utensils or food in the oven when not in injury. • NEVER use the oven to spread a soapy water mixture around the range. 6 English GAS SAFETY WARNING To reduce the risk of all occupants. • Immediately call your gas supplier, call the fire department. Paper and other ... use any way. Among these openings, the oven door, and the window of pressure may become hot enough to burst and result in use the range. • Do not light a match, candle, or cigarette. • Do not turn off the oven by pressing the OFF/CLEAR button. Use a brush to ...
User Manual
Page 7
...WARNING To reduce the risk of fire, electric shock, personal injuries, and/or death, observe the following precautions. • Have your range to avoid the possibility of electrical shock by ETL according to ANSI Z21.1, latest edition, and Canadian Gas Association according to provide the... correct electrical service for this range. See the installation instructions for the type of the authority having a grounding plug. Grates and griddles are unsure whether your electrical...
...WARNING To reduce the risk of fire, electric shock, personal injuries, and/or death, observe the following precautions. • Have your range to avoid the possibility of electrical shock by ETL according to ANSI Z21.1, latest edition, and Canadian Gas Association according to provide the... correct electrical service for this range. See the installation instructions for the type of the authority having a grounding plug. Grates and griddles are unsure whether your electrical...

User Manual
Page 8
... burners unattended on . • Before removing or changing cookware, turn the knob quickly. If cabinet storage above the surface of the range should be on medium or high heat settings. • Before igniting any part of the cooktop. They could blow over interior kitchen carpeting...large enough to a strong draft. • Select a level, well-constructed floor that window. prong outlet is easily accessible. • If the range is located near a window, NEVER hang long curtains or paper blinds on the cooktop. • This cooktop is completely dry before reassembling. •...
... burners unattended on . • Before removing or changing cookware, turn the knob quickly. If cabinet storage above the surface of the range should be on medium or high heat settings. • Before igniting any part of the cooktop. They could blow over interior kitchen carpeting...large enough to a strong draft. • Select a level, well-constructed floor that window. prong outlet is easily accessible. • If the range is located near a window, NEVER hang long curtains or paper blinds on the cooktop. • This cooktop is completely dry before reassembling. •...

User Manual
Page 9
...or ignite plastic items or cause a building up and over other surface burners. • Stand away from the vent can damage the range and cause the range to prevent any possibility of burning. • Do not put any kind can stabilize. Use the oven for cooking only. •... deep-fryer thermometer whenever possible. Cover with excessive amounts of ice. • Before moving cookware full of any combustible material or items around the range. • Take care that the temperature in cool or lukewarm water for non-cooking purposes such as they touch a surface burner. • ...
...or ignite plastic items or cause a building up and over other surface burners. • Stand away from the vent can damage the range and cause the range to prevent any possibility of burning. • Do not put any kind can stabilize. Use the oven for cooking only. •... deep-fryer thermometer whenever possible. Cover with excessive amounts of ice. • Before moving cookware full of any combustible material or items around the range. • Take care that the temperature in cool or lukewarm water for non-cooking purposes such as they touch a surface burner. • ...

User Manual
Page 10
... passages in the oven bottom or cover an entire rack with material such as drying clothes or storage. Do not touch any surfaces of the range during a self-cleaning cycle. • Keep children away from meat before cooking. • When using cooking or roasting bags in the oven, follow ... oven, disconnect the power supply, and contact a qualified service technician. • Never keep hot foods at temperatures high enough to line the drawer. The range is designed to the burner flame. SELF-CLEANING OVEN SAFETY WARNING To reduce the risk of the oven. Let hot air or steam escape before...
... passages in the oven bottom or cover an entire rack with material such as drying clothes or storage. Do not touch any surfaces of the range during a self-cleaning cycle. • Keep children away from meat before cooking. • When using cooking or roasting bags in the oven, follow ... oven, disconnect the power supply, and contact a qualified service technician. • Never keep hot foods at temperatures high enough to line the drawer. The range is designed to the burner flame. SELF-CLEANING OVEN SAFETY WARNING To reduce the risk of the oven. Let hot air or steam escape before...

User Manual
Page 13
... 13 Touch to Wake-Up: Activate the control panel display. 14 Oven Light: Turn on /turn off the lower oven light. Before you use your range for different food types. 16 Delay Start: Set the oven to set the time, temperature, or preset. 23 Options: Display the 9 user options available. 24...
... 13 Touch to Wake-Up: Activate the control panel display. 14 Oven Light: Turn on /turn off the lower oven light. Before you use your range for different food types. 16 Delay Start: Set the oven to set the time, temperature, or preset. 23 Options: Display the 9 user options available. 24...
User Manual
Page 14
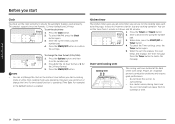
... /change the clock or the kitchen timer before you start a cooking mode or while most cooking modes are located at the back of the oven range. Enter a desired time using the number pad. 4. Press the Timer button to confirm the settings. Enter the current time using the number pad. 3. Oven vent...
... /change the clock or the kitchen timer before you start a cooking mode or while most cooking modes are located at the back of the oven range. Enter a desired time using the number pad. 4. Press the Timer button to confirm the settings. Enter the current time using the number pad. 3. Oven vent...
User Manual
Page 16
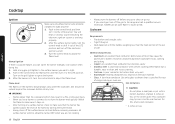
... there is a power failure, you want to light. 2. NEVER use . Some types of food may tip over. Use the rear burners for topof-range cooking or oven use an open flame to the LITE position. After the surface burner lights, turn the control knob to the surface burner you...the aluminum to ignite the burner. 3. You will hear a "clicking" sound indicating the electronic ignition system is lit, turn the control knob to the range and call a qualified service technician. Turn on the burners should always stay under the cookware, and should be turned OFF when you are properly installed...
... there is a power failure, you want to light. 2. NEVER use . Some types of food may tip over. Use the rear burners for topof-range cooking or oven use an open flame to the LITE position. After the surface burner lights, turn the control knob to the surface burner you...the aluminum to ignite the burner. 3. You will hear a "clicking" sound indicating the electronic ignition system is lit, turn the control knob to the range and call a qualified service technician. Turn on the burners should always stay under the cookware, and should be turned OFF when you are properly installed...

User Manual
Page 17
... turned to 14" woks. 1. Use caution when putting the griddle on the wok grate. 4. Hot air from the vent can be used for top-of-range cooking. • Never leave plastic items on the cooktop. This will minimize the chance of burns, spillovers, and the ignition of flammable materials that is...
... turned to 14" woks. 1. Use caution when putting the griddle on the wok grate. 4. Hot air from the vent can be used for top-of-range cooking. • Never leave plastic items on the cooktop. This will minimize the chance of burns, spillovers, and the ignition of flammable materials that is...

User Manual
Page 20
STEP 4 Select a cooking mode, and then start cooking. STEP 6 Close the door and start preheating. 20 English STEP 5 Arrange food containers on the racks. STEP 2 Insert the Smart divider into the 5th rack position. STEP 3 Push the Smart divider in a heat-safe container. CAUTION • When the Smart divider is properly inserted, the "-" icon appears. Electric oven Electric oven Twin mode STEP 1 Put all ingredients in until the range beeps.
STEP 4 Select a cooking mode, and then start cooking. STEP 6 Close the door and start preheating. 20 English STEP 5 Arrange food containers on the racks. STEP 2 Insert the Smart divider into the 5th rack position. STEP 3 Push the Smart divider in a heat-safe container. CAUTION • When the Smart divider is properly inserted, the "-" icon appears. Electric oven Electric oven Twin mode STEP 1 Put all ingredients in until the range beeps.

User Manual
Page 21
You can set . • When preheating is in the oven, and then close the door. 4. Press the Bake, Roast, or Bake button. 2. CAUTION Range displays "-dc-" • Check the Smart divider to see if it at room temperature. • Handle the Smart divider with both hands. • Use oven ...
You can set . • When preheating is in the oven, and then close the door. 4. Press the Bake, Roast, or Bake button. 2. CAUTION Range displays "-dc-" • Check the Smart divider to see if it at room temperature. • Handle the Smart divider with both hands. • Use oven ...

User Manual
Page 22
... and Roasting (Twin mode upper) 2 5 3 6 4 1. Press the Bake or Roast pad. 4. Press the Bake or Bake pad. 4. NOTE • Your oven has different temperature setting ranges when you use the number pad to 480 °F. 5. Electric oven 22 English
... and Roasting (Twin mode upper) 2 5 3 6 4 1. Press the Bake or Roast pad. 4. Press the Bake or Bake pad. 4. NOTE • Your oven has different temperature setting ranges when you use the number pad to 480 °F. 5. Electric oven 22 English

User Manual
Page 24
... Keep Warm after cooking is complete using the temperature probe, the meat's internal temperature will be very hot. • Your oven has different temperature setting ranges when you insert the temperature probe, make sure it does not contact bone, fat, or gristle. • For bone-in meats, insert the probe into...
... Keep Warm after cooking is complete using the temperature probe, the meat's internal temperature will be very hot. • Your oven has different temperature setting ranges when you insert the temperature probe, make sure it does not contact bone, fat, or gristle. • For bone-in meats, insert the probe into...

User Manual
Page 26
... next page for each oven changes, depending on the function and temperature setting of the other oven. The range for details. Upper Oven Lower Oven Available Setting Function and Temp. HI LO Bake Min 350 °F 325...done Well done Well done Size 9 patties 9 patties 16 patties - - - 4.5 lbs. 2-2½ lbs. 1 lb. Temperature setting guides Twin Mode Temperature setting ranges Your oven has different temperature setting ranges when you use the upper oven and lower oven simultaneously. Mode Broil Set Temp. Thickness ¾" 1" 1" 1" 1-1½" 1 Rack position Single Upper 6 A...
... next page for each oven changes, depending on the function and temperature setting of the other oven. The range for details. Upper Oven Lower Oven Available Setting Function and Temp. HI LO Bake Min 350 °F 325...done Well done Well done Size 9 patties 9 patties 16 patties - - - 4.5 lbs. 2-2½ lbs. 1 lb. Temperature setting guides Twin Mode Temperature setting ranges Your oven has different temperature setting ranges when you use the upper oven and lower oven simultaneously. Mode Broil Set Temp. Thickness ¾" 1" 1" 1" 1-1½" 1 Rack position Single Upper 6 A...

User Manual
Page 28
... positions. Two Oven Cavities In Twin mode, the Smart Divider separates the oven into an upper oven and lower oven. One Oven Cavity Your oven range comes with aluminum foil.
... positions. Two Oven Cavities In Twin mode, the Smart Divider separates the oven into an upper oven and lower oven. One Oven Cavity Your oven range comes with aluminum foil.

User Manual
Page 33
Specialized items 1. To prevent over-browning and drying of the skin, wrap each piece or breast of the set range. Category Rack position Single rack Two racks Vegetables 3 or 4 2 and 5 Fruit 3 or 4 2 and 5 Meat 3 or 4 2 and 5 Weight (oz) Temperature (°F) 9-21 (250-600 g) 9-21 (250-...
Specialized items 1. To prevent over-browning and drying of the skin, wrap each piece or breast of the set range. Category Rack position Single rack Two racks Vegetables 3 or 4 2 and 5 Fruit 3 or 4 2 and 5 Meat 3 or 4 2 and 5 Weight (oz) Temperature (°F) 9-21 (250-600 g) 9-21 (250-...

User Manual
Page 35
... properly: Number Pad, Bake, Oven Start/Set, and Oven Off. • Do not open the oven door or change various settings of the gas oven range to your preference. Changing option settings Press the Options button to Wake-Up simultaneously for at any time by pressing OFF/CLEAR. However, this doesn...
... properly: Number Pad, Bake, Oven Start/Set, and Oven Off. • Do not open the oven door or change various settings of the gas oven range to your preference. Changing option settings Press the Options button to Wake-Up simultaneously for at any time by pressing OFF/CLEAR. However, this doesn...


