
User Manual
Page 2
... Safety information What you need to know about the safety instructions Important safety symbols Important safety precautions Warnings Cautions Installation requirements Key installation requirements Location considerations Ducting requirements Exhausting requirements Gas requirements Electrical requirements Installation What's included Step-by-step installation Vent blockage test Exhaust ducting guide Switching the door position Before you start Sort and load Functional prerequisite Operations Feature panel Simple steps to start Cycle overview Drying guide Special features 2 English DV8700K...
... Safety information What you need to know about the safety instructions Important safety symbols Important safety precautions Warnings Cautions Installation requirements Key installation requirements Location considerations Ducting requirements Exhausting requirements Gas requirements Electrical requirements Installation What's included Step-by-step installation Vent blockage test Exhaust ducting guide Switching the door position Before you start Sort and load Functional prerequisite Operations Feature panel Simple steps to start Cycle overview Drying guide Special features 2 English DV8700K...
User Manual
Page 4
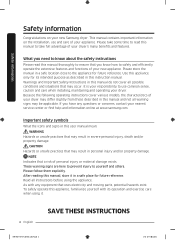
... on your nearest service center or find help and information online at www.samsung.com. It is your responsibility to know about the safety instructions Please read this instruction manual. Safety information Safety information Congratulations on the installation, use common sense, caution and care when installing, maintaining and operating your dryer. Use this appliance only for its operation and exercise care when using the appliance. Important...
... on your nearest service center or find help and information online at www.samsung.com. It is your responsibility to know about the safety instructions Please read this instruction manual. Safety information Safety information Congratulations on the installation, use common sense, caution and care when installing, maintaining and operating your dryer. Use this appliance only for its operation and exercise care when using the appliance. Important...

User Manual
Page 6
... in injury. 20.Take care that you understand and have the skills to carry out. 11.Do not use heat to dry articles containing foam rubber or similarly textured rubber-like materials. 14.Keep area around the exhaust opening and adjacent surrounding areas free from service or discarded, remove the door to the weather. 9. Do not install or store this appliance...
... in injury. 20.Take care that you understand and have the skills to carry out. 11.Do not use heat to dry articles containing foam rubber or similarly textured rubber-like materials. 14.Keep area around the exhaust opening and adjacent surrounding areas free from service or discarded, remove the door to the weather. 9. Do not install or store this appliance...

User Manual
Page 7
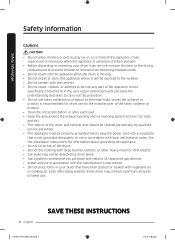
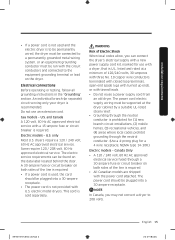
... highly flammable items used in the dryer until all occupants. • Immediately call your gas supplier, call the fire department. • Installation and service must not be performed by a qualified installer, service agency, or the gas supplier. Follow the gas supplier's instructions. • If you smell gas: • Do not try to light any appliance. • Do not turn on a heat setting. To reduce the...
... highly flammable items used in the dryer until all occupants. • Immediately call your gas supplier, call the fire department. • Installation and service must not be performed by a qualified installer, service agency, or the gas supplier. Follow the gas supplier's instructions. • If you smell gas: • Do not try to light any appliance. • Do not turn on a heat setting. To reduce the...
User Manual
Page 8
... dryer and exhaust duct should be cleaned periodically by qualified service personnel. • This appliance must be detected by smell alone. • Gas suppliers recommend you have been spotted or soaked with the controls. • Do not repair, replace, or attempt to service any part of the appliance unless specifically instructed to in the user-repair instructions and you purchase and install a UL-approved gas detector. • Install and use...
... dryer and exhaust duct should be cleaned periodically by qualified service personnel. • This appliance must be detected by smell alone. • Gas suppliers recommend you have been spotted or soaked with the controls. • Do not repair, replace, or attempt to service any part of the appliance unless specifically instructed to in the user-repair instructions and you purchase and install a UL-approved gas detector. • Install and use...
User Manual
Page 10
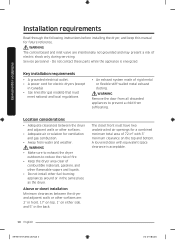
... during servicing. Installation requirements Installation requirements Read through the following instructions before installing the dryer, and keep this manual for a combined minimum total area of combustible materials, gasoline, and other flammable vapors and liquids. • Do not install other fuel-burning appliances around or in the back. Key installation requirements • A grounded electrical outlet. • A power cord for ventilation and gas combustion. • Away from water and weather. Location...
... during servicing. Installation requirements Installation requirements Read through the following instructions before installing the dryer, and keep this manual for a combined minimum total area of combustible materials, gasoline, and other flammable vapors and liquids. • Do not install other fuel-burning appliances around or in the back. Key installation requirements • A grounded electrical outlet. • A power cord for ventilation and gas combustion. • Away from water and weather. Location...

User Manual
Page 14
... modify the plug provided with your dryer - Grounding This dryer must be plugged into an appropriate outlet that is located on the plate under the control panel or rear frame. if it doesn't't fit the outlet, have a proper outlet installed by a qualified electrician. • Do not connect the ground wire to plastic plumbing lines, gas lines, or hot water pipes. if it doesn't't fit the outlet, have a proper outlet installed by a qualified...
... modify the plug provided with your dryer - Grounding This dryer must be plugged into an appropriate outlet that is located on the plate under the control panel or rear frame. if it doesn't't fit the outlet, have a proper outlet installed by a qualified electrician. • Do not connect the ground wire to plastic plumbing lines, gas lines, or hot water pipes. if it doesn't't fit the outlet, have a proper outlet installed by a qualified...
User Manual
Page 15
...; The power cord is not provided with U.S. Electrical connections Before operating or testing, follow all grounding instructions in the "Grounding" section. WARNING Risk of 120/240 volts, 30-amperes with three No. 10 copper wire conductors terminated with closed loop terminals, open-end spade lugs with turned up ends, or with the power cord attached. The power cord electric supply wiring must be run with a 15-ampere fuse or circuit breaker is required.
...; The power cord is not provided with U.S. Electrical connections Before operating or testing, follow all grounding instructions in the "Grounding" section. WARNING Risk of 120/240 volts, 30-amperes with three No. 10 copper wire conductors terminated with closed loop terminals, open-end spade lugs with turned up ends, or with the power cord attached. The power cord electric supply wiring must be run with a 15-ampere fuse or circuit breaker is required.

User Manual
Page 18
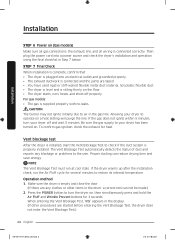
... the dryer. DO NOT use an open flame to the site. Select a location and move the dryer easily, lay two of a flexible connector to facilitate ducting and wiring. To change the door direction, see "Switching the door position". 3. Install the exhaust system as instructed in the same location as your washer. 2. Push the dryer so that it lies across both cushion-tops. STEP 2 Connect the gas line First, read through the "Gas requirements" section...
... the dryer. DO NOT use an open flame to the site. Select a location and move the dryer easily, lay two of a flexible connector to facilitate ducting and wiring. To change the door direction, see "Switching the door position". 3. Install the exhaust system as instructed in the same location as your washer. 2. Push the dryer so that it lies across both cushion-tops. STEP 2 Connect the gas line First, read through the "Gas requirements" section...
User Manual
Page 24
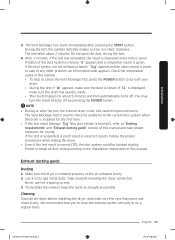
... Wrinkle Prevent buttons for heat. Operation method 1. Then, plug the power cord into an electrical outlet and grounded properly. • The exhaust ductwork is connected and the joints are any blockage or problems to air in the gas line. For gas models: • The gas is connected correctly. Be sure the gas supply to check if the duct system is installed, start the Vent Blockage Test to your dryer has been turned on. Vent blockage test After the dryer is properly installed...
... Wrinkle Prevent buttons for heat. Operation method 1. Then, plug the power cord into an electrical outlet and grounded properly. • The exhaust ductwork is connected and the joints are any blockage or problems to air in the gas line. For gas models: • The gas is connected correctly. Be sure the gas supply to check if the duct system is installed, start the Vent Blockage Test to your dryer has been turned on. Vent blockage test After the dryer is properly installed...
User Manual
Page 25
... then automatically turns off. If the duct system can not exhaust properly, "CLg" appears and an alarm sound is installed properly so the air exhausts freely. 2. Check the information codes in this manual. • To stop or cancel the Vent Blockage Test, press the POWER button to turn the result directly off your dryer. • During the test, if "dc" appears, make sure the vent flap opens and closes...
... then automatically turns off. If the duct system can not exhaust properly, "CLg" appears and an alarm sound is installed properly so the air exhausts freely. 2. Check the information codes in this manual. • To stop or cancel the Vent Blockage Test, press the POWER button to turn the result directly off your dryer. • During the test, if "dc" appears, make sure the vent flap opens and closes...

User Manual
Page 26
...-foil, or non-metal flexible ducts of any kind. • Do not use a poor exhaust system because it up slightly. 3. Remove the two screws from the door, and then remove the door by lifting it slows down the dryer's performance. • Do not use crushed or clogged venting or ducts. Switching the door position To reverse the direction of the dryer. 2. It is recommended to put...
...-foil, or non-metal flexible ducts of any kind. • Do not use a poor exhaust system because it up slightly. 3. Remove the two screws from the door, and then remove the door by lifting it slows down the dryer's performance. • Do not use crushed or clogged venting or ducts. Switching the door position To reverse the direction of the dryer. 2. It is recommended to put...

User Manual
Page 33
... relevant button (Anti Static, Drum Light, Mixed Load Bell, Wrinkle Prevent, and/or Eco Dry). 5. Change the cycle settings (Dry Level, Temp. Press and hold START/PAUSE. To change the cycle during operation 1. Operations DV8700K-03170T-00_EN (US)_151130.indd 33 English 33 2015-11-30 12:26:47 Press to stop operation. 2. Press START/PAUSE to select a cycle in the left-most panel. 3. Select a different cycle. 3. The dryer indicator turns on...
... relevant button (Anti Static, Drum Light, Mixed Load Bell, Wrinkle Prevent, and/or Eco Dry). 5. Change the cycle settings (Dry Level, Temp. Press and hold START/PAUSE. To change the cycle during operation 1. Operations DV8700K-03170T-00_EN (US)_151130.indd 33 English 33 2015-11-30 12:26:47 Press to stop operation. 2. Press START/PAUSE to select a cycle in the left-most panel. 3. Select a different cycle. 3. The dryer indicator turns on...

User Manual
Page 38
.... • Check and clean the lint filter or duct and make sure they are intentionally not grounded and may present a risk of the current cycle. NOTE • For duct installation, see "Exhaust ducting guide". • The dryer may be extended. • If the indicator turns on again later, it is because the duct is installed or connected with some restrictions (it is clogged, but the drying time will...
.... • Check and clean the lint filter or duct and make sure they are intentionally not grounded and may present a risk of the current cycle. NOTE • For duct installation, see "Exhaust ducting guide". • The dryer may be extended. • If the indicator turns on again later, it is because the duct is installed or connected with some restrictions (it is clogged, but the drying time will...

User Manual
Page 39
... air flow. Do not use abrasive substances. • Do not spray liquid cleaning agents directly on the dryer. Stainless steel tumbler To clean the stainless steel tumbler, use abrasive substances. • Protect the surface from the tumbler with a clean cloth. Dryer exterior • Clean with a mild, non-abrasive cleaner suitable for easily marred surfaces. Do not use a damp cloth with a soft, damp cloth. Be careful not...
... air flow. Do not use abrasive substances. • Do not spray liquid cleaning agents directly on the dryer. Stainless steel tumbler To clean the stainless steel tumbler, use abrasive substances. • Protect the surface from the tumbler with a clean cloth. Dryer exterior • Clean with a mild, non-abrasive cleaner suitable for easily marred surfaces. Do not use a damp cloth with a soft, damp cloth. Be careful not...

User Manual
Page 40
... electrical outlet. • Check your home's circuit breakers or fuses. • Press or tap START/PAUSE again if the door is on. • Clean the lint filter and exhaust duct. • The dryer may be too small to tumble properly. Does not dry. Check the selected cycle again. • For a gas dryer, make sure the gas supply is opened during a cycle. • Clean the lint filter. • Check your home can open and close freely. • Check the exhaust...
... electrical outlet. • Check your home's circuit breakers or fuses. • Press or tap START/PAUSE again if the door is on. • Clean the lint filter and exhaust duct. • The dryer may be too small to tumble properly. Does not dry. Check the selected cycle again. • For a gas dryer, make sure the gas supply is opened during a cycle. • Clean the lint filter. • Check your home can open and close freely. • Check the exhaust...
User Manual
Page 43
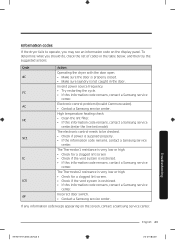
... temperature heating check • Clean the lint filter. • If this information code remains, contact a Samsung service center.(enter the line test mode) The electronic control needs to operate, you should do, check the list of codes in the door. The Thermistor2 resistance is very low or high. • Check for a clogged lint screen • Check if the vent system is not caught in the table below, and then try the suggested actions. Troubleshooting...
... temperature heating check • Clean the lint filter. • If this information code remains, contact a Samsung service center.(enter the line test mode) The electronic control needs to operate, you should do, check the list of codes in the door. The Thermistor2 resistance is very low or high. • Check for a clogged lint screen • Check if the vent system is not caught in the table below, and then try the suggested actions. Troubleshooting...

User Manual
Page 44
... clothing care labels include symbols for detergent activation and eff ective cleaning.) Bleach Any bleach (when needed) Only non-chlorine (color-safe) bleach (when needed) Tumble dry Normal Permanent press/Wrinkle resistant/Wrinkle control Gentle/Delicates Special instructions Line dry/Hang to optimize garment life and reduce laundering problems. Wash cycle Normal Permanent press/Wrinkle resistant/Wrinkle control Gentle/Delicates Hand wash Water temperature Hot Warm Cold NOTE The Water Temperature table lists...
... clothing care labels include symbols for detergent activation and eff ective cleaning.) Bleach Any bleach (when needed) Only non-chlorine (color-safe) bleach (when needed) Tumble dry Normal Permanent press/Wrinkle resistant/Wrinkle control Gentle/Delicates Special instructions Line dry/Hang to optimize garment life and reduce laundering problems. Wash cycle Normal Permanent press/Wrinkle resistant/Wrinkle control Gentle/Delicates Hand wash Water temperature Hot Warm Cold NOTE The Water Temperature table lists...

User Manual
Page 50
... uses for instructions, or fixing installation errors. NOR SHALL RECOVERY OF ANY KIND AGAINST SAMSUNG BE GREATER IN AMOUNT THAN THE PURCHASE PRICE OF THE PRODUCT SOLD BY SAMSUNG AND CAUSING THE ALLEGED DAMAGE. cosmetic damage or exterior finish; product removal and reinstallation; SAMSUNG does not warrant uninterrupted or error-free operation of products, equipment, systems, utilities, services, parts, supplies, accessories, applications, installations, repairs, external wiring or connectors...
... uses for instructions, or fixing installation errors. NOR SHALL RECOVERY OF ANY KIND AGAINST SAMSUNG BE GREATER IN AMOUNT THAN THE PURCHASE PRICE OF THE PRODUCT SOLD BY SAMSUNG AND CAUSING THE ALLEGED DAMAGE. cosmetic damage or exterior finish; product removal and reinstallation; SAMSUNG does not warrant uninterrupted or error-free operation of products, equipment, systems, utilities, services, parts, supplies, accessories, applications, installations, repairs, external wiring or connectors...
User Manual
Page 53
... 12:26:52 This limited warranty does not cover problems resulting from incorrect electric current, voltage or supply, light bulbs, house fuses, house wiring, cost of products, equipment, systems, utilities, services, parts, supplies, accessories, applications, installations, repairs, external wiring or connectors not supplied or authorized by pest infestations. accidents, abuse, neglect, fire, water, lightning, or other acts of nature or God; SAMSUNG SHALL NOT BE LIABLE FOR...
... 12:26:52 This limited warranty does not cover problems resulting from incorrect electric current, voltage or supply, light bulbs, house fuses, house wiring, cost of products, equipment, systems, utilities, services, parts, supplies, accessories, applications, installations, repairs, external wiring or connectors not supplied or authorized by pest infestations. accidents, abuse, neglect, fire, water, lightning, or other acts of nature or God; SAMSUNG SHALL NOT BE LIABLE FOR...


