Ryobi P1816 Support and Manuals
Get Help and Manuals for this Ryobi item

Ryobi P1816 Videos

NEW UPDATED RYOBI ONE+ 18-Volt 6 Piece Combo Kit P1819 & 4 Piece Kit P1818 & 2 Piece Kit P1817 P1816
Duration: 17:49
Total Views: 60,279
Duration: 17:49
Total Views: 60,279
Popular Ryobi P1816 Manual Pages
Operation Manual - Page 2
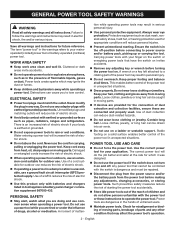
...not overreach. Stable footing on .
Distractions can be repaired.
Disconnect the plug from the power source ...tools create sparks which it on a ladder or unstable support.
Always wear eye protection. Such preventive safety measures reduce...and collection facilities, ensure these instructions to lose control.
Keep cord away from moving parts, breakage of electric shock.
...
Operation Manual - Page 3

...manual. avoid contact.
Secure the workpiece to follow Maintenance instructions may create a risk of injury and fire.
When battery pack is the result of fire when used with another . Blades that is important to support... to climb out of control.
Never use only identical replacement parts. Use of the blade can be avoided by insulated gripping surfaces only...
Operation Manual - Page 4

...blow. therefore, they must be serviced before placing saw blade is .... English Unsharpened or improperly set blades produce narrow kerf causing... personal injury.
Save these instructions also.
4 - Following this rule ...platform. Refer to them to damaged parts, gummy deposits, or a build-...in its path. Supports must be retracted manually only for the blade to...
Operation Manual - Page 5
... product.
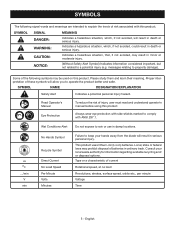
Local, state or federal laws may prohibit disposal of injury, user must read and understand operator's manual before using this product. SYMBOLS
The following symbols may be used on this product. Read Operator's Manual
To reduce the risk of batteries in death or serious injury.
English Consult your hands away from...
Operation Manual - Page 6
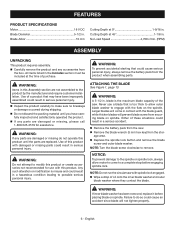
...product by the manufacturer and require customer installation. English n Carefully remove the product and any parts are replaced. WARNING:
If any parts are not assembled to possible serious personal...the product. WARNING:
A 5-1/2 in . n Wipe a drop of purchase. FEATURES
PRODUCT SPECIFICATIONS
Motor 18 V DC Blade Diameter 5-1/2 in . Any such alteration or modification is the ...
Operation Manual - Page 7
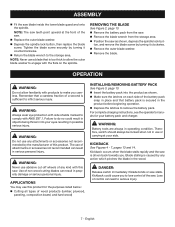
...For complete charging instructions, see the operator's manuals for the purposes listed below: Cutting all types of wood products (lumber, plywood,
paneling, composition board, and hard wood)
INSTALLING/REMOVING BATTERY ...a blade that is driven back towards you to serious injury.
7 -
English n Replace the outer blade washer. NOTE: Never use abrasive cut-off wheels of control can...
Operation Manual - Page 8

...and properly set. The depth
setting should occur. This helps prevent twisting the blade. Use clean, sharp, and properly set
blade. Supporting the ...repaired or replaced. If it for damage at the correct depth setting. LOCK-OFF BUTTON
See Figure 9, page 14. To lessen the chance of accidental starting.
The lock resets each use a straight edge guide...
Operation Manual - Page 9

... to 1 in this section to
your side. Support the workpiece near the cut. Clamp the workpiece securely so that the cut (kerf) is supported,
not the "cut off" piece. Place the...° bevel cuts. Make a trial cut before setting the saw . Use a guide when making long or wide rip cuts with the inner blade guide notch on
the base when making a cross cut or rip ...
Operation Manual - Page 10
... direction could lead to serious injury.
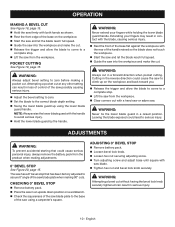
POCKET CUTTING
See Figure 19, page 15. WARNING:
Always adjust bevel setting to zero before making 90° cuts.
The saw has a 0° bevel stop .
... on the workpiece. Start the saw and let the blade reach full speed. Guide the saw into the workpiece and make the cut. Release the trigger and allow the blade...
Operation Manual - Page 11
... etc.
WARNING:
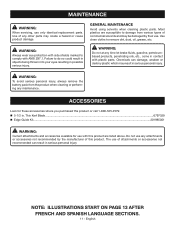
Do not at any maintenance. MAINTENANCE
WARNING:
When servicing, use of attachments or accessories not recommended can damage, weaken or ...Guide Kit...201985001
WARNING:
Current attachments and accessories available for these accessories where you purchased this product or call 1-800-525-2579: 5-1/2 in.
The use only identical replacement parts...
Parts Diagram - Page 3

... repair parts. Always mention the model number in . (140 mm) CIRCULAR SAW - ITEM NUMBER P505
The model number will be found on a label attached to the motor housing.
Key Nos. 30-33 1 Screw (M6 x 12 mm, Pan Hd 1 Screw (M4 x 16 mm, Pan Hd 1 Hex Nut (M4 1 Bevel Lock Knob 1 Not Shown Operator's Manual
3 KEY PART...
Parts Diagram - Page 5
...6
270016162
7
560219006
8
305003001
9
660208049
10
660212004
11
670030004
12
230163006
13
304522001
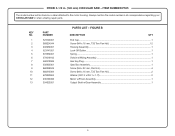
PARTS LIST - FIGURE B
DESCRIPTION
QTY
End Cap...1 Screw (M4 x 16 mm, T20 ...ID4.1 x 1.1t 2 Motor w/Pinion Assembly 1 Output Shaft w/Gear Assembly 1
5 KEY
PART
NO.
ITEM NUMBER P505
The model number will be found on a label attached to the motor housing. RYOBI 5-1/2 in all...
Ryobi P1816 Reviews
We have not received any reviews for Ryobi yet.