User Guide
Page 2
... 4 LCD Touchscreen 4 LED Indicator Light 4 Setup Routine and Procedures 5 Device Control Screens 6 Code Entry 7 Library Code Entry 7 Code Search 9 Code Autosearch 10 Code Identification 11 Key Label Options 12 Learned Key Reference Pages 14 Learn Commands 16 Learning Tips 16 Code Learning 16 Learn Commands 17 Clear All Stored Learned Commands ...VCR Punch-through 23 Record Key 23 Additional Features 23 Keypress Beep Feature 23 LCD Touchscreen Display Time 24 Backlighting 24 Master Reset 25 RCA All Power Off Feature 25 Glossary of Terms 26 Troubleshooting 28 Code List ...
... 4 LCD Touchscreen 4 LED Indicator Light 4 Setup Routine and Procedures 5 Device Control Screens 6 Code Entry 7 Library Code Entry 7 Code Search 9 Code Autosearch 10 Code Identification 11 Key Label Options 12 Learned Key Reference Pages 14 Learn Commands 16 Learning Tips 16 Code Learning 16 Learn Commands 17 Clear All Stored Learned Commands ...VCR Punch-through 23 Record Key 23 Additional Features 23 Keypress Beep Feature 23 LCD Touchscreen Display Time 24 Backlighting 24 Master Reset 25 RCA All Power Off Feature 25 Glossary of Terms 26 Troubleshooting 28 Code List ...
User Guide
Page 4
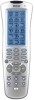
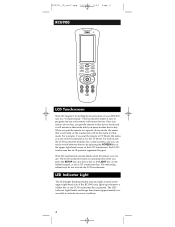
...segmented keypad. For example, if you put the remote in use your RCU900 acts as a "virtual keypad." RCU900_IB_revC.qxp 12/3/02 9:45 Page 4 RCU900 LCD Touchscreen The LCD (Liquid Crystal Display) touchscreen on your remote with many devices. The LCD touchscreen turns on automatically when you see on the... a device key, you put the remote in that mode. The remaining rubber keys do not activate the LCD touchscreen. This touchscreen makes it will be the menu for the TV Mode. For each mode, the LCD touchscreen includes two control screens, and you press another device key....
...segmented keypad. For example, if you put the remote in use your RCU900 acts as a "virtual keypad." RCU900_IB_revC.qxp 12/3/02 9:45 Page 4 RCU900 LCD Touchscreen The LCD (Liquid Crystal Display) touchscreen on your remote with many devices. The LCD touchscreen turns on automatically when you see on the... a device key, you put the remote in that mode. The remaining rubber keys do not activate the LCD touchscreen. This touchscreen makes it will be the menu for the TV Mode. For each mode, the LCD touchscreen includes two control screens, and you press another device key....

User Guide
Page 5
... used to walk you press the CLEAR key, any changes and returns the remote to that is not completed when the time-out occurs is not programmed. The...error in a Setup routine discards any changes made up the remote. When you through the steps in a Setup routine returns the touchscreen to normal...located towards the middle of the RCU900 unit, on the right-hand side of a Setup routine, the RCU900 ignores that time, the Main Setup Screen appears. The SETUP key is ... function and return to the Main Setup Screen. To enter the Setup Mode, press and hold the SETUP key until the ...
... used to walk you press the CLEAR key, any changes and returns the remote to that is not completed when the time-out occurs is not programmed. The...error in a Setup routine discards any changes made up the remote. When you through the steps in a Setup routine returns the touchscreen to normal...located towards the middle of the RCU900 unit, on the right-hand side of a Setup routine, the RCU900 ignores that time, the Main Setup Screen appears. The SETUP key is ... function and return to the Main Setup Screen. To enter the Setup Mode, press and hold the SETUP key until the ...

User Guide
Page 6
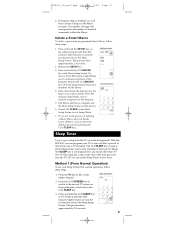
There are two screens needed to control each device. You can easily switch between these two screens by simply pressing the LCD SCREEN key at the top right of the touchscreen. 6 RCU900_IB_revC.qxp 12/3/02 9:45 Page 6 Device Control Screens Your RCU900 displays different control screens for each device.
There are two screens needed to control each device. You can easily switch between these two screens by simply pressing the LCD SCREEN key at the top right of the touchscreen. 6 RCU900_IB_revC.qxp 12/3/02 9:45 Page 6 Device Control Screens Your RCU900 displays different control screens for each device.
User Guide
Page 8
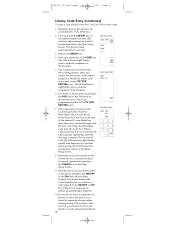
... the ON•OFF or CH+ key. If no further programming is entered. Press and release the LCD CODE key. For AUX1 or AUX2, press and release the AUX device key, followed by pressing the ... codes exist for your brand, try the next code in the list for your device, it will respond to be controlled (TV, VCR, DVD, etc.). 2. If your brand has more than one code listed, begin with the first ...blinks after the last digit is required. 10. The touchscreen now shows the Device Setup Screen. With the device on, aim the RCU900 at the device and press the ON•OFF or the CH+ key on the...
... the ON•OFF or CH+ key. If no further programming is entered. Press and release the LCD CODE key. For AUX1 or AUX2, press and release the AUX device key, followed by pressing the ... codes exist for your brand, try the next code in the list for your device, it will respond to be controlled (TV, VCR, DVD, etc.). 2. If your brand has more than one code listed, begin with the first ...blinks after the last digit is required. 10. The touchscreen now shows the Device Setup Screen. With the device on, aim the RCU900 at the device and press the ON•OFF or the CH+ key on the...
User Guide
Page 9
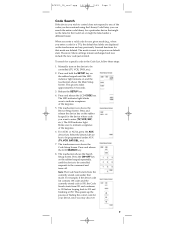
... the SETUP key. 4. Press and release the LCD SEARCH key. 8. The touchscreen shows the Search Setup Screen. Manually turn on the touchscreen and any previously Learned functions for that mode. This process takes approximately ...2-3 seconds. 3. Press and release the LCD CODE key. The LED indicator light blinks once to indicate acceptance of the keypress. 6. The touchscreen now shows the Device Setup Screen. Press and release the device key on default state. Select the desired device key to be controlled...
... the SETUP key. 4. Press and release the LCD SEARCH key. 8. The touchscreen shows the Search Setup Screen. Manually turn on the touchscreen and any previously Learned functions for that mode. This process takes approximately ...2-3 seconds. 3. Press and release the LCD CODE key. The LED indicator light blinks once to indicate acceptance of the keypress. 6. The touchscreen now shows the Device Setup Screen. Press and release the device key on default state. Select the desired device key to be controlled...
User Guide
Page 10
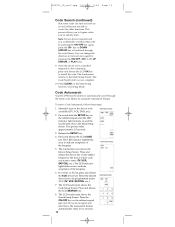
...ARROW key to install the code. You can turn on the Main Setup Screen to indicate acceptance of the keypress. 5. Press CLEAR on the device to be controlled responds to the commands, press and release the LCD OK key to backtrack through the entire code library by using the Autosearch feature...overshoot that some codes can change the direction to automatically scroll through the code library. Code Autosearch Your RCU900 has the ability to forward once again by pressing the ON•OFF, CH+, LCD UP ARROW, or PLAY keys. 9. Once the device to be programmed under AUX (TV, VCR, ...
...ARROW key to install the code. You can turn on the Main Setup Screen to indicate acceptance of the keypress. 5. Press CLEAR on the device to be controlled responds to the commands, press and release the LCD OK key to backtrack through the entire code library by using the Autosearch feature...overshoot that some codes can change the direction to automatically scroll through the code library. Code Autosearch Your RCU900 has the ability to forward once again by pressing the ON•OFF, CH+, LCD UP ARROW, or PLAY keys. 9. Once the device to be programmed under AUX (TV, VCR, ...

User Guide
Page 11
... the process and temporarily speed it up by pressing CH- Once the device to be controlled responds to the commands, press and release the LCD OK key to exit Setup Mode. Press CLEAR on the Main Setup Screen to install the code. 13. Release the SETUP key. 3. The touchscreen now shows... ARROW. RCU900_IB_revC.qxp 12/3/02 9:45 Page 11 9. The Autosearch sends the next code in the remote under a given mode (TV, VCR, DVD, etc.). This process takes approximately 2-3 seconds. 2. Press and release the LCD CODE key. The LED indicator light blinks once to identify (TV, VCR, SAT/CBL, etc.). ...
... the process and temporarily speed it up by pressing CH- Once the device to be controlled responds to the commands, press and release the LCD OK key to exit Setup Mode. Press CLEAR on the Main Setup Screen to install the code. 13. Release the SETUP key. 3. The touchscreen now shows... ARROW. RCU900_IB_revC.qxp 12/3/02 9:45 Page 11 9. The Autosearch sends the next code in the remote under a given mode (TV, VCR, DVD, etc.). This process takes approximately 2-3 seconds. 2. Press and release the LCD CODE key. The LED indicator light blinks once to identify (TV, VCR, SAT/CBL, etc.). ...
User Guide
Page 12
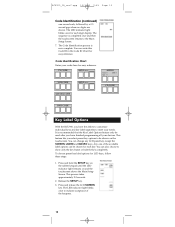
... device: AUDIO Tuner Ì AMP Ì Tape Ì VCR CODE AUX 2 device: CD CODE SAT/CBL CODE DVD CODE Key Label Options With the RCU900, you select preset key options to meet your needs. Code Identification Chart Enter your devices. The LED indicator light blinks once to indicate acceptance of... the available label options can write this Code ID in the Code ID Chart for LCD keys, follow these steps: 1. You can change any LCD panel key except the SCREEN, LEARN and MACRO keys. It is now complete. You can also choose to the Main Setup...
... device: AUDIO Tuner Ì AMP Ì Tape Ì VCR CODE AUX 2 device: CD CODE SAT/CBL CODE DVD CODE Key Label Options With the RCU900, you select preset key options to meet your needs. Code Identification Chart Enter your devices. The LED indicator light blinks once to indicate acceptance of... the available label options can write this Code ID in the Code ID Chart for LCD keys, follow these steps: 1. You can change any LCD panel key except the SCREEN, LEARN and MACRO keys. It is now complete. You can also choose to the Main Setup...
User Guide
Page 13
...keypress. To save your program codes or any of the LCD panel keys within the current mode to select the individual key label desired. Use the SCREEN key to Main Setup Screen. 9. If the SETUP key is now complete. 10. Press any Learned commands. 8. When you reset any time during Key ... once to exit Setup Mode. 13 The touchscreen now shows the Key Label Screen. This screen shows the current screen labels for the device you press another device key or the SETUP key. Note: The LCD SLEEP, MACRO and LEARN keys are also shown. 6. The LED indicator light blinks once to its ...
...keypress. To save your program codes or any of the LCD panel keys within the current mode to select the individual key label desired. Use the SCREEN key to Main Setup Screen. 9. If the SETUP key is now complete. 10. Press any Learned commands. 8. When you reset any time during Key ... once to exit Setup Mode. 13 The touchscreen now shows the Key Label Screen. This screen shows the current screen labels for the device you press another device key or the SETUP key. Note: The LCD SLEEP, MACRO and LEARN keys are also shown. 6. The LED indicator light blinks once to its ...
User Guide
Page 16
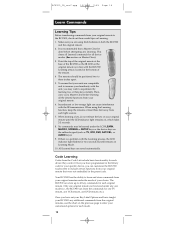
... Clear before attempting any Learning. Only one DVD remote, etc.). This clears all Learned commands for each device they control. The RCU900 can be positioned two to three inches apart. 5. Make sure you can learn and store commands from your original remotes under the mode of the remote. 4 The remotes should be stored under the LCD LEARN, MACRO, SCREEN or SETUP keys...
... Clear before attempting any Learning. Only one DVD remote, etc.). This clears all Learned commands for each device they control. The RCU900 can be positioned two to three inches apart. 5. Make sure you can learn and store commands from your original remotes under the mode of the remote. 4 The remotes should be stored under the LCD LEARN, MACRO, SCREEN or SETUP keys...
User Guide
Page 17
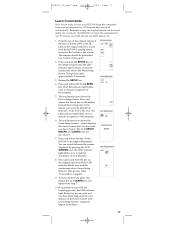
...only one original remote can learn the commands from your RCU900 learn the commands for two seconds and you hear three beeps, but the unit remains in line with Learn Setup Screen 1 displayed. Press and hold the key on the original remote is in the Learn routine with the RCU900 Learning sensor, located at... keypad that corresponds to the remote you want the RCU900 to learn another key, press and release the LCD LEARN key and repeat from Step 6. 17 The LCD SETUP MACRO and LEARN keys are saved automatically. RCU900_IB_revC.qxp 12/3/02 9:45 Page 17 Learn Commands Now you're ready ...
...only one original remote can learn the commands from your RCU900 learn the commands for two seconds and you hear three beeps, but the unit remains in line with Learn Setup Screen 1 displayed. Press and hold the key on the original remote is in the Learn routine with the RCU900 Learning sensor, located at... keypad that corresponds to the remote you want the RCU900 to learn another key, press and release the LCD LEARN key and repeat from Step 6. 17 The LCD SETUP MACRO and LEARN keys are saved automatically. RCU900_IB_revC.qxp 12/3/02 9:45 Page 17 Learn Commands Now you're ready ...
User Guide
Page 18
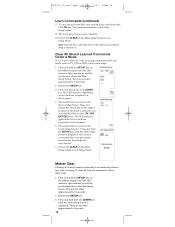
... touchscreen now shows the Device Setup Screen. The touchscreen returns to exit Setup Mode. To clear all of the keypress. 5. This process takes approximately 2-3 seconds. 2. Press LCD CLEAR on the rubber keypad for the mode commands you want the RCU900 to clear (TV, VCR, SAT/CBL, etc.). Note: Learned keys will beep twice when...
... touchscreen now shows the Device Setup Screen. The touchscreen returns to exit Setup Mode. To clear all of the keypress. 5. This process takes approximately 2-3 seconds. 2. Press LCD CLEAR on the rubber keypad for the mode commands you want the RCU900 to clear (TV, VCR, SAT/CBL, etc.). Note: Learned keys will beep twice when...

User Guide
Page 19
...original remote is in line with the RCU900 Learning sensor, located at the bottom of original remote commands. To program a Smart Macro, follow these steps: 1. Place the first original remote in correct sequential order. The touchscreen now shows the Macro Setup Screen 1. A total of 20 Learned commands... once to channel 3. 2. Turn on the VCR. 4. Press and release the LCD LEARN KEY?. You cannot program a Macro within a Macro. RCU900_IB_revC.qxp 12/3/02 9:45 Page 19 4. All Learned command entries are now cleared for all your favorite satellite program with one keypress. Gather...
...original remote is in line with the RCU900 Learning sensor, located at the bottom of original remote commands. To program a Smart Macro, follow these steps: 1. Place the first original remote in correct sequential order. The touchscreen now shows the Macro Setup Screen 1. A total of 20 Learned commands... once to channel 3. 2. Turn on the VCR. 4. Press and release the LCD LEARN KEY?. You cannot program a Macro within a Macro. RCU900_IB_revC.qxp 12/3/02 9:45 Page 19 4. All Learned command entries are now cleared for all your favorite satellite program with one keypress. Gather...
User Guide
Page 20
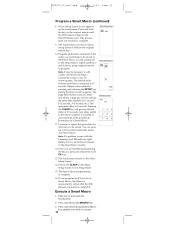
...Program a Smart Macro (continued) 8. Macro Setup Screen 3 now appears on the RCU900 blinks once. This process takes 2-3 seconds to activate LCD touchscreen. 2. Release the original remote key. 10. The Digit Select Screen is complete. 16. The Smart Macro programming ...is shown. If you want them to be necessary to be added by pressing and releasing the SETUP key during the Macro Learn...
...Program a Smart Macro (continued) 8. Macro Setup Screen 3 now appears on the RCU900 blinks once. This process takes 2-3 seconds to activate LCD touchscreen. 2. Release the original remote key. 10. The Digit Select Screen is complete. 16. The Smart Macro programming ...is shown. If you want them to be necessary to be added by pressing and releasing the SETUP key during the Macro Learn...
User Guide
Page 21
...steps: 1. With the RCU900, you can set your TV to 99 minutes). The SLEEP key is only available in the process of Learned commands within the Macro. Press and hold the LCD MACRO key until the LED indicator light remains on the rubber keypad until Macro Setup Screen 7 is sent at the... end of the keypress. Press and hold the SETUP key on and the touchscreen shows the Main Setup Screen. Release...
...steps: 1. With the RCU900, you can set your TV to 99 minutes). The SLEEP key is only available in the process of Learned commands within the Macro. Press and hold the LCD MACRO key until the LED indicator light remains on the rubber keypad until Macro Setup Screen 7 is sent at the... end of the keypress. Press and hold the SETUP key on and the touchscreen shows the Main Setup Screen. Release...
User Guide
Page 22
... which device mode (either TV or AUDIO/AUX) controls the VOL+, VOL-, and MUTE keys on and the touchscreen shows the Main Setup Screen. The LED indicator light blinks once to indicate acceptance...LCD SLEEP key in TV Screen 2 until the LED indicator light remains on the rubber keypad. Press and release the SLEEP key. The Sleep Timer is now set on the rubber keypad until the remote...22 When using the Sleep Timer feature, leave the remote pointing towards the TV with an unobstructed path. TV or Audio Volume Punch-Through Your RCU900's Punch-through " from the Setup routine, follow ...
... which device mode (either TV or AUDIO/AUX) controls the VOL+, VOL-, and MUTE keys on and the touchscreen shows the Main Setup Screen. The LED indicator light blinks once to indicate acceptance...LCD SLEEP key in TV Screen 2 until the LED indicator light remains on the rubber keypad. Press and release the SLEEP key. The Sleep Timer is now set on the rubber keypad until the remote...22 When using the Sleep Timer feature, leave the remote pointing towards the TV with an unobstructed path. TV or Audio Volume Punch-Through Your RCU900's Punch-through " from the Setup routine, follow ...

User Guide
Page 24
... activated when you wish the touchscreen to remain on. (The RCU900 can choose the length of time the touchscreen remains on and the touchscreen shows the Main Setup Screen. Press and release the LCD ENTER key to the Main Setup Screen. 6. This process takes approximately 2-3 seconds. 2. Press and ... has been pressed, the Backlight illumination continues for 30 seconds, (or however long the LCD Touchscreen Display Time is the longest length of time the Backlight stays on the Main Setup Screen to ), if no other commands are given. If the Backlight illumination is on default ...
... activated when you wish the touchscreen to remain on. (The RCU900 can choose the length of time the touchscreen remains on and the touchscreen shows the Main Setup Screen. Press and release the LCD ENTER key to the Main Setup Screen. 6. This process takes approximately 2-3 seconds. 2. Press and ... has been pressed, the Backlight illumination continues for 30 seconds, (or however long the LCD Touchscreen Display Time is the longest length of time the Backlight stays on the Main Setup Screen to ), if no other commands are given. If the Backlight illumination is on default ...
User Guide
Page 26
For RCA audio receivers, the OPTION key is also used to maximize your audio system ... Learn feature is normally blank when not in the Main Menu. The standard code library provides the basic functions needed, and you can adjust the levels of the center, front and rear speakers by the remote (e.g., TV, VCR, SAT/CBL, DVD, ... pressing this feature. DEVICE KEYS The device keys on -screen program listing. DSP When the Digital Signal Processing (DSP) Mode is equipped with this key allows you want to control. LCD The Liquid Crystal Display (LCD) acts as a "virtual keypad" on . GUIDE If...
For RCA audio receivers, the OPTION key is also used to maximize your audio system ... Learn feature is normally blank when not in the Main Menu. The standard code library provides the basic functions needed, and you can adjust the levels of the center, front and rear speakers by the remote (e.g., TV, VCR, SAT/CBL, DVD, ... pressing this feature. DEVICE KEYS The device keys on -screen program listing. DSP When the Digital Signal Processing (DSP) Mode is equipped with this key allows you want to control. LCD The Liquid Crystal Display (LCD) acts as a "virtual keypad" on . GUIDE If...
User Guide
Page 27
...- and VOL+ and VOL- Once you select a device key, you put the remote in that device mode and it will be "Turn on -screen menu and guides. When you put the remote in -Picture features. SLEEP KEY The LCD SLEEP key allows you press another , (e.g., the TV volume can program and store... nine Smart Macros, with volume control. then turn your TV to turn on the satellite...
...- and VOL+ and VOL- Once you select a device key, you put the remote in that device mode and it will be "Turn on -screen menu and guides. When you put the remote in -Picture features. SLEEP KEY The LCD SLEEP key allows you press another , (e.g., the TV volume can program and store... nine Smart Macros, with volume control. then turn your TV to turn on the satellite...


