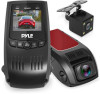
Pyle PLDVRCAM74 Support and Manuals
Get Help and Manuals for this Pyle item
View All Support Options Below
Free Pyle PLDVRCAM74 manuals!
Problems with Pyle PLDVRCAM74?
Ask a Question
Free Pyle PLDVRCAM74 manuals!
Problems with Pyle PLDVRCAM74?
Ask a Question
Popular Pyle PLDVRCAM74 Manual Pages
Instruction Manual - Page 3

... get 11 Microphone Rreeacroimrdaaguedio with OK. Press UP and DOWN to select options and confirm with microphone while recording
12
Micro SD Memory Card Slot
Supports 32G MAX
13 RESET
Press to restart in the menu
4 REC/UP
MIC / 5 DOWN /
MODE
6 REC LED
Press to select upwards...
Instruction Manual - Page 6

... remove memory card while the device is powered on Page 9. Connecting the charger to the car's 12V DC outlet Be sure to 32GB. The recorder supports Micro SD cards with your device.
5. For reliable operation, use a Class 10 memory card with a capacity of up to connect only the PLDVRCAM74 approved charger...
Instruction Manual - Page 7

Using unapproved chargers or cables can be used to an authorized Service Center. Allow a depleted battery to charge for a few minutes before ... the device's performance or lifespan. • If the device is not charging properly, take longer to do so manually by misuse is charging, although it is completely discharged, the device will automatically power o after 5 seconds. Please always...
Instruction Manual - Page 12

... OK to con rm your entry 6. Press OK to view the current ON/OFF status for this feature 4. Press MENU to exit Video Settings
WDR WIDE DYNAMIC RANGE Recommend Setting: On When enabled, this
feature 5. Press OK to improve recording quality in particularly bright or dim environments, providing balanced lighting and clearer...
Instruction Manual - Page 15

...Press the UP or DOWN button to enter Video Settings 2. Press MENU to exit Video Settings
SYSTEM SETTINGS Date/ Time Setup Use the following procedure to change the device's ...Settings 2. Press MENU twice to the "Date/Time"
option 3. GRAVITY SENSING Recommend Setting: Low This feature acts as an accelerometer, measuring physical and gravitational forces acting on the memory card until manually...
Instruction Manual - Page 16

...DOWN button to make your entry
Beep Sound This setting allows you to enable or disable this feature 4. Press the UP or DOWN button to navigate to enter Setup 2. Auto Power O When enabled, this option ...Press MENU to con rm your entry
16 www.PyleUSA.com 5. Press OK again to exit System Settings
Note: If the battery remains fully discharged or is not engaged.
1. Press MENU twice to the...
Instruction Manual - Page 17

... to the power supply speci cation used in your choice
TV Mode Recommend Setting: NTSC This feature will setup video output format.
1. Press MENU twice to view the current selection: 50Hz / 60Hz 4. option 3. Press OK to enter System Settings 2. Press MENU twice to the "TV
Mode" option 3. Press the UP or DOWN button...
Instruction Manual - Page 18

5. Press OK to con rm your selection 5. Press MENU to enter System Settings 2. Press OK to con rm your entry 6. Press OK to view YES / NO con rmation for this option, please follow instructions for installing the latest rmware update.)
1. Press OK to con rm your entry 6. Note: any les in the memory card will...
Instruction Manual - Page 19

... hold OK to their original values.
Press OK to stop recording 2. Press MENU to exit System Settings
Playback Mode You can use a hot key shortcut for this operation will be lost.
1. Press ...to make your device using the following steps:
1. Press the UP or DOWN button to exit System Settings
Alternatively, you can play back recorded video on or o . Press OK to the "Screen Saver" ...
Instruction Manual - Page 20

... playback speed ( 2X / 4X / 8X ) 8. FAST FORWARD: While video is playing, press the DOWN button one or more times to set reverse playback speed ( -2X / -4X / -8X )
Deleting Files To delete one or more times to view options for the selected video 5. Press the DOWN button ...
Instruction Manual - Page 21

... for automatically capturing images.
1. Press OK to capture an image
Capture Mode With this feature you to make your selection 6. Press OK to exit Photo Settings 8. Press OK to con rm your entry 7. Press MENU to view current selection:
12M 4032x3024, 10M 3648x2736, etc. 5. Press the UP or DOWN button to...
Instruction Manual - Page 22

... 4. Press OK to enter Photo Mode 2. Press OK once to capture a 3-photo sequence
Quality This option allows you to make your selection 6. Press OK to set the quality level of 3 quick photos with one button press.
1. Press the UP or DOWN button to capture a sequence of captured images. (Lower quality images...
Instruction Manual - Page 23

... your entry 7. Press OK to con rm your entry 7. Press MODE once to exit Photo Settings 8. Press MENU to enter Photo Mode 2. Press OK to capture an image
White Balance This setting allows you to enter Photo Settings 3. Press MENU once to adjust the lighting balance for different environments. Press the...
Instruction Manual - Page 24

... Black & White / Sepia 5. Press MENU once to con rm your entry 7. Press OK to enter Photo Settings 3. Press MENU to con rm your entry 7. Press the UP or DOWN button to make your selection 6.... Press the UP or DOWN button to exit Photo Settings 8. Press OK to exit Photo Settings 8. Press the UP or DOWN button to navigate to light when taking photos....
Instruction Manual - Page 25

... Press OK to make your selection 6. Press the UP or DOWN button to view the current selection: +0.0, +1/3, -1/3, etc. 5. Press OK to the "Color"
option 4. The "+0.0" setting is recommended.
1. Press the UP or DOWN button to navigate to con rm your entry 7. Press the UP or DOWN button to navigate to enter...
Pyle PLDVRCAM74 Reviews
We have not received any reviews for Pyle yet.