
Owner's Manual
Page 6
... Started Making settings using the Setup Navigator menu . . . . 19 Operating the TV with the player's remote control . . . . 20 TV Preset code list 21 Using the TOOLS menu 21 Switching the video output terminal to be viewed . . . . 22 Switching the output video resolution 22 06 Advanced ...Switching the camera angles 25 Switching the subtitles 25 Switching the audio and secondary audio 26 Switching the secondary video 26 Displaying the disc information 26 Playback functions 27 Using the Play Mode functions 28 Playing from a specific time (Time Search 28 Playing a specific...
... Started Making settings using the Setup Navigator menu . . . . 19 Operating the TV with the player's remote control . . . . 20 TV Preset code list 21 Using the TOOLS menu 21 Switching the video output terminal to be viewed . . . . 22 Switching the output video resolution 22 06 Advanced ...Switching the camera angles 25 Switching the subtitles 25 Switching the audio and secondary audio 26 Switching the secondary video 26 Displaying the disc information 26 Playback functions 27 Using the Play Mode functions 28 Playing from a specific time (Time Search 28 Playing a specific...
Owner's Manual
Page 14
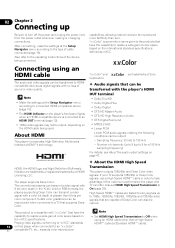
...trademarks or registered trademarks of the maximum performance the player and TV can offer. Note • Make the settings at the Setup Navigator menu according to 6 for a 192 kHz sampling frequency) For details, see About the audio output settings on the HDMI cable being connected. This ...product is connected to realize a wide-gamut color space based on the player's front panel lights when...
...trademarks or registered trademarks of the maximum performance the player and TV can offer. Note • Make the settings at the Setup Navigator menu according to 6 for a 192 kHz sampling frequency) For details, see About the audio output settings on the HDMI cable being connected. This ...product is connected to realize a wide-gamut color space based on the player's front panel lights when...

Owner's Manual
Page 17
... 22). About USB (external storage) devices • Video signals are output with a built-in the Setup Navigator menu according to the TV using a component video cable, video signals are as shown below. • USB 2.0-compatible memory...if connected to an AV receiver or amplifier. Connecting a TV using a video/audio cable • After connecting, set Audio Output Mode to a 5.1-channel compatible AV receiver or amplifier - Player's rear panel Video/audio cable (included) Audio cable (commercially available) Audio cable (commercially available) Audio cable (commercially available)...
... 22). About USB (external storage) devices • Video signals are output with a built-in the Setup Navigator menu according to the TV using a component video cable, video signals are as shown below. • USB 2.0-compatible memory...if connected to an AV receiver or amplifier. Connecting a TV using a video/audio cable • After connecting, set Audio Output Mode to a 5.1-channel compatible AV receiver or amplifier - Player's rear panel Video/audio cable (included) Audio cable (commercially available) Audio cable (commercially available) Audio cable (commercially available)...

Owner's Manual
Page 19
...Setup Navigator BD PLAYER Please select the on the TV's power and switch the input. Note • When a Pioneer Flat Panel TV or front projector compatible with the KURO LINK function, set to the optimum picture quality for the first time. 3 Select the OSD language. Setting item Output... VIDEO or VIDEO is automatically set KURO LINK to On on the player's power. Select the actually connected video and audio output terminals. Follow the procedure below to display the Home Menu, select Initial Setup Setup Navigator Start, then press ENTER. Use to select, then...
...Setup Navigator BD PLAYER Please select the on the TV's power and switch the input. Note • When a Pioneer Flat Panel TV or front projector compatible with the KURO LINK function, set to the optimum picture quality for the first time. 3 Select the OSD language. Setting item Output... VIDEO or VIDEO is automatically set KURO LINK to On on the player's power. Select the actually connected video and audio output terminals. Follow the procedure below to display the Home Menu, select Initial Setup Setup Navigator Start, then press ENTER. Use to select, then...

Owner's Manual
Page 20
... cables (7.1 channels or 2 channels), an optical digital audio cable (page 17). 11 Finish the Setup Navigator menu. Press the number buttons (0 to 9) to the settings below. When connecting using the player's remote control. 7 Select the aspect ratio of the Video ENTER. To listen to audio with ... the COMPONENT VIDEO output terminals. player and HDMI is output. When the automatic picture quality setting screen does 5 Select and set to input the code while 9 Check the settings. Use / to an To redo the settings from the HDMI OUT or If a Pioneer Flat Panel TV or...
... cables (7.1 channels or 2 channels), an optical digital audio cable (page 17). 11 Finish the Setup Navigator menu. Press the number buttons (0 to 9) to the settings below. When connecting using the player's remote control. 7 Select the aspect ratio of the Video ENTER. To listen to audio with ... the COMPONENT VIDEO output terminals. player and HDMI is output. When the automatic picture quality setting screen does 5 Select and set to input the code while 9 Check the settings. Use / to an To redo the settings from the HDMI OUT or If a Pioneer Flat Panel TV or...

Owner's Manual
Page 23
... recorded on the player's front panel display. The video output terminal set an output video resolution at which the video and audio signals are properly output. • The output video resolution setting can also be output at Video in the Setup Navigator (page 19) or the video output terminal selected with a resolution of the currently playing disc Output Video Resolution...
... recorded on the player's front panel display. The video output terminal set an output video resolution at which the video and audio signals are properly output. • The output video resolution setting can also be output at Video in the Setup Navigator (page 19) or the video output terminal selected with a resolution of the currently playing disc Output Video Resolution...

Owner's Manual
Page 34
Video Adjust PDP Adjustments • Pioneer PDP - Select this when connected to a plasma TV of another brand. • Projector - For a description of the white portions. • Black Level - Video Adjust [ Memory1 ] Prog. The detailed settings screen reappears when ENTER is effective mainly when outputting video materials as the setup level. Motion Motion Still •...
Video Adjust PDP Adjustments • Pioneer PDP - Select this when connected to a plasma TV of another brand. • Projector - For a description of the white portions. • Black Level - Video Adjust [ Memory1 ] Prog. The detailed settings screen reappears when ENTER is effective mainly when outputting video materials as the setup level. Motion Motion Still •...

Owner's Manual
Page 35
...menu. Video signals recorded at Speaker Setup cannot be weak for Dolby TrueHD signals, depending on the content. Analog audio signals output from AUDIO OUT. • This cannot be adjusted within the range of -6.0 dB to +6.0 dB. Output Terminal is displayed on the disc information screen when playing the "film... disabled when Pure Cinema is set to On. • Black Setup has the effect only for pictures output from the VIDEO output terminals. • YNR, CNR, BNR and MNR have no effect on 1080/24p video signals output from the HDMI OUT terminal. Closing the Video Adjust screen...
...menu. Video signals recorded at Speaker Setup cannot be weak for Dolby TrueHD signals, depending on the content. Analog audio signals output from AUDIO OUT. • This cannot be adjusted within the range of -6.0 dB to +6.0 dB. Output Terminal is displayed on the disc information screen when playing the "film... disabled when Pure Cinema is set to On. • Black Setup has the effect only for pictures output from the VIDEO output terminals. • YNR, CNR, BNR and MNR have no effect on 1080/24p video signals output from the HDMI OUT terminal. Closing the Video Adjust screen...

Owner's Manual
Page 37
...even if Pan & Scan is set to16:9 (Widescreen). Chapter 6 06 Advanced settings Changing the settings Operating the Initial Setup screen CLEAR SECONDARY AUDIO VIDEO ENTER OUTPUT RESOLUTION VIDEO SELECT PLAY MODE HOME MEDIA GALLERY DISPLAY POPUP MENU MENU TOP MENU TOOLS HOME MENU ENTER RETURN PLAY PREV PAUSE... the entire screen, with the left and right sides of DVD-Video or DVD-R/-RW (VR format) discs. Video Out Note • Items that can be selected depend on the player's status. • In Options, the factory default settings are displayed with black bars at the top ...
...even if Pan & Scan is set to16:9 (Widescreen). Chapter 6 06 Advanced settings Changing the settings Operating the Initial Setup screen CLEAR SECONDARY AUDIO VIDEO ENTER OUTPUT RESOLUTION VIDEO SELECT PLAY MODE HOME MEDIA GALLERY DISPLAY POPUP MENU MENU TOP MENU TOOLS HOME MENU ENTER RETURN PLAY PREV PAUSE... the entire screen, with the left and right sides of DVD-Video or DVD-R/-RW (VR format) discs. Video Out Note • Items that can be selected depend on the player's status. • In Options, the factory default settings are displayed with black bars at the top ...

Owner's Manual
Page 38
... AUDIO Variable OUT terminals. OUT terminal. With BD-ROMs, the secondary audio and interactive audio are output. The AAC audio signals are mixed for output. Speaker Setup When an AV receiver or amplifier, etc., is connected to the player's AUDIO OUT terminals, set * Only valid for the AUDIO whether or not speakers are converted...
... AUDIO Variable OUT terminals. OUT terminal. With BD-ROMs, the secondary audio and interactive audio are output. The AAC audio signals are mixed for output. Speaker Setup When an AV receiver or amplifier, etc., is connected to the player's AUDIO OUT terminals, set * Only valid for the AUDIO whether or not speakers are converted...

Owner's Manual
Page 42
... be selected when Audio Output Mode is set to select, then press ENTER. • Fix - Use / to select, then press ENTER. • Speaker Distance of the speakers set to between you and the different speakers. L/R C SL/SR SBL/SBR SW Crossover Speaker Setup BD PLAYER Large Large Large Large ...Yes Bypass Speaker Distance BD PLAYER L 10'00" C 10'00" R 10'00" SR 10'00" SBR 10'00" SBL 10'00" SL 10'00" ...
... be selected when Audio Output Mode is set to select, then press ENTER. • Fix - Use / to select, then press ENTER. • Speaker Distance of the speakers set to between you and the different speakers. L/R C SL/SR SBL/SBR SW Crossover Speaker Setup BD PLAYER Large Large Large Large ...Yes Bypass Speaker Distance BD PLAYER L 10'00" C 10'00" R 10'00" SR 10'00" SBR 10'00" SBL 10'00" SL 10'00" ...

Owner's Manual
Page 46
...The help menu is displayed. 4 Select and set Yes. 2 Select and set Options Output Terminal • If the player is already running the latest software, the message "The player's software is displayed on the Internet connection conditions, downloading may take a certain period of time..... • Other operations are defeated during software Restoring all the settings to the factory default settings, use Setup Navigator to reset the player (page 19). Eject the disc from the Internet). • When all the settings are restored to the factory defaults, all the data...
...The help menu is displayed. 4 Select and set Yes. 2 Select and set Options Output Terminal • If the player is already running the latest software, the message "The player's software is displayed on the Internet connection conditions, downloading may take a certain period of time..... • Other operations are defeated during software Restoring all the settings to the factory default settings, use Setup Navigator to reset the player (page 19). Eject the disc from the Internet). • When all the settings are restored to the factory defaults, all the data...

Owner's Manual
Page 58
... due to turn off the power, then turn off , press and hold STANDBY/ON on the player's front panel for discs recorded on the player's front panel to analog copy protection. Change the Pure Cinema setting (page 34). set the TV's aspect ...player's front panel to 4:3 (Standard) (page 37). In this , if you using an HDMI using the Setup Navigator (page 19). Read the TV's operating instructions and set ? terminal selected with a Standard video outputs to output the video signals from the video output (page 22). Is the output video resolution Use OUTPUT...
... due to turn off the power, then turn off , press and hold STANDBY/ON on the player's front panel for discs recorded on the player's front panel to analog copy protection. Change the Pure Cinema setting (page 34). set the TV's aspect ...player's front panel to 4:3 (Standard) (page 37). In this , if you using an HDMI using the Setup Navigator (page 19). Read the TV's operating instructions and set ? terminal selected with a Standard video outputs to output the video signals from the video output (page 22). Is the output video resolution Use OUTPUT...
Owner's Manual
Page 59
Is the disc played back in slow motion? If the cable is connected to make the player's settings (page 19). connections are output from the HDMI OUT or DIGITAL OUT terminal (page 46). signals are completed, use Setup Navigator to the DIGITAL OUT terminal, set ? Channel (page 38...the AV receiver or When the AV receiver or amplifier, etc., is not output properly. Noise can be output from this player's DIGITAL OUT terminal. The signals are only output from output terminals set ? Is the disc played back in fast forward or fast reverse? Are the audio cables properly ...
Is the disc played back in slow motion? If the cable is connected to make the player's settings (page 19). connections are output from the HDMI OUT or DIGITAL OUT terminal (page 46). signals are completed, use Setup Navigator to the DIGITAL OUT terminal, set ? Channel (page 38...the AV receiver or When the AV receiver or amplifier, etc., is not output properly. Noise can be output from this player's DIGITAL OUT terminal. The signals are only output from output terminals set ? Is the disc played back in fast forward or fast reverse? Are the audio cables properly ...