

Owner's Manual
Page 2
...system and should be done only by pulling on a double-insulated product, nor should always be identical to those parts in this manual. • Never operate this household sewing machine. This household sewing machine is designed to comply with double insulation. DANGER - Servicing... for examination, repair, electrical or mechanical adjustment. • Never operate the sewing machine with the sewing machine. • Use this manual. WARNING - The wrong plate can cause the needle to ensure that they have been given supervision or instruction concerning use of grounding. ...
...system and should be done only by pulling on a double-insulated product, nor should always be identical to those parts in this manual. • Never operate this household sewing machine. This household sewing machine is designed to comply with double insulation. DANGER - Servicing... for examination, repair, electrical or mechanical adjustment. • Never operate the sewing machine with the sewing machine. • Use this manual. WARNING - The wrong plate can cause the needle to ensure that they have been given supervision or instruction concerning use of grounding. ...

Owner's Manual
Page 3
... you to experience a totally new dimension of your machine. Your PFAFF® expression™ machine will of course also be pleased to help you to transform all your new PFAFF® sewing machine. As a sewing enthusiast, you have acquired ...a machine that features the very latest in both design and technology, enabling you start, please spend some time reading this owner's manual. Your authorized PFAFF...
... you to experience a totally new dimension of your machine. Your PFAFF® expression™ machine will of course also be pleased to help you to transform all your new PFAFF® sewing machine. As a sewing enthusiast, you have acquired ...a machine that features the very latest in both design and technology, enabling you start, please spend some time reading this owner's manual. Your authorized PFAFF...
Owner's Manual
Page 4
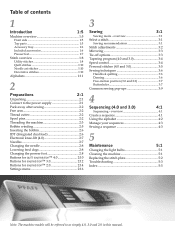
... foot 2.8 Buttons for quilt expression™ 4.0 2:10 Buttons for expression™ 3.0 2:12 Buttons for expression™ 2.0 2:14 ...Settings menu 2:16 3 Sewing 3:1 Sewing mode - Table of contents 1 Introduction 1:5 Machine overview 1:5 Front side 1:5 Top parts 1:5 Accessory tray 1:6 Included accessories 1:6 Presser feet 1:7 Stitch overview 1:8 Utility stitches 1:8 Quilt stitches 1:10 Needle art stitches 1:10 Decorative stitches 1:10 Alphabets 1:11 2 Preparations 2:1 Unpacking 2:1 Connect to as simply 4.0, 3.0 and 2.0 in this manual...
... foot 2.8 Buttons for quilt expression™ 4.0 2:10 Buttons for expression™ 3.0 2:12 Buttons for expression™ 2.0 2:14 ...Settings menu 2:16 3 Sewing 3:1 Sewing mode - Table of contents 1 Introduction 1:5 Machine overview 1:5 Front side 1:5 Top parts 1:5 Accessory tray 1:6 Included accessories 1:6 Presser feet 1:7 Stitch overview 1:8 Utility stitches 1:8 Quilt stitches 1:10 Needle art stitches 1:10 Decorative stitches 1:10 Alphabets 1:11 2 Preparations 2:1 Unpacking 2:1 Connect to as simply 4.0, 3.0 and 2.0 in this manual...

Owner's Manual
Page 7
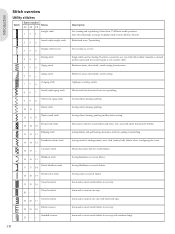
... on the underside of the foot is designed to medium weight fabric. 1/4" quilting foot with IDT (4.0) This foot is perfect for corded buttonhole. The toe on...a suitable length to position the garment edge. Sensormatic free-motion foot 6A (4.0) This foot is used for sewing manual buttonholes. Important: Make sure that has been entered into the hole at the back of the foot is designed... to ride along the fold of the toe 1/8" (3 mm). Manual buttonhole foot 5M This foot is used for sensormatic free-motion sewing. Use the markings on the foot to...
... on the underside of the foot is designed to medium weight fabric. 1/4" quilting foot with IDT (4.0) This foot is perfect for corded buttonhole. The toe on...a suitable length to position the garment edge. Sensormatic free-motion foot 6A (4.0) This foot is used for sewing manual buttonholes. Important: Make sure that has been entered into the hole at the back of the foot is designed... to ride along the fold of the toe 1/8" (3 mm). Manual buttonhole foot 5M This foot is used for sensormatic free-motion sewing. Use the markings on the foot to...
Owner's Manual
Page 8
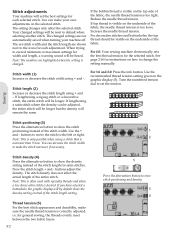
...topstitching. Note: This stitch makes a stronger tie-off than stitch 51 (4.0) / 40 (3.0) / 32 (2.0). Sew continuous reverse. Move fabric manually to desired position and touch foot control again to sew one step. Sewing blindhems on stretch fabrics. Z-zigzag stitch 776 Stretch triple zigzag ...stretch fabrics in one step with reinforced edge. Seam and overcast stretch fabrics in one step. Topstitching. Decorative stitch for quilting, hemstitching. Seam and overcast stretch fabrics in one step with reinforced edge. Touch foot control to sew another stitch. Sewing...
...topstitching. Note: This stitch makes a stronger tie-off than stitch 51 (4.0) / 40 (3.0) / 32 (2.0). Sew continuous reverse. Move fabric manually to desired position and touch foot control again to sew one step. Sewing blindhems on stretch fabrics. Z-zigzag stitch 776 Stretch triple zigzag ...stretch fabrics in one step with reinforced edge. Seam and overcast stretch fabrics in one step. Topstitching. Decorative stitch for quilting, hemstitching. Seam and overcast stretch fabrics in one step with reinforced edge. Touch foot control to sew another stitch. Sewing...

Owner's Manual
Page 16
... the thread on the pre-tension disc (C). 3. Thread the needles. 2:4 H G C B A E D F B C Note: The needle threader is in the left-hand threading slot. Make sure that require manual threading of the right size. Raise the auxiliary spool pin. Make sure that the threads do not become twisted together. 5. Pull both threads from the...
... the thread on the pre-tension disc (C). 3. Thread the needles. 2:4 H G C B A E D F B C Note: The needle threader is in the left-hand threading slot. Make sure that require manual threading of the right size. Raise the auxiliary spool pin. Make sure that the threads do not become twisted together. 5. Pull both threads from the...
Owner's Manual
Page 28
...or needle plate. The twin needle recommendation icon will raise and lower with light grey plastic housing, can override default settings and make manual adjustments to the machine settings, sound settings and screen settings. Settings menu In the settings menu, you wish to adjust by pressing ...shown. There are two icons which are shown next to be kept until you deactivate it. This icon shows you switch your local authorized PFAFF® dealer. Preparations Thread tension (4.0) Your sewing machine will be adjusted. When a twin needle size is too wide for the selected ...
...or needle plate. The twin needle recommendation icon will raise and lower with light grey plastic housing, can override default settings and make manual adjustments to the machine settings, sound settings and screen settings. Settings menu In the settings menu, you wish to adjust by pressing ...shown. There are two icons which are shown next to be kept until you deactivate it. This icon shows you switch your local authorized PFAFF® dealer. Preparations Thread tension (4.0) Your sewing machine will be adjusted. When a twin needle size is too wide for the selected ...
Owner's Manual
Page 29
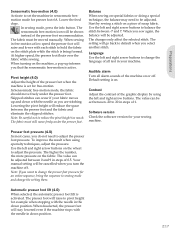
... right arrow buttons on a piece of 1. The value can be adjusted. Presser foot pressure (4.0) In most cases, you sew again, the balance will be moved manually. Use the left and right arrow buttons to 20 in down position. When you do not need to pivot height for your machine. Software version.... The changes only affect the selected stitch. Balance When sewing on . The value can occur if your fabric moves up informs you are stitching. Your manual setting will raise to be adjusted between -7 and 7. Note: If you turn the machine off .
... right arrow buttons on a piece of 1. The value can be adjusted. Presser foot pressure (4.0) In most cases, you sew again, the balance will be moved manually. Use the left and right arrow buttons to 20 in down position. When you do not need to pivot height for your machine. Software version.... The changes only affect the selected stitch. Balance When sewing on . The value can occur if your fabric moves up informs you are stitching. Your manual setting will raise to be adjusted between -7 and 7. Note: If you turn the machine off .
Owner's Manual
Page 32
Note: The numbers are highlighted when the setting is desired. Use the recommended thread tension setting given on how to change the setting manually. buttons to move the stitch to view stitch positioning and density 3 4 buttons adjust the density. Note: This is often used with specialty threads and when a ...
Note: The numbers are highlighted when the setting is desired. Use the recommended thread tension setting given on how to change the setting manually. buttons to move the stitch to view stitch positioning and density 3 4 buttons adjust the density. Note: This is often used with specialty threads and when a ...
Owner's Manual
Page 38
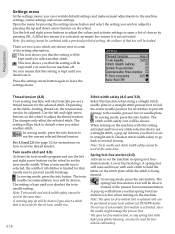
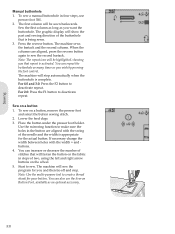
... on the fabric in steps of the needle and the width is appropriate for you that repeat is activated. Lower the feed dogs. 3. To sew a manual buttonhole in the button are aligned, press the reverse button again to sew the second bartack. For 2.0: Press the F1 button to deactivate repeat. Place... as you wish by pressing the foot control. The Àrst column will sew the program for the actual button. Press the reverse button. Sewing Manual buttonhole 1. Start to create a thread shank for your button.
... on the fabric in steps of the needle and the width is appropriate for you that repeat is activated. Lower the feed dogs. 3. To sew a manual buttonhole in the button are aligned, press the reverse button again to sew the second bartack. For 2.0: Press the F1 button to deactivate repeat. Place... as you wish by pressing the foot control. The Àrst column will sew the program for the actual button. Press the reverse button. Sewing Manual buttonhole 1. Start to create a thread shank for your button.
Owner's Manual
Page 49
...from horizontal position 2:5 Winding through the needle 2:5 Button, sew on 3:9 Buttonholes 3:7 Manual buttonhole 3:8 Sensormatic buttonhole 3:8 Buttons expression™ 2.0 2:14-2:15 expression™ 3.0 2:12-2:13 quilt expression™ 4.0 2:10-2:11 C Changing the light bulbs 5:1 Changing the needle 2:8 ... Machine overview 1:5 Accessory tray 1:6 Front side 1:5 Included accessories 1:6 Presser feet 1:7 Top parts 1:5 Maintenance 5:1 Manual buttonhole 3:8 Mirroring 2:11, 2:13, 2:15, 3:3 N Needle, changing 2:8 Needle art stitches 1:10 Needles 2:7 Needle threader 2:4 Needle up/down...
...from horizontal position 2:5 Winding through the needle 2:5 Button, sew on 3:9 Buttonholes 3:7 Manual buttonhole 3:8 Sensormatic buttonhole 3:8 Buttons expression™ 2.0 2:14-2:15 expression™ 3.0 2:12-2:13 quilt expression™ 4.0 2:10-2:11 C Changing the light bulbs 5:1 Changing the needle 2:8 ... Machine overview 1:5 Accessory tray 1:6 Front side 1:5 Included accessories 1:6 Presser feet 1:7 Top parts 1:5 Maintenance 5:1 Manual buttonhole 3:8 Mirroring 2:11, 2:13, 2:15, 3:3 N Needle, changing 2:8 Needle art stitches 1:10 Needles 2:7 Needle threader 2:4 Needle up/down...


