
Owner's Manual
Page 1
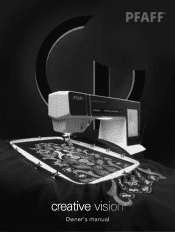
creative ™ Owner's manual
creative ™ Owner's manual

Owner's Manual
Page 2
...the following: Read all controls to the off ("0") when making any adjustment in the needle area, such as contained in the instruction manual. • Never drop or insert any object into any air openings blocked. Use only attachments recommended by the manufacturer as threading needle,... free from the electrical outlet when removing covers, lubricating, or when making any other user servicing adjustments mentioned in this manual. • Never operate this manual. Do not allow plug to whip when rewinding. • This sewing machine is required around the sewing machine needle....
...the following: Read all controls to the off ("0") when making any adjustment in the needle area, such as contained in the instruction manual. • Never drop or insert any object into any air openings blocked. Use only attachments recommended by the manufacturer as threading needle,... free from the electrical outlet when removing covers, lubricating, or when making any other user servicing adjustments mentioned in this manual. • Never operate this manual. Do not allow plug to whip when rewinding. • This sewing machine is required around the sewing machine needle....
Owner's Manual
Page 3
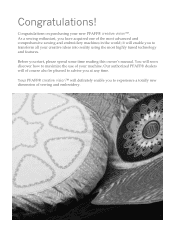
... sewing enthusiast, you to maximize the use of your new PFAFF® creative vision™. Congratulations! You will enable you have acquired one of sewing and embroidery. Before you at any time. Your PFAFF® creative vision™ will of course also be pleased to experience a ...totally new dimension of the most highly tuned technology and features. Our authorized PFAFF® dealers will definitely enable you to advise you start, please spend some time reading this owner's manual...
... sewing enthusiast, you to maximize the use of your new PFAFF® creative vision™. Congratulations! You will enable you have acquired one of sewing and embroidery. Before you at any time. Your PFAFF® creative vision™ will of course also be pleased to experience a ...totally new dimension of the most highly tuned technology and features. Our authorized PFAFF® dealers will definitely enable you to advise you start, please spend some time reading this owner's manual...

Owner's Manual
Page 11
...for darning. Move needle position to right or left of the zipper teeth. Presser foot 5M Presser foot 6A Presser foot 7 Presser foot 8 Manual buttonhole foot This foot is used for straight stitching and zigzag stitching with a stitch length longer than 1.0mm stitch length, use this foot. Presser...2A Presser foot 3 Presser foot 4 Standard presser foot with IDT (attached on the machine upon delivery) This foot is used mainly for sewing manual buttonholes. Fancy stitch foot with IDT This foot is used for side-motion stitches. Rolled hem foot with less than 1.0mm. Maxi-stitch ...
...for darning. Move needle position to right or left of the zipper teeth. Presser foot 5M Presser foot 6A Presser foot 7 Presser foot 8 Manual buttonhole foot This foot is used for straight stitching and zigzag stitching with a stitch length longer than 1.0mm stitch length, use this foot. Presser...2A Presser foot 3 Presser foot 4 Standard presser foot with IDT (attached on the machine upon delivery) This foot is used mainly for sewing manual buttonholes. Fancy stitch foot with IDT This foot is used for side-motion stitches. Rolled hem foot with less than 1.0mm. Maxi-stitch ...
Owner's Manual
Page 12
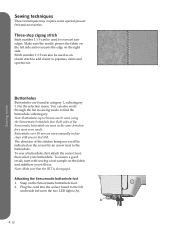
... or topstitching. 1.1.9 1.1.10 1.1.11 1.1.12 1.1.13 1.1.14 1.1.15 1.1.16 Three-step zigzag stitch Sewing elastic, darning, patching. Elastic stitch Sewing elastic, darning, patching. Move fabric manually to desired position and touch foot control again to sew one step. 1:12 Topstitching. 1.1.3 Straight stitch reverse Sew continuous reverse with elastic thread in one...
... or topstitching. 1.1.9 1.1.10 1.1.11 1.1.12 1.1.13 1.1.14 1.1.15 1.1.16 Three-step zigzag stitch Sewing elastic, darning, patching. Elastic stitch Sewing elastic, darning, patching. Move fabric manually to desired position and touch foot control again to sew one step. 1:12 Topstitching. 1.1.3 Straight stitch reverse Sew continuous reverse with elastic thread in one...
Owner's Manual
Page 25
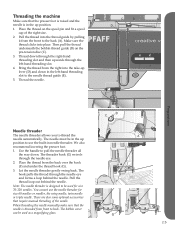
...all the way down through the right-hand threading slot and then upwards through the left-hand threading slot. 4. When threading the needle manually make sure that the needle is designed to be used for size 60 needles or smaller, the wing needle, twin needle or triple needle.... Bring the thread from front to thread the needle automatically. Threading the machine Make sure that require manual threading of the right size. 2. Place the thread on the pre-tension disc (C). 3. Then pull the thread underneath the bobbin thread guide (B)...
...all the way down through the right-hand threading slot and then upwards through the left-hand threading slot. 4. When threading the needle manually make sure that the needle is designed to be used for size 60 needles or smaller, the wing needle, twin needle or triple needle.... Bring the thread from front to thread the needle automatically. Threading the machine Make sure that require manual threading of the right size. 2. Place the thread on the pre-tension disc (C). 3. Then pull the thread underneath the bobbin thread guide (B)...
Owner's Manual
Page 34
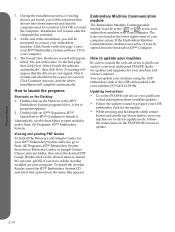
... authorized PFAFF® dealer for updates and upgrades for the update. • While pressing and holding the stitch restart button and needle up/down button, turn your computer screen. Leave your 4D™ Embroidery System software CD in your machine and Owner's manual. If... Embroidery System. Select 'Install the software automatically', then click Next. Follow the instructions on the last page. Click Finish on the PFAFF® HD screen to use the Start Menu to restart the computer. Click Continue Anyway, and the driver installation will be informed ...
... authorized PFAFF® dealer for updates and upgrades for the update. • While pressing and holding the stitch restart button and needle up/down button, turn your computer screen. Leave your 4D™ Embroidery System software CD in your machine and Owner's manual. If... Embroidery System. Select 'Install the software automatically', then click Next. Follow the instructions on the last page. Click Finish on the PFAFF® HD screen to use the Start Menu to restart the computer. Click Continue Anyway, and the driver installation will be informed ...
Owner's Manual
Page 44
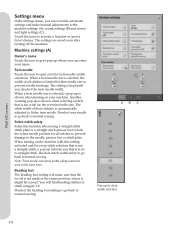
... a stitch that it might hit a pearl. ABC Pop-up for all stitches is not a straight stitch, a pop-up is set twin needle size. Pfaff HD screen Settings menu In the Settings menu, you can enter your machine. The settings are saved even after turning off is automatically adjusted to... twin needle. Note: Twin needle and stitch width safety cannot be used at the same time. The stitch width of choices. You will make manual adjustments to prevent needle breakage. Twin needle Touch the icon to get a pop-up is shown when turning on the machine with this function when...
... a stitch that it might hit a pearl. ABC Pop-up for all stitches is not a straight stitch, a pop-up is set twin needle size. Pfaff HD screen Settings menu In the Settings menu, you can enter your machine. The settings are saved even after turning off is automatically adjusted to... twin needle. Note: Twin needle and stitch width safety cannot be used at the same time. The stitch width of choices. You will make manual adjustments to prevent needle breakage. Twin needle Touch the icon to get a pop-up is shown when turning on the machine with this function when...
Owner's Manual
Page 46
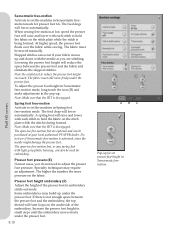
...stitch is being formed. Some embroideries may require an adjustment. Presser foot pressure (E) In most cases, you are optional and can be moved manually. Note: Make sure that the IDT is disengaged. The fabric must still move freely under the presser foot. The feed dogs will lower ... touch the icon (D) and make adjustments in the pop-up and down with light grey plastic housing, can occur if your local authorized PFAFF® dealer. Spring foot free-motion Activate to set the machine in Sensormatic freemotion mode for presser foot 6A. The open -toe free...
...stitch is being formed. Some embroideries may require an adjustment. Presser foot pressure (E) In most cases, you are optional and can be moved manually. Note: Make sure that the IDT is disengaged. The fabric must still move freely under the presser foot. The feed dogs will lower ... touch the icon (D) and make adjustments in the pop-up and down with light grey plastic housing, can occur if your local authorized PFAFF® dealer. Spring foot free-motion Activate to set the machine in Sensormatic freemotion mode for presser foot 6A. The open -toe free...
Owner's Manual
Page 49
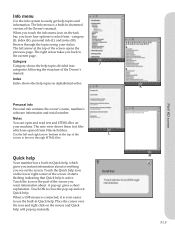
.... Place the cursor over the icon and right click on the task bar, you see on your stylus. K M 3:13 Pfaff HD screen Use the left arrow at the top of the Owner's manual. When a USB mouse is connected, it is a built-in Quick help, which are opened from - The Info menu is... alphabetical order. Personal info Personal info contains the owner's name, machine's software information and serial number. Touch the icon or the part of the Owner's manual. A pop-up instantly. Touch OK to the current page.
.... Place the cursor over the icon and right click on the task bar, you see on your stylus. K M 3:13 Pfaff HD screen Use the left arrow at the top of the Owner's manual. When a USB mouse is connected, it is a built-in Quick help, which are opened from - The Info menu is... alphabetical order. Personal info Personal info contains the owner's name, machine's software information and serial number. Touch the icon or the part of the Owner's manual. A pop-up instantly. Touch OK to the current page.
Owner's Manual
Page 62
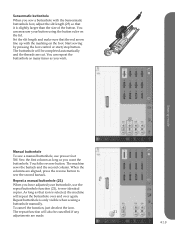
... foot 5M. Note: Buttonholes up to overcast raw edges. The direction of the Sensormatic buttonhole are sewn in the selection menu. Buttonholes Buttonholes are sewn manually in sewing mode to pajamas, skirts and sportswear. Attaching the Sensormatic buttonhole foot 1. Plug the cord into the socket found in category 1, subcategory 1.3 in the...
... foot 5M. Note: Buttonholes up to overcast raw edges. The direction of the Sensormatic buttonhole are sewn in the selection menu. Buttonholes Buttonholes are sewn manually in sewing mode to pajamas, skirts and sportswear. Attaching the Sensormatic buttonhole foot 1. Plug the cord into the socket found in category 1, subcategory 1.3 in the...
Owner's Manual
Page 63
... button. The repeat function will be cancelled if any 21 adjustments are cut. As long as that icon is only visible when sewing a buttonhole manually. Sensormatic buttonhole When you sew a buttonhole with the Sensormatic buttonhole foot, adjust the slit length (23) so that the red arrow line up... with the marking on the lid. Sewing mode 23 Manual buttonhole To sew a manual buttonhole, use the repeat buttonhole function (21), to sew the second bartack. Touch the reverse button. You can repeat the buttonhole as...
... button. The repeat function will be cancelled if any 21 adjustments are cut. As long as that icon is only visible when sewing a buttonhole manually. Sensormatic buttonhole When you sew a buttonhole with the Sensormatic buttonhole foot, adjust the slit length (23) so that the red arrow line up... with the marking on the lid. Sewing mode 23 Manual buttonhole To sew a manual buttonhole, use the repeat buttonhole function (21), to sew the second bartack. Touch the reverse button. You can repeat the buttonhole as...
Owner's Manual
Page 74
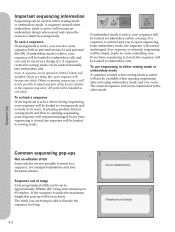
... mode can be handled as a stitch in either sewing mode or embroidery mode A sequence created when sewing mode is selected, sequencing will not be loaded manually into embroidery edit. A sequence created in either sewing mode or embroidery mode. If no sequence is active will be loaded to sewing mode. If you...
... mode can be handled as a stitch in either sewing mode or embroidery mode A sequence created when sewing mode is selected, sequencing will not be loaded manually into embroidery edit. A sequence created in either sewing mode or embroidery mode. If no sequence is active will be loaded to sewing mode. If you...
Owner's Manual
Page 80
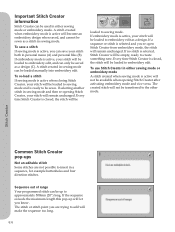
... stitch is active will be loaded to be sewn. If embroidery mode is ready to embroidery edit as a stitch in sewing mode can be loaded manually into embroidery edit. Stitch Creator Common Stitch Creator pop-ups Not an editable stitch Some stitches are trying to embroidery edit. To re-load a stitch...
... stitch is active will be loaded to be sewn. If embroidery mode is ready to embroidery edit as a stitch in sewing mode can be loaded manually into embroidery edit. Stitch Creator Common Stitch Creator pop-ups Not an editable stitch Some stitches are trying to embroidery edit. To re-load a stitch...
Owner's Manual
Page 137
... 8:13 Select design(s 8:5 Select hoop 8:10 11:7 Index M Machine overview 1:8 Machine settings 3:8, 4:3 Main functions in task bar 3:2 Main parts 3:2 Manual buttonhole 4:13 Mirroring 4:8, 8:6 Mirroring end to end 6:3 Mirroring side to side 6:3 Monochrome 9:6 More options 8:9, 9:6 Move 6:5, 8:7 Move a file...:2 Patchwork program 4:7 Personal designs 10:4 Personal files 10:3 Personal fonts 10:3 Personal info 3:13 Personal menu 3:4 PFAFF® HD screen 3:2 Position of the marked stitch point 6:5 Precise positioning 9:8 Presser feet 1:11 Presser foot down (J ...
... 8:13 Select design(s 8:5 Select hoop 8:10 11:7 Index M Machine overview 1:8 Machine settings 3:8, 4:3 Main functions in task bar 3:2 Main parts 3:2 Manual buttonhole 4:13 Mirroring 4:8, 8:6 Mirroring end to end 6:3 Mirroring side to side 6:3 Monochrome 9:6 More options 8:9, 9:6 Move 6:5, 8:7 Move a file...:2 Patchwork program 4:7 Personal designs 10:4 Personal files 10:3 Personal fonts 10:3 Personal info 3:13 Personal menu 3:4 PFAFF® HD screen 3:2 Position of the marked stitch point 6:5 Precise positioning 9:8 Presser feet 1:11 Presser foot down (J ...


