
Owner's Manual
Page 4
... 4:3 Raise and lower the presser foot 4:3 Option bar 4:4 Save options 4:4 Tie-off options 4:5 Speed control 4:6 Sewing programs 4:6 Balance 4:8 Mirroring 4:8 Zoom to update your machine 2:14 Buttons and icons 2:15 3 PFAFF® HD screen 3:1 Task bar 3:2 Use the task bar 3:3 Common icons 3:3 Selection menu 3:4 Embroidery edit 3:5 Embroidery text editor 3:6 Embroidery stitch-out 3:6 Sequencing...
... 4:3 Raise and lower the presser foot 4:3 Option bar 4:4 Save options 4:4 Tie-off options 4:5 Speed control 4:6 Sewing programs 4:6 Balance 4:8 Mirroring 4:8 Zoom to update your machine 2:14 Buttons and icons 2:15 3 PFAFF® HD screen 3:1 Task bar 3:2 Use the task bar 3:3 Common icons 3:3 Selection menu 3:4 Embroidery edit 3:5 Embroidery text editor 3:6 Embroidery stitch-out 3:6 Sequencing...

Owner's Manual
Page 33
... embroidery machine to start automatically when starting Windows. Then add the PFAFF® creative vision™ from the menu. 4. Insert your machine type: PFAFF® creative vision™. Select your desired language, and select the "Install Embroidery Machine...Update instead of your embroidery machine is required to continue', click the Continue button. 7. From the main menu of Windows® 7/Vista. Ensure you will be informed when your CD, click the Install Drivers option for Windows® XP. Click the option to continue. Covert your PFAFF® creative vision...
... embroidery machine to start automatically when starting Windows. Then add the PFAFF® creative vision™ from the menu. 4. Insert your machine type: PFAFF® creative vision™. Select your desired language, and select the "Install Embroidery Machine...Update instead of your embroidery machine is required to continue', click the Continue button. 7. From the main menu of Windows® 7/Vista. Ensure you will be informed when your CD, click the Install Drivers option for Windows® XP. Click the option to continue. Covert your PFAFF® creative vision...
Owner's Manual
Page 34
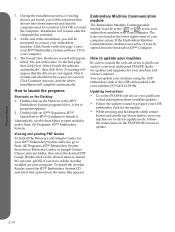
...machine (P/N:412 62 59-04). Follow the instructions on your computer screen. Updating instructions • Go to the PFAFF® web site at www.pfaff.com and/or your local authorized PFAFF® dealer for updates and upgrades for concern. Leave your embroidery machine. Preparations 2:14 Click ... manual. 7. Click OK to consult the web site at www.pfaff.com to find information about available updates. • Follow the update wizard to connect your 4D™ Embroidery System software CD in update mode. Double-click on to launch the programs Shortcuts on the last...
...machine (P/N:412 62 59-04). Follow the instructions on your computer screen. Updating instructions • Go to the PFAFF® web site at www.pfaff.com and/or your local authorized PFAFF® dealer for updates and upgrades for concern. Leave your embroidery machine. Preparations 2:14 Click ... manual. 7. Click OK to consult the web site at www.pfaff.com to find information about available updates. • Follow the update wizard to connect your 4D™ Embroidery System software CD in update mode. Double-click on to launch the programs Shortcuts on the last...

Owner's Manual
Page 136
... screen 9:6 L Language 3:12 List view 10:3 Load a design 8:2 Load a file 10:5 Load a font 8:3 Load a font from another location 8:21 Load a stitch 8:3 Load text to update your machine 2:14 I IDT (Integrated dual feed 2:9 Immediate tie-off 2:15 Important resize information 8:19 Important sequencing information 5:6 Important Stitch Creator information 6:6 Included accessories 1:10...
... screen 9:6 L Language 3:12 List view 10:3 Load a design 8:2 Load a file 10:5 Load a font 8:3 Load a font from another location 8:21 Load a stitch 8:3 Load text to update your machine 2:14 I IDT (Integrated dual feed 2:9 Immediate tie-off 2:15 Important resize information 8:19 Important sequencing information 5:6 Important Stitch Creator information 6:6 Included accessories 1:10...

Owner's Manual
Page 139
U Universal needle 2:10 Unpacking 2:2 Update via USB embroidery stick 2:14 Updating instructions 2:14 USB embroidery stick 2:12 USB ports 2:12 User defined sound 3:11 Use the task bar 3:3 Using the USB embroidery stick 2:12 Utility stitches 1:12 V Vertical position 2:4 Viewing and printing PDF Guides 2:14 Volume 3:11 W Winding from horizontal position 2:7 Winding while embroidering or sewing 2:8 Winding while threaded 2:7 Windows® Vista 2:13 Windows® XP 2:13 Wing needles 2:10 Z Zoom 6:4, 8:4, 9:3 Zoom to all 4:8, 5:3 Zoom to needle 9:9
U Universal needle 2:10 Unpacking 2:2 Update via USB embroidery stick 2:14 Updating instructions 2:14 USB embroidery stick 2:12 USB ports 2:12 User defined sound 3:11 Use the task bar 3:3 Using the USB embroidery stick 2:12 Utility stitches 1:12 V Vertical position 2:4 Viewing and printing PDF Guides 2:14 Volume 3:11 W Winding from horizontal position 2:7 Winding while embroidering or sewing 2:8 Winding while threaded 2:7 Windows® Vista 2:13 Windows® XP 2:13 Wing needles 2:10 Z Zoom 6:4, 8:4, 9:3 Zoom to all 4:8, 5:3 Zoom to needle 9:9

