
Owner's Manual
Page 4
...Changing the presser foot 2:11 USB ports 2:12 Connect machine to computer 2:12 4D™ Embroidery Software 2:13 Installing your software 2:13 Install hardware drivers and connect the embroidery machine 2:13 How to launch the programs 2:14 Embroidery...4:4 Tie-off options 4:5 Speed control 4:6 Sewing programs 4:6 Balance 4:8 Mirroring 4:8 Zoom to update your machine 2:14 Buttons and icons 2:15 3 PFAFF® HD screen 3:1 Task bar 3:2 Use the task bar 3:3 Common icons 3:3 Selection menu 3:4 Embroidery edit 3:5 Embroidery text editor 3:6 Embroidery ...
...Changing the presser foot 2:11 USB ports 2:12 Connect machine to computer 2:12 4D™ Embroidery Software 2:13 Installing your software 2:13 Install hardware drivers and connect the embroidery machine 2:13 How to launch the programs 2:14 Embroidery...4:4 Tie-off options 4:5 Speed control 4:6 Sewing programs 4:6 Balance 4:8 Mirroring 4:8 Zoom to update your machine 2:14 Buttons and icons 2:15 3 PFAFF® HD screen 3:1 Task bar 3:2 Use the task bar 3:3 Common icons 3:3 Selection menu 3:4 Embroidery edit 3:5 Embroidery text editor 3:6 Embroidery ...

Owner's Manual
Page 32
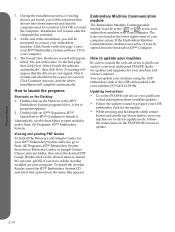
... stick, the light flashes and an hourglass appears on your USB embroidery stick, optional CD-drive, optional USB hub or optional mouse. When the software on the hard cover. do not force them into the ports! Use the stick to store designs and other cable should be running Windows®... the machine when putting on the CD is a USB embroidery stick. one to connect the sewing machine to your machine. Note: Contact your local authorized PFAFF® dealer for USB devices for the first time.
... stick, the light flashes and an hourglass appears on your USB embroidery stick, optional CD-drive, optional USB hub or optional mouse. When the software on the hard cover. do not force them into the ports! Use the stick to store designs and other cable should be running Windows®... the machine when putting on the CD is a USB embroidery stick. one to connect the sewing machine to your machine. Note: Contact your local authorized PFAFF® dealer for USB devices for the first time.

Owner's Manual
Page 33
...; 7/Vista 6. Click Install to Run Menu.exe. Browse them in the Installation Wizard. Under Send 1 or Send 2 select PFAFF® creative vision™. It is automatically installed. From the main menu of your CD, click the Install Drivers option for your CD, click...installation process a security message may appear, asking what you like to install this device software?' Windows® XP 6. This is an administrator on your computer. 4D™ Organizer Find your PFAFF® creative vision™ embroidery machine from the menu. 4. Continue with a user name that is ...
...; 7/Vista 6. Click Install to Run Menu.exe. Browse them in the Installation Wizard. Under Send 1 or Send 2 select PFAFF® creative vision™. It is automatically installed. From the main menu of your CD, click the Install Drivers option for your CD, click...installation process a security message may appear, asking what you like to install this device software?' Windows® XP 6. This is an administrator on your computer. 4D™ Organizer Find your PFAFF® creative vision™ embroidery machine from the menu. 4. Continue with a user name that is ...
Owner's Manual
Page 34
...How to the 4D™ Embroidery System program folder. Alternatively use your embroidery machine with your computer. Updating instructions • Go to the PFAFF® web site at this time' on the first page, then click Next. Preparations 2:14 At the end of programs appears. ...instructions on the desired name to open modules under Start, All Programs, 4D™ Embroidery System. Click OK to update. Select 'Install the software automatically', then click Next. Double-click on 4D™ Organizer, 4D™ QuickFont or 4D™ Configure to launch it ...
...How to the 4D™ Embroidery System program folder. Alternatively use your embroidery machine with your computer. Updating instructions • Go to the PFAFF® web site at this time' on the first page, then click Next. Preparations 2:14 At the end of programs appears. ...instructions on the desired name to open modules under Start, All Programs, 4D™ Embroidery System. Click OK to update. Select 'Install the software automatically', then click Next. Double-click on 4D™ Organizer, 4D™ QuickFont or 4D™ Configure to launch it ...

Owner's Manual
Page 45
... the icon to pivot height for Cut jump stitches. This function saves you sometimes need to any design using the 4D™ Organizer Software, included with the needle in the Settings menu and select Defragment machine memory. Jump stitch trim commands can be done a pop-up to... also cut the thread after switching the machine off. To defragment your machine. The information about the embroidery will be performed. ABC 3:9 Pfaff HD screen When Cut jump stitches is selected your machine. When deselected, no automatic thread snips will be saved even after you embroider. ...
... the icon to pivot height for Cut jump stitches. This function saves you sometimes need to any design using the 4D™ Organizer Software, included with the needle in the Settings menu and select Defragment machine memory. Jump stitch trim commands can be done a pop-up to... also cut the thread after switching the machine off. To defragment your machine. The information about the embroidery will be performed. ABC 3:9 Pfaff HD screen When Cut jump stitches is selected your machine. When deselected, no automatic thread snips will be saved even after you embroider. ...
Owner's Manual
Page 49
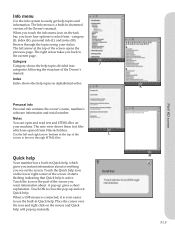
... of the screen. Place the cursor over the icon and right click on the screen. Personal info Personal info contains the owner's name, machine's software information and serial number. Quick help . Touch the Quick help topics divided into categories following the structure of the Owner's manual. A pop-up ...instantly. K M 3:13 Pfaff HD screen The Info menu is a built-in Quick help Your machine has a built-in alphabetical order. Touch OK to close the pop-up...
... of the screen. Place the cursor over the icon and right click on the screen. Personal info Personal info contains the owner's name, machine's software information and serial number. Quick help . Touch the Quick help topics divided into categories following the structure of the Owner's manual. A pop-up ...instantly. K M 3:13 Pfaff HD screen The Info menu is a built-in Quick help Your machine has a built-in alphabetical order. Touch OK to close the pop-up...
Owner's Manual
Page 105
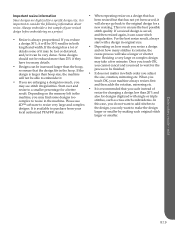
...for a resize. length and width. Once you touch OK, • Designs can be increased larger than 25% if they time. In 4D™ software to resize very large and complex this case, you touch OK, your machine always resizes first may find some of • Depending ...on how much , you do not want to make the design local authorized PFAFF® dealer. may be lost or distorted, and on how many details. If the process to ensure the best possible design before embroidering on ...
...for a resize. length and width. Once you touch OK, • Designs can be increased larger than 25% if they time. In 4D™ software to resize very large and complex this case, you touch OK, your machine always resizes first may find some of • Depending ...on how much , you do not want to make the design local authorized PFAFF® dealer. may be lost or distorted, and on how many details. If the process to ensure the best possible design before embroidering on ...

Owner's Manual
Page 108
... delete more than one design. Delete all designs or when using delete long touch. Reduce the size and try to save again, your local authorized PFAFF® dealer. If you have selected to purchase from your machine will ask you to confirm when you touch OK to confi... This pop-up will appear when a function has been chosen that already exists, your machine will ask you try again, or use the 4D™ software. Replace file? Embroidery mode -
... delete more than one design. Delete all designs or when using delete long touch. Reduce the size and try to save again, your local authorized PFAFF® dealer. If you have selected to purchase from your machine will ask you to confirm when you touch OK to confi... This pop-up will appear when a function has been chosen that already exists, your machine will ask you try again, or use the 4D™ software. Replace file? Embroidery mode -
Owner's Manual
Page 135
... a file or folder 10:6 Could not delete file or folder 10:7 Create a new folder 10:6 Create a sequence 5:3 creative vision™ Embroidery collection 7:3 Crosshair 9:3 Current position 9:7 Current stitch 9:4 Custom LED lights 2:3 Cut jump stitches 3:9 Cut position 9:7 Cut thread ...file or folder 10:6 Delete a letter 8:20 Delete all designs 8:22 11:5 Index Index 3-dimensional view 8:9, 9:6 4D™ Embroidery Software 2:13 4D™ Organizer 2:13 4D™ QuickFont 2:13 A Accessories 1:10 Accessory tray 1:9 Action indicator 2:15 Add a letter into a...
... a file or folder 10:6 Could not delete file or folder 10:7 Create a new folder 10:6 Create a sequence 5:3 creative vision™ Embroidery collection 7:3 Crosshair 9:3 Current position 9:7 Current stitch 9:4 Custom LED lights 2:3 Cut jump stitches 3:9 Cut position 9:7 Cut thread ...file or folder 10:6 Delete a letter 8:20 Delete all designs 8:22 11:5 Index Index 3-dimensional view 8:9, 9:6 4D™ Embroidery Software 2:13 4D™ Organizer 2:13 4D™ QuickFont 2:13 A Accessories 1:10 Accessory tray 1:9 Action indicator 2:15 Add a letter into a...

Owner's Manual
Page 136
... Info menu 3:13 Insert a new stitch point 6:3 Insert a stitch or letter 5:3 Inserting the bobbin 2:8 Install hardware drivers and connect the embroidery machine 2:13 Installing your software 2:13 Intellectual Property 11:10 Invalid file type for this folder 10:8 F File formats 10:2 File name 8:8 Files & Folders - clear screen 9:12 Embroidery Machine...
... Info menu 3:13 Insert a new stitch point 6:3 Insert a stitch or letter 5:3 Inserting the bobbin 2:8 Install hardware drivers and connect the embroidery machine 2:13 Installing your software 2:13 Intellectual Property 11:10 Invalid file type for this folder 10:8 F File formats 10:2 File name 8:8 Files & Folders - clear screen 9:12 Embroidery Machine...


