Pfaff Tipmatic 1027 Support and Manuals

Get Help and Manuals for this Pfaff item

View All Support Options Below
Free Pfaff Tipmatic 1027 manuals!
Problems with Pfaff Tipmatic 1027?

Ask a Question

Most Recent Pfaff Tipmatic 1027 Questions

Stitch Selection - Zigzag Etc.
good day, please tell me how the stitch selection works on the tipmatic 1027 sewing machine
(Posted by myrnamjs 2 years ago)
How Do I Solve Loose Under Thread?
Hi I bought a Pfaff 1027 Tipmatic second. It sewed beautifully. I sewed quilted plate 'coasters'. Wh...
(Posted by monaleecq 3 years ago)
Pfaff 1027 Clutch
We have a Pfaff 1027. The needle continues to go up and down when we reload a bobbin. We have a brok...
(Posted by doubloonmain 6 years ago)

Popular Pfaff Tipmatic 1027 Manual Pages

Owner's Manual - Page 2

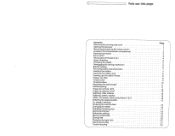
... connection Foot control Placing spool of thread on pin Upper threading Threading the needle Disengaging the sewing mechanism Bobbin winding Removing bobbin case and bobbin Inserting the bobbin Inserting the bobbin case Drawing up the bobbin thread Presser bar lifter Thread cutter Thread tensions Regulating the stitch length Reverse sewing Finger-tip controls 1027 Finger-tip controls 1025...
Owner's Manual - Page 4

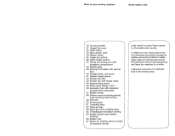
... Hand wheel 33 Stop motion knob 34 Master switch 35 Finger-tip controls 36 Stitch length control 37 Swing-out sewing arm with accessory compartment 38 Needle plate 39 Sewing foot holder with sewing foot 40 Needle holder with screw 41 Needle thread tension 42 Presser bar lifter 43 Presser bar with thread cutter 44 Reverse-feed control 45 Stitch chart (Model 1027...
Owner's Manual - Page 5

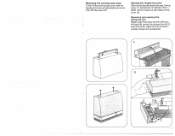
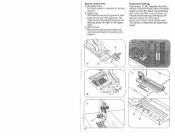
On Model 1027 a stitch chart is found on the inside of this cover (A). Swing cover 31 backwards. Removing and opening the swing-out arm Reach under the swing-out arm with your left (C) and lift it out toward the rear. Opening the hinged top cover Also fold the handle toward the left hand (B), swing...
Owner's Manual - Page 7

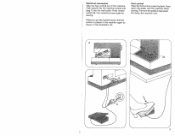
... depressed, the faster the machine runs. 3 Press master switch 34. The more the pedal is placed in the machine again as shown in the illustration (A). Electrical connection Take the foot control out of the machine. Press down the pedal, and the machine starts sewing. Your machine is now readyfor sewing. Push plug B into the...
Owner's Manual - Page 9

Hold the hand wheel steady and turn the stop motion knob toward you . 5 After bobbin winding, tighten the knob again by turning it away from front to back. V Disengaging the sewing mechanism Before you start winding the bobbin, disen gage the sewing mechanism. Threading the needle Thread the needle from you .
Owner's Manual - Page 12

... hand wheel 32 toward the left and back under the sewing foot. 8 Pull the bobbin thread out of the needle hole and lay both threads toward you until the needle movesdownand upagainandthetake-up lever is up. Release the latch and lightly press against the bobbin case to make sure it has snapped into place. Drawing up . Inserting the bobbin case...
Owner's Manual - Page 13

... work , turn the hand wheel toward the back. Raise the sewing foot. Draw the threads into the cutter slot and pulithem downwards to raise the needle and take-up lever 52.) B = The sewing foot is lowered for inserting extra-thick materials. Presser bar lifter Lever 42 has three positions: A = The sewing foot is raised. (Before you...
Owner's Manual - Page 15

B shows how to set the stitch length control for sewing stretch stitches (red stitch symbols on push buttons). Regulating the stitch length Turn the control so that the number indi cating the stitch length chosen is opposite mark A. Stitch length range: Model 1025: 0-4 Model 1027: 0-6 Ill. As long as you keep this button depressed, the machine sews...
Owner's Manual - Page 19

...- and stretch-stitch combinations, model 1027 The various stitch combinations are shown in the chart on the inside of the hinged top cover. This stitch can also be sewn with model 1025. Selecting the needle position for straight stitching Left needle position: push button 20 Central needle position: push button 1 0 Right needle position (model 1 027): push buttons 11...
Owner's Manual - Page 21

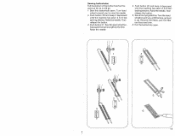
... used for attaching an edge guide. Screw F serves to secure the sewing foot holder on the presser bar. 17 Lower presser bar lifter 42 and at the same time reposition the sewing foot so that stud B fits in place with your left hand. Changing the sewing foot To release the sewing foot push the red button...
Owner's Manual - Page 22

... stitch length control (B). Insert the filler cord as follows (C): Place it in front lug D. The zipper foot can be adjusted sideways for stitching along scale F. Buttonhole settings Push button 1 9 (A). This serves to determine the buttonhole length. As you sew, arrow E moves along the right or left zipper chain. Special sewing feet A Blindstitch foot Blindstich guide E is adjusted...
Owner's Manual - Page 23

... of the buttonhole foot for ward as far as the first. Then release the button. 5 Sew a few tying stitches. Then release the button. 3 Push button 21 . Raise the needle. 4 Push button 20 and keep it will go. 1 Sew first buttonhole seam. Turn the hand wheel toward you to 6 bartacking stitches. Turn hand wheel torward you until...
Owner's Manual - Page 25

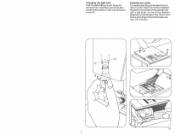
Cleaning and oiling Tilt needle plate 38 up at the back (A) and take it out (B). Push it up and turn it toward B. All you have to do is maintenance-free. Insert ... a sàft brush. Changing the light bulb Push the light bulb up, turn it toward A and pull it out. Clean the machine feed and the parts in slots C.
Owner's Manual - Page 26

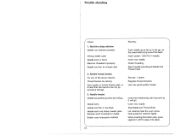
... new needle. Machine threaded improperly. Bobbin case improperly inserted. Insert system 1 30/705 H needle. Insert new needle. Trouble shooting rCa use: 1. Needle thread breaks For any of the above . See par. 1 above reasons. Check threading. Regulate thread tensions. Insert new needle and push it up as far as it will go. Needle bent and strikes needle plate because...
Owner's Manual - Page 27

.... Remove needle plate and clean out lint. Bobbin thread wound unevenly. Machine feeds irregularly or not at left.) Flick reverse-feed control to the right. 6. Thread too thick, knotty or hard. During bobbin winding, do not hold thread in hook raceway. Thread machine properly and check both tensions. 5. Machine runs with difficulty Thread ends in hand...

Pfaff Tipmatic 1027 Reviews

Do you have an experience with the Pfaff Tipmatic 1027 that you would like to share?
Earn 750 points for your review!
We have not received any reviews for Pfaff yet.

Popular Pfaff Tipmatic 1027 Search Terms

The following terms are frequently used to search for Pfaff Tipmatic 1027 support:

Ask a New Question
Use the box below to post a new question about Pfaff Tipmatic 1027.
Manuals / Documents
Download any of our Pfaff Tipmatic 1027 manuals for free!

We have the following 1 documents available for the Pfaff Tipmatic 1027:
  • Owner's Manual

Points & Prizes
  • You can earn points for nearly everything you do on HelpOwl.com
  • You can trade in those points for gift cards at leading retailers such as Amazon.com and Walmart
  • It's that simple!
See How it Works
Create a Free Account

Pfaff Manuals

Find free Pfaff Tipmatic 1027 manuals and user guides available at ManualOwl.com. Try out our unique manual viewer allowing you to interact with manuals from directly within your browser!

Pfaff Reviews

View thousands of Pfaff Tipmatic 1027 user reviews and customer ratings available at ReviewOwl.com.

Contact Information

Complete Pfaff customer service contact information including steps to reach representatives, hours of operation, customer support links and more from ContactHelp.com.

Scoreboard Ratings

See detailed Pfaff customer service rankings, employee comments and much more from our sister site.