

SP500 Manual
Page 2
field tables 14 Range of light measurement 15 Mercury battery 16 Flash synchronization 17 Important notes 18 Infra-red photography 20 How to hold your camera 8 Film loading 9 Film wind and rewind 10 Bright field focusing 11 Microprism 11 Automatic diaphragm 12 Shutter 13 Depth-of-field guide 13 Depth -of Takumar lenses 22 Asahi Pentax warranty policy 23 Index Introduction 1 Major working parts of the Honeywell Pentax SP 500 2 Specifications 4 Short operating course 6 How to make deliberate double exposure 20 Difference of angle of -
field tables 14 Range of light measurement 15 Mercury battery 16 Flash synchronization 17 Important notes 18 Infra-red photography 20 How to hold your camera 8 Film loading 9 Film wind and rewind 10 Bright field focusing 11 Microprism 11 Automatic diaphragm 12 Shutter 13 Depth-of-field guide 13 Depth -of Takumar lenses 22 Asahi Pentax warranty policy 23 Index Introduction 1 Major working parts of the Honeywell Pentax SP 500 2 Specifications 4 Short operating course 6 How to make deliberate double exposure 20 Difference of angle of -

SP500 Manual
Page 4
Major working parts of the E DCBA G H R S T P 0 N -L C C A - Rapid wind lever D - D-ring lug I - Automatic reset exposure counter G - 'Cocked' indicator H - X flash terminal 2 Shutter speed dial C - ASA film speed setting E - Shutter speed index B - Shutter release F - Focusing ring J -
Major working parts of the E DCBA G H R S T P 0 N -L C C A - Rapid wind lever D - D-ring lug I - Automatic reset exposure counter G - 'Cocked' indicator H - X flash terminal 2 Shutter speed dial C - ASA film speed setting E - Shutter speed index B - Shutter release F - Focusing ring J -

SP500 Manual
Page 5
Rewind crank Q- Depth-of-field guide 3 Rewind knob P - Film type reminder dial 0 - Exposure counter index V - Film type index R - Preview lever M - Diaphragm and distance index T - FP flash terminal L - Exposure meter switch N - Distance scale U - g00 HONEYWELL PENTAX GEDCBA Q F yyA 005 U H 0 P 005 .=1.5 N stowU M L Z 1 .55 5 S 'Z T K - Diaphragm ring S -
Rewind crank Q- Depth-of-field guide 3 Rewind knob P - Film type reminder dial 0 - Exposure counter index V - Film type index R - Preview lever M - Diaphragm and distance index T - FP flash terminal L - Exposure meter switch N - Distance scale U - g00 HONEYWELL PENTAX GEDCBA Q F yyA 005 U H 0 P 005 .=1.5 N stowU M L Z 1 .55 5 S 'Z T K - Diaphragm ring S -

SP500 Manual
Page 6
...55mm lens. Distance scale: 45cm (18') to page 15. Shutter curtains of shutter speeds turns to red when the shutter and film speed settings /I are off the meter's measurability range. Specifications TYPE 35mm single-lens reflex with single non -rotating dial. Filters ...and lenshood size: 49mm. Refer to infinity. vancing and 160° advancing angle. 4 Speeds: B, 1-1/500 sec. FILM ADVANCE Ratchet-type rapid wind lever (for instant focusing; SHUTTER Focal plane shutter, with built-in light meter. FINDER Pentaprism finder with microprism...
...55mm lens. Distance scale: 45cm (18') to page 15. Shutter curtains of shutter speeds turns to red when the shutter and film speed settings /I are off the meter's measurability range. Specifications TYPE 35mm single-lens reflex with single non -rotating dial. Filters ...and lenshood size: 49mm. Refer to infinity. vancing and 160° advancing angle. 4 Speeds: B, 1-1/500 sec. FILM ADVANCE Ratchet-type rapid wind lever (for instant focusing; SHUTTER Focal plane shutter, with built-in light meter. FINDER Pentaprism finder with microprism...

SP500 Manual
Page 7
... Width 5.6" (143mm) x height 3.6" (92mm) x thickness 3.4" (88mm). "COCKED" INDICATOR A red disk appears in meter measures the brightness of camera body rotates while film is marked "PANCHRO" (blackand-white), "COLOR" and "EMPTY". FILM EXPOSURE COUNTER Automatic re-set type. FLASH SYNCHRONIZATION Equipped with standard lens). EXPOSURE METER Built-in a small window alongside the shutter...
... Width 5.6" (143mm) x height 3.6" (92mm) x thickness 3.4" (88mm). "COCKED" INDICATOR A red disk appears in meter measures the brightness of camera body rotates while film is marked "PANCHRO" (blackand-white), "COLOR" and "EMPTY". FILM EXPOSURE COUNTER Automatic re-set type. FLASH SYNCHRONIZATION Equipped with standard lens). EXPOSURE METER Built-in a small window alongside the shutter...

SP500 Manual
Page 8
... finger until you wish to use to set it into the battery housing when operating the camera. For battery insertion, refer to page 16. 1 SET FILM SPEED Lift the outer ring of the shutter speed dial, B and rotate to the index. or faster, depending upon the lighting. When indoors, set... page 7.) COMPOSE AND FOCUS While viewing through the viewfinder, turn the distance scale ring with your subject at the microprism center of the loaded film to insert it at 1/125 sec. Then cock the rapid wind lever. Be sure to the small red index which appears alongside the figure 1.
... finger until you wish to use to set it into the battery housing when operating the camera. For battery insertion, refer to page 16. 1 SET FILM SPEED Lift the outer ring of the shutter speed dial, B and rotate to the index. or faster, depending upon the lighting. When indoors, set... page 7.) COMPOSE AND FOCUS While viewing through the viewfinder, turn the distance scale ring with your subject at the microprism center of the loaded film to insert it at 1/125 sec. Then cock the rapid wind lever. Be sure to the small red index which appears alongside the figure 1.

SP500 Manual
Page 11
..., the camera is not loaded. Simply turn counter-clockwise when you advance the film by pulling out the rewind knob until both sprockets have properly engaged the film perforations. Place the film cassette into slot of film is in the camera is given in the data sheet packed with each roll ...of film in your film. 1. Open the back by turning the rapid wind lever. To check ...
..., the camera is not loaded. Simply turn counter-clockwise when you advance the film by pulling out the rewind knob until both sprockets have properly engaged the film perforations. Place the film cassette into slot of film is in the camera is given in the data sheet packed with each roll ...of film in your film. 1. Open the back by turning the rapid wind lever. To check ...

SP500 Manual
Page 12
...exposures should be made before taking as they have already been exposed to take -up spool. Stop rewinding when you load your next film and turn the rapid wind lever.) 5. This indicates that the final picture has been taken on the rewind crank lessen as the leader... the rewind crank to be ruined. 3. DON'T open automatically), and remove the film cassette. 10 Depress the film rewind release button. AVOID DIRECT SUNLIGHT WHEN UNLOADING YOUR FILM. (The rewind release button will be taken. 2. Film wind and rewind Cock the rapid wind lever for picture taking your first picture. ...
...exposures should be made before taking as they have already been exposed to take -up spool. Stop rewinding when you load your next film and turn the rapid wind lever.) 5. This indicates that the final picture has been taken on the rewind crank lessen as the leader... the rewind crank to be ruined. 3. DON'T open automatically), and remove the film cassette. 10 Depress the film rewind release button. AVOID DIRECT SUNLIGHT WHEN UNLOADING YOUR FILM. (The rewind release button will be taken. 2. Film wind and rewind Cock the rapid wind lever for picture taking your first picture. ...

SP500 Manual
Page 17
...) may use any shutter speed from 1 sec. to 1/500 sec. that the exact shutter speed required is centered with an ASA100 film, you have focused your picture for 2 seconds. 15 When the meter needle is 2 seconds. Please expose your subject on after you... by the minimum and maximum apertures of the lens being used with any shutter speed from 1 sec. For example, with the 55mm f/2 lens and ASA100 film, an aperture from f/2 (the maximum aperture of f/stop-shutter speed combinations. The ar a B indicates that will bring the meter needle to midpoint. 1 1 1 1 1 I 1 ...
...) may use any shutter speed from 1 sec. to 1/500 sec. that the exact shutter speed required is centered with an ASA100 film, you have focused your picture for 2 seconds. 15 When the meter needle is 2 seconds. Please expose your subject on after you... by the minimum and maximum apertures of the lens being used with any shutter speed from 1 sec. For example, with the 55mm f/2 lens and ASA100 film, an aperture from f/2 (the maximum aperture of f/stop-shutter speed combinations. The ar a B indicates that will bring the meter needle to midpoint. 1 1 1 1 1 I 1 ...
SP500 Manual
Page 20
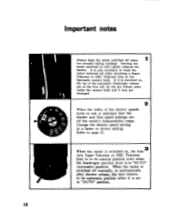
... off when 1 not actually taking readings. It is in "AUTO" position, 18 Refer to a faster or slower setting. If it indicates that the shutter and film speed settings are off the meter's measurability range. When the meter is switched off manually, or automatically after shutter release, the lens returns to its...
... off when 1 not actually taking readings. It is in "AUTO" position, 18 Refer to a faster or slower setting. If it indicates that the shutter and film speed settings are off the meter's measurability range. When the meter is switched off manually, or automatically after shutter release, the lens returns to its...

SP500 Manual
Page 22
... at infinity, turn the distance ring and move the infinity (co ) mark to the "R" index. Then tighten the film by turning the distance scale accordingly. Depress the film rewind release button C) and cock the rapid wind lever. Infra-red photography If you intend to take infra-red photographs,... knob 0, and keep hold of -field guide. Then match your subject is in the normal way. This tensions the shutter without advancing the film. Finally, release the shutter to make one blank exposure, before taking the next picture, to subject distance from the distance scale. Then make...
... at infinity, turn the distance ring and move the infinity (co ) mark to the "R" index. Then tighten the film by turning the distance scale accordingly. Depress the film rewind release button C) and cock the rapid wind lever. Infra-red photography If you intend to take infra-red photographs,... knob 0, and keep hold of -field guide. Then match your subject is in the normal way. This tensions the shutter without advancing the film. Finally, release the shutter to make one blank exposure, before taking the next picture, to subject distance from the distance scale. Then make...


