Multi-line Phn Lowp
Page 4
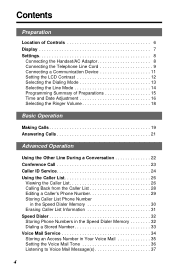
Contents Preparation Location of Controls 16 Display 17 Settings 18 Connecting the Handset/AC Adaptor 18 Connecting the Telephone Line Cord 9 Connecting a Communication Device 11 Setting the LCD Contrast 12 Selecting the Dialing Mode 13 Selecting the Line Mode 14 Programming Summary of ...the Caller List 26 Calling Back from the Caller List 28 Editing a Caller's Phone Number 29 Storing Caller List Phone Number in the Speed Dialer Memory 30 Erasing Caller List Information 31 Speed Dialer 32 Storing Phone Numbers in the Speed Dialer Memory 32 Dialing a Stored Number 33 Voice Mail ...
Contents Preparation Location of Controls 16 Display 17 Settings 18 Connecting the Handset/AC Adaptor 18 Connecting the Telephone Line Cord 9 Connecting a Communication Device 11 Setting the LCD Contrast 12 Selecting the Dialing Mode 13 Selecting the Line Mode 14 Programming Summary of ...the Caller List 26 Calling Back from the Caller List 28 Editing a Caller's Phone Number 29 Storing Caller List Phone Number in the Speed Dialer Memory 30 Erasing Caller List Information 31 Speed Dialer 32 Storing Phone Numbers in the Speed Dialer Memory 32 Dialing a Stored Number 33 Voice Mail ...

Multi-line Phn Lowp
Page 45
To temporarily set the handset down . 3 Adjust the LCD contrast level to make the display distinct (p. 12). Power Outlet 2 Connect the telephone line cord. Mount the unit, then slide down during a conversation, place it as shown here. 45 Useful Information Wall Mounting The unit can be mounted on a wall phone plate. 1 Connect the AC adaptor.
To temporarily set the handset down . 3 Adjust the LCD contrast level to make the display distinct (p. 12). Power Outlet 2 Connect the telephone line cord. Mount the unit, then slide down during a conversation, place it as shown here. 45 Useful Information Wall Mounting The unit can be mounted on a wall phone plate. 1 Connect the AC adaptor.


