
User Manual
Page 1
... Setup...32 Options...40 Appendices...45 Troubleshooting...45 Image Problems...45 Intermission Problems...47 Projector Status Indication...48 Remote Control Problems...49 Audio Problems...49 Replacing the Lamp...50 Cleaning the Projector...52 Compatibility Modes...53 RS232 Commands...55 RS232 Protocol Function List...56 Ceiling Installation...59...
... Setup...32 Options...40 Appendices...45 Troubleshooting...45 Image Problems...45 Intermission Problems...47 Projector Status Indication...48 Remote Control Problems...49 Audio Problems...49 Replacing the Lamp...50 Cleaning the Projector...52 Compatibility Modes...53 RS232 Commands...55 RS232 Protocol Function List...56 Ceiling Installation...59...
User Manual
Page 4
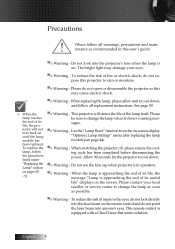
... or service center to change the lamp as soon as this projector to change the lamp when it shows warning messages. ▀■ Warning - v When the lamp reaches the end of its useful life" displays on -screen display "Options|Lamp Settings" menu after replacing the lamp module (see page 44). ▀...on the remote control and do not point the laser beam into the projector's lens when the lamp is approaching the end of injury to cool down , and follow the procedures listed under "Replacing the Lamp" section on pages 50 - 51. ▀■ Warning - This remote control is in...
... or service center to change the lamp as soon as this projector to change the lamp when it shows warning messages. ▀■ Warning - v When the lamp reaches the end of its useful life" displays on -screen display "Options|Lamp Settings" menu after replacing the lamp module (see page 44). ▀...on the remote control and do not point the laser beam into the projector's lens when the lamp is approaching the end of injury to cool down , and follow the procedures listed under "Replacing the Lamp" section on pages 50 - 51. ▀■ Warning - This remote control is in...
User Manual
Page 44
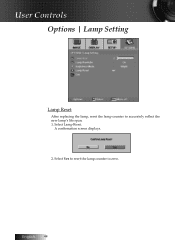
Select Yes to reset the lamp counter to accurately reflect the new lamp's life span. 1. English 44 User Controls Options | Lamp Setting Lamp Reset After replacing the lamp, reset the lamp counter to zero. A confirmation screen displays. 2. Select Lamp Reset.
Select Yes to reset the lamp counter to accurately reflect the new lamp's life span. 1. English 44 User Controls Options | Lamp Setting Lamp Reset After replacing the lamp, reset the lamp counter to zero. A confirmation screen displays. 2. Select Lamp Reset.

User Manual
Page 45
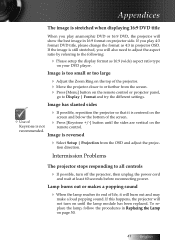
... of connectors are using a PC: For Windows 95, 98, 2000, XP: 1. Verify the resolution setting is lower than or equal to the Replacing the lamp section. 4 Make sure you have removed the lens cap and the projector is switched on the remote. 4 If you are using . Next, ... all devices. Select the Change button under the SP box; choose the resolution mode you are not bent or broken. 4 Check if the projection lamp has been securely installed. Please refer to UXGA (1600 x 1200). 6. Verify that your projector, please refer to the following information. Open the My...
... of connectors are using a PC: For Windows 95, 98, 2000, XP: 1. Verify the resolution setting is lower than or equal to the Replacing the lamp section. 4 Make sure you have removed the lens cap and the projector is switched on the remote. 4 If you are using . Next, ... all devices. Select the Change button under the SP box; choose the resolution mode you are not bent or broken. 4 Check if the projection lamp has been securely installed. Please refer to UXGA (1600 x 1200). 6. Verify that your projector, please refer to the following information. Open the My...
User Manual
Page 47
... not turn off the projector, then unplug the power cord and wait at least 60 seconds before reconnecting power. To replace the lamp, follow the procedures in R��e�p�l�a�c�i�n�g��t�h��e�L�...Image has slanted sides 4 If possible, reposition the projector so that it is not 4 Press [Keystone +/-] button until the lamp module has been replaced. tion direction. Intermission Problems The projector stops responding to Display | Format and try the different settings. If the image is ...
... not turn off the projector, then unplug the power cord and wait at least 60 seconds before reconnecting power. To replace the lamp, follow the procedures in R��e�p�l�a�c�i�n�g��t�h��e�L�...Image has slanted sides 4 If possible, reposition the projector so that it is not 4 Press [Keystone +/-] button until the lamp module has been replaced. tion direction. Intermission Problems The projector stops responding to Display | Format and try the different settings. If the image is ...
User Manual
Page 49
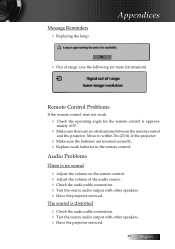
Message Reminders 4 Replacing the lamp: Appendices 4 Out of the audio source. 4 Check the audio cable connection. 4 Test the source audio output with other speakers. 4 Have the projector serviced. Audio Problems ...There is no obstructions between the remote control and the projector. The sound is approxi- mately ±15°. 4 Make sure there are inserted correctly. 4 Replace...
Message Reminders 4 Replacing the lamp: Appendices 4 Out of the audio source. 4 Check the audio cable connection. 4 Test the source audio output with other speakers. 4 Have the projector serviced. Audio Problems ...There is no obstructions between the remote control and the projector. The sound is approxi- mately ±15°. 4 Make sure there are inserted correctly. 4 Replace...

User Manual
Page 50
... mercury and should be disposed of the new lamp, doing so may shorten its operation life. Remove the lamp compartment cover. 3. Appendices Replacing the Lamp The projection lamp should be replaced with a certified replacement part, which you can order from the lamp module. 4. Warning: 4 Be sure to re-move the lamp module. Lift the module handle up and pull...
... mercury and should be disposed of the new lamp, doing so may shorten its operation life. Remove the lamp compartment cover. 3. Appendices Replacing the Lamp The projection lamp should be replaced with a certified replacement part, which you can order from the lamp module. 4. Warning: 4 Be sure to re-move the lamp module. Lift the module handle up and pull...

User Manual
Page 51
Replace the lamp compartment lid and tighten the captive screws. See page 44 for more information. 51 English Insert the replacement lamp and push down firmly. After replacing the lamp, the lamp hours counter must be reset. Tighten the captive screws to hold the lamp in place. 6. Appendices 5.
Replace the lamp compartment lid and tighten the captive screws. See page 44 for more information. 51 English Insert the replacement lamp and push down firmly. After replacing the lamp, the lamp hours counter must be reset. Tighten the captive screws to hold the lamp in place. 6. Appendices 5.

