

User Manual
Page 3
... 6 ------- Remote Control with Mouse Function and Laser Pointer 7 ------- Power On the Projector 9 ------- On-Screen Display Menus 15 ------- Image-I (Computer mode 16 ------- Troubleshooting 22 ------- Changing the Lamp 24 ------- Audio 20 ------- Connection Ports 6 ------- Power Off the Projector 10 ----+--- Adjusting the Projected Image 11 ------- Image-II (Computer mode 18 ------- Powering On/Off the Projector...
... 6 ------- Remote Control with Mouse Function and Laser Pointer 7 ------- Power On the Projector 9 ------- On-Screen Display Menus 15 ------- Image-I (Computer mode 16 ------- Troubleshooting 22 ------- Changing the Lamp 24 ------- Audio 20 ------- Connection Ports 6 ------- Power Off the Projector 10 ----+--- Adjusting the Projected Image 11 ------- Image-II (Computer mode 18 ------- Powering On/Off the Projector...

User Manual
Page 4
...Warning- Precautions Follow all changing instructions. In areas susceptible to computer, please turn back on the unit provided for a long period of the lamp itself. Place in this product to rain or moisture. This product will detect the life of time. Please be sure to the eyes, ...this happens, the projector will burn out and may make a loud popping sound. Extremely hot, cold or humid environment. - When changing the lamp, please allow unit to clean the display housing. Warning- When connecting the projector to excessive dust and dirt. - This remote control is ...
...Warning- Precautions Follow all changing instructions. In areas susceptible to computer, please turn back on the unit provided for a long period of the lamp itself. Place in this product to rain or moisture. This product will detect the life of time. Please be sure to the eyes, ...this happens, the projector will burn out and may make a loud popping sound. Extremely hot, cold or humid environment. - When changing the lamp, please allow unit to clean the display housing. Warning- When connecting the projector to excessive dust and dirt. - This remote control is ...
User Manual
Page 5
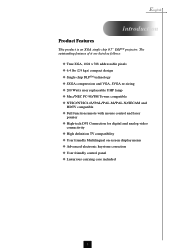
... XGA, 1024 x 768 addressable pixels u 6.4 lbs (2.9 kgs) compact design u Single chip DLPTM technology u SXGA compression and VGA, SVGA re-sizing u 200 Watts user replaceable UHP lamp u Mac/NEC PC-98/FM Towns compatible u NTSC/NTSC4.43/PAL/PAL-M/PAL-N/SECAM and HDTV compatible u Full function remote with mouse control and laser...
... XGA, 1024 x 768 addressable pixels u 6.4 lbs (2.9 kgs) compact design u Single chip DLPTM technology u SXGA compression and VGA, SVGA re-sizing u 200 Watts user replaceable UHP lamp u Mac/NEC PC-98/FM Towns compatible u NTSC/NTSC4.43/PAL/PAL-M/PAL-N/SECAM and HDTV compatible u Full function remote with mouse control and laser...
User Manual
Page 8
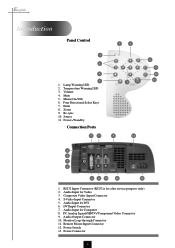
Zoom 9. Composite Video Input Connector 4. PC Analog Signal/HDTV/Component Video Connector 9. Remote Mouse Input Connector 12. Lamp Warning LED 2. Re-sync 10. Power /Standby Connection Ports 5 7 2 6 7 9 12 8 9 10 11 1 2 3 4 6 8 10 11 13 1 RS232 Input Connector (RS232 is for Video 3. Audio Input for ...
Zoom 9. Composite Video Input Connector 4. PC Analog Signal/HDTV/Component Video Connector 9. Remote Mouse Input Connector 12. Lamp Warning LED 2. Re-sync 10. Power /Standby Connection Ports 5 7 2 6 7 9 12 8 9 10 11 1 2 3 4 6 8 10 11 13 1 RS232 Input Connector (RS232 is for Video 3. Audio Input for ...

User Manual
Page 11
... displays "No Signal" , please make sure the signal cables are securely connected. 3. Turn on the main power switch on your source automatically. Turn on the lamp by pressing "Power/Standby" button on the projector first and then the computer. The projector will light solid green. 5. The...
... displays "No Signal" , please make sure the signal cables are securely connected. 3. Turn on the main power switch on your source automatically. Turn on the lamp by pressing "Power/Standby" button on the projector first and then the computer. The projector will light solid green. 5. The...
User Manual
Page 12
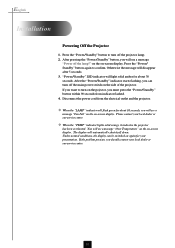
Press the "Power/ Standby" button again to turn off the projector lamp. 2. Please contact your presentation. After pressing the "Power/Standby" button, you will see a message "Over Temperature" on the on the pojector, you must press the "... the side of the projector. If the problem persists, you can be switched on -screen display. v When the "LAMP" indicator will flash green for about 10 seconds, you want to turn off the lamp?" "Power/Standby" LED indicator will see a message "Power off the main power switch on -screen display. Otherwise the...
Press the "Power/ Standby" button again to turn off the projector lamp. 2. Please contact your presentation. After pressing the "Power/Standby" button, you will see a message "Over Temperature" on the on the pojector, you must press the "... the side of the projector. If the problem persists, you can be switched on -screen display. v When the "LAMP" indicator will flash green for about 10 seconds, you want to turn off the lamp?" "Power/Standby" LED indicator will see a message "Power off the main power switch on -screen display. Otherwise the...
User Manual
Page 23
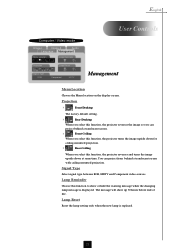
... up 30 hours before end of life. You can project behind a translucent screen with ceiling mounted projection. Lamp Reset Reset the lamp setting only when the new lamp is displayed. Signal Type Select signal type between RGB, HDTV and Component video sources. The message will show... or hide the warning message when the changing lamp message is replaced. 21 Projection 4 Front-Desktop The factory default setting. 4 Rear-Desktop When you select this function, the projector reverses...
... up 30 hours before end of life. You can project behind a translucent screen with ceiling mounted projection. Lamp Reset Reset the lamp setting only when the new lamp is displayed. Signal Type Select signal type between RGB, HDTV and Component video sources. The message will show... or hide the warning message when the changing lamp message is replaced. 21 Projection 4 Front-Desktop The factory default setting. 4 Rear-Desktop When you select this function, the projector reverses...
User Manual
Page 24
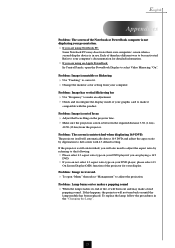
... and the projector. 22 Follow the steps outlined below to implement above steps 1~2. If the projector is less than or equal to the "Changing the lamp" section. 4 Make sure you are using a PC: If the resolution of connectors are not crooked or broken. 4 Check if the projection... lamp has been securely installed. choose the resolution mode you are using. Please refer to 1024 x 768 resolution. In the Windows Program Manager, click the "Windows ...
... and the projector. 22 Follow the steps outlined below to implement above steps 1~2. If the projector is less than or equal to the "Changing the lamp" section. 4 Make sure you are using a PC: If the resolution of connectors are not crooked or broken. 4 Check if the projection... lamp has been securely installed. choose the resolution mode you are using. Please refer to 1024 x 768 resolution. In the Windows Program Manager, click the "Windows ...
User Manual
Page 25
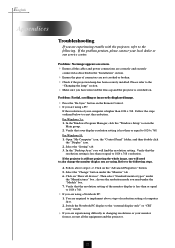
... the projector lens. 4 Make sure the projection screen is reversed. 4 To open the PowerBook Display to select Video Mirroring "On". To replace the lamp, follow the procedures in use. Problem : Image has vertical flickering bar 4 Use "Frequency" to make an adjustment. 4 Check and reconfigure the display... mode of your graphic card to make a loud popping sound. If the projector is in the "Changing the Lamp". 23 Problem : Image is between the required distance 3.7ft.(1.1m)~ 40.7ft.(12.4m) from your computer. Problem : The screen is unstable ...
... the projector lens. 4 Make sure the projection screen is reversed. 4 To open the PowerBook Display to select Video Mirroring "On". To replace the lamp, follow the procedures in use. Problem : Image has vertical flickering bar 4 Use "Frequency" to make an adjustment. 4 Check and reconfigure the display... mode of your graphic card to make a loud popping sound. If the projector is in the "Changing the Lamp". 23 Problem : Image is between the required distance 3.7ft.(1.1m)~ 40.7ft.(12.4m) from your computer. Problem : The screen is unstable ...
User Manual
Page 26
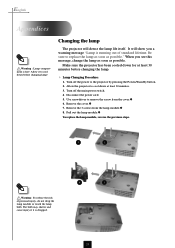
...Standby button. 2. Disconnect the power cord. 5. Remove the 3 screws from the cover.Π6. Be sure to cool down before changing the lamp. 4 Lamp Changing Procedure: 1. Turn off the main power switch. 4. Remove the cover. 7. Make sure the projector has been cooled down at ...least 30 minutes before changing lamp! Allow it is hot! It will detect the lamp life itself. Pull out the lamp module. To replace the lamp module, reverse the previous steps. 2 1 Warning : To reduce the risk of standard...
...Standby button. 2. Disconnect the power cord. 5. Remove the 3 screws from the cover.Π6. Be sure to cool down before changing the lamp. 4 Lamp Changing Procedure: 1. Turn off the main power switch. 4. Remove the cover. 7. Make sure the projector has been cooled down at ...least 30 minutes before changing lamp! Allow it is hot! It will detect the lamp life itself. Pull out the lamp module. To replace the lamp module, reverse the previous steps. 2 1 Warning : To reduce the risk of standard...
User Manual
Page 27
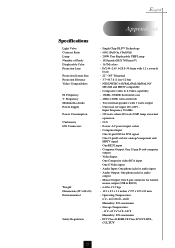
...) - 6.4 lbs / 2.9 kgs - 10.9 x 8.9 x 3.3 inches / 277 x 225 x 85 mm - English Appendices Specifications Light Valve Contrast Ratio Lamp Number of Pixels Displayable Color Projection Lens Projection Screen Size Projection Distance Video Compatibility H. Single Chip DLPTM Technology - 600:1 (Full On / Full Off) - 200W... User Replaceable UHP Lamp - 1024 pixels(H) X 768 lines(V) - 16.7M colors - NTSC/NTSC 4.43/PAL/PAL-M/PAL-N/ SECAM and HDTV compatible - Mouse ...
...) - 6.4 lbs / 2.9 kgs - 10.9 x 8.9 x 3.3 inches / 277 x 225 x 85 mm - English Appendices Specifications Light Valve Contrast Ratio Lamp Number of Pixels Displayable Color Projection Lens Projection Screen Size Projection Distance Video Compatibility H. Single Chip DLPTM Technology - 600:1 (Full On / Full Off) - 200W... User Replaceable UHP Lamp - 1024 pixels(H) X 768 lines(V) - 16.7M colors - NTSC/NTSC 4.43/PAL/PAL-M/PAL-N/ SECAM and HDTV compatible - Mouse ...


