User Manual
Page 7
System Requirement ± Intel Pentium® II or III, or compatible system with AGP Bus Extension Slot ± CD-ROM drive, Double speed or faster ± Hard Drive with at least 10MB Free space ± MS Windows® 9x / Me/NT™4.0/2000 operating system ± USB supplemental driver for mainboard's core-logic chipset (Only for MS Windows® 95 OS) Check List R 3DForce2 MX, or 3DForce2 MX-LCD Multimedia Accelerator R Software & Documents CD R Quick Start Guide (Printed) 7
System Requirement ± Intel Pentium® II or III, or compatible system with AGP Bus Extension Slot ± CD-ROM drive, Double speed or faster ± Hard Drive with at least 10MB Free space ± MS Windows® 9x / Me/NT™4.0/2000 operating system ± USB supplemental driver for mainboard's core-logic chipset (Only for MS Windows® 95 OS) Check List R 3DForce2 MX, or 3DForce2 MX-LCD Multimedia Accelerator R Software & Documents CD R Quick Start Guide (Printed) 7
User Manual
Page 11
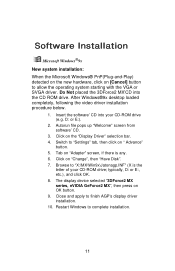
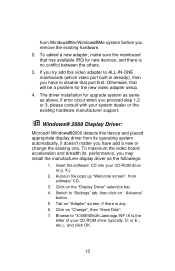
..." button. 5. The display device selected "3DForce2 MX series, nVIDIA GeForce2 MX", then press on the "Display Driver" selection bar. 4. Switch to finish AGP's display driver installation. 10. Browse to complete installation. 11 Restart Windows to "X:\MX\Win9x\Jatonagp.INF" (X is any. 6. Click...driver. Software Installation ÿ Microsoft Windows®9x New system installation: When the Microsoft Windows® PnP(Plug-and-Play) detected on the new hardware, click on "Change", then "Have Disk". 7. After Windows®9x desktop loaded completely, following the video driver...
..." button. 5. The display device selected "3DForce2 MX series, nVIDIA GeForce2 MX", then press on the "Display Driver" selection bar. 4. Switch to finish AGP's display driver installation. 10. Browse to complete installation. 11 Restart Windows to "X:\MX\Win9x\Jatonagp.INF" (X is any. 6. Click...driver. Software Installation ÿ Microsoft Windows®9x New system installation: When the Microsoft Windows® PnP(Plug-and-Play) detected on the new hardware, click on "Change", then "Have Disk". 7. After Windows®9x desktop loaded completely, following the video driver...
User Manual
Page 12
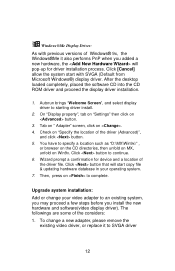
... a new adapter, please remove the existing video driver, or replace it also performs PnP when you install the new hardware and software(video display driver). Autorun brings "Welcome Screen", and select display driver to SVGA driver 12 To change your operating system. 7. ...MX, unfold on to an existing system, you may proceed a few steps before you added a new hardware, the will start with previous versions of the driver (Advanced)", and click button. 5. Then, press on Win9x. Click [Cancel] allow the system start copy file & updating hardware database in your video...
... a new adapter, please remove the existing video driver, or replace it also performs PnP when you install the new hardware and software(video display driver). Autorun brings "Welcome Screen", and select display driver to SVGA driver 12 To change your operating system. 7. ...MX, unfold on to an existing system, you may proceed a few steps before you added a new hardware, the will start with previous versions of the driver (Advanced)", and click button. 5. Then, press on Win9x. Click [Cancel] allow the system start copy file & updating hardware database in your video...
User Manual
Page 13
... consult with your system dealer or the existing hardware manufacturer support. ÿ Windows® 2000 Display Driver: Microsoft Windows®2000 detects this video adapter to ALL-IN-ONE mainboards (which video port built-in already), then you have to disable that port first. Tab on the "Display...click OK. 13 To maximum the video board acceleration and breadth its operating system automatically, it doesn't matter you have add a new or change the existing one. Browse to "Settings" tab, then click on "Change", then "Have Disk". 7. Switch to "X:\MX\Win2k\Jatonagp.INF (X is no ...
... consult with your system dealer or the existing hardware manufacturer support. ÿ Windows® 2000 Display Driver: Microsoft Windows®2000 detects this video adapter to ALL-IN-ONE mainboards (which video port built-in already), then you have to disable that port first. Tab on the "Display...click OK. 13 To maximum the video board acceleration and breadth its operating system automatically, it doesn't matter you have add a new or change the existing one. Browse to "Settings" tab, then click on "Change", then "Have Disk". 7. Switch to "X:\MX\Win2k\Jatonagp.INF (X is no ...
User Manual
Page 14
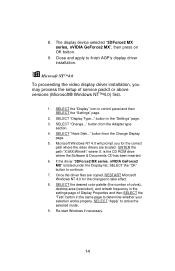
... SELECT "Apply" to determine whether your selection works properly. The display device selected "3DForce2 MX series, nVIDIA GeForce2 MX", then press on OK button. 9. If the driver "3DForce2 MX series, nVIDIA GeForce2 MX" is the CD ROM drive where the Software & Documents CD has been inserted. 6.... the selected mode. 9. Once the driver files are located. Close and apply to finish AGP's display driver installation. ÿ Microsoft NT™4.0 To proceeding the video display driver installation, you for the correct path where the video drivers are copied, RESTART Microsoft Windows NT ...
... SELECT "Apply" to determine whether your selection works properly. The display device selected "3DForce2 MX series, nVIDIA GeForce2 MX", then press on OK button. 9. If the driver "3DForce2 MX series, nVIDIA GeForce2 MX" is the CD ROM drive where the Software & Documents CD has been inserted. 6.... the selected mode. 9. Once the driver files are located. Close and apply to finish AGP's display driver installation. ÿ Microsoft NT™4.0 To proceeding the video display driver installation, you for the correct path where the video drivers are copied, RESTART Microsoft Windows NT ...


