User Manual
Page 1
LCD nVIDIA TNT2 GeForce2 MX™/MX400™ User's Manual Version 3.00 Copyright © 2000 Jaton Corporation, USA 3DForce2 MX 3DForce2 MX -
LCD nVIDIA TNT2 GeForce2 MX™/MX400™ User's Manual Version 3.00 Copyright © 2000 Jaton Corporation, USA 3DForce2 MX 3DForce2 MX -
User Manual
Page 4
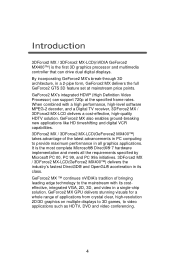
...-2 decoder, and a Digital TV receiver, 3DForce2 MX / 3DForce2 MX-LCD delivers a cost-effective, high-quality HDTV solution. GeForce2 MX ™ continues nVIDIA's tradition of the latest advancements in PC computing to video applications such as HDTV, DVD and video conferencing. 4 By incorporating GeForce2 MX's break-through 3D architecture, in a single-chip solution. GeForce2 MX GPU delivers stunning visuals for a whole range...
...-2 decoder, and a Digital TV receiver, 3DForce2 MX / 3DForce2 MX-LCD delivers a cost-effective, high-quality HDTV solution. GeForce2 MX ™ continues nVIDIA's tradition of the latest advancements in PC computing to video applications such as HDTV, DVD and video conferencing. 4 By incorporating GeForce2 MX's break-through 3D architecture, in a single-chip solution. GeForce2 MX GPU delivers stunning visuals for a whole range...
User Manual
Page 7
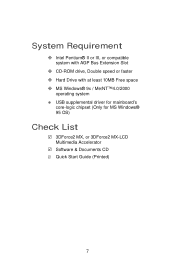
System Requirement ± Intel Pentium® II or III, or compatible system with AGP Bus Extension Slot ± CD-ROM drive, Double speed or faster ± Hard Drive with at least 10MB Free space ± MS Windows® 9x / Me/NT™4.0/2000 operating system ± USB supplemental driver for mainboard's core-logic chipset (Only for MS Windows® 95 OS) Check List R 3DForce2 MX, or 3DForce2 MX-LCD Multimedia Accelerator R Software & Documents CD R Quick Start Guide (Printed) 7
System Requirement ± Intel Pentium® II or III, or compatible system with AGP Bus Extension Slot ± CD-ROM drive, Double speed or faster ± Hard Drive with at least 10MB Free space ± MS Windows® 9x / Me/NT™4.0/2000 operating system ± USB supplemental driver for mainboard's core-logic chipset (Only for MS Windows® 95 OS) Check List R 3DForce2 MX, or 3DForce2 MX-LCD Multimedia Accelerator R Software & Documents CD R Quick Start Guide (Printed) 7
User Manual
Page 8
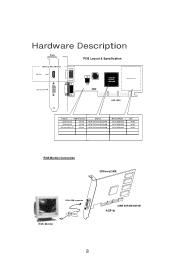
Hardware Description Plate PCB Layout & Specification 3DForce2 MX-LCD ONLY DVI Out nVIDIA GeForce2 MX400 Display Memory Y1 DB 15 VGA AGP BUS Product / PCB Reversion 3DForce2 MX 82118A 3DForce2 MX 82118D 3DForce2 MX-LCD 82118A Chipset nVIDIA GeForce2 MX/MX400 nVIDIA GeForce2 MX/MX400 nVIDIA GeForce2 MX/MX400 Memory Model / 2M*32 SDRAMx4 2M*32 SDRAMx4 2M*32 SDRAMx4 Size 32 MB 32 MB 32 MB RGB Monitor Connection 3DForce2 MX 15Pin RGB connector RGB Monitor RGB Out 32MB SDRAM/SGRAM AGP 4x 8
Hardware Description Plate PCB Layout & Specification 3DForce2 MX-LCD ONLY DVI Out nVIDIA GeForce2 MX400 Display Memory Y1 DB 15 VGA AGP BUS Product / PCB Reversion 3DForce2 MX 82118A 3DForce2 MX 82118D 3DForce2 MX-LCD 82118A Chipset nVIDIA GeForce2 MX/MX400 nVIDIA GeForce2 MX/MX400 nVIDIA GeForce2 MX/MX400 Memory Model / 2M*32 SDRAMx4 2M*32 SDRAMx4 2M*32 SDRAMx4 Size 32 MB 32 MB 32 MB RGB Monitor Connection 3DForce2 MX 15Pin RGB connector RGB Monitor RGB Out 32MB SDRAM/SGRAM AGP 4x 8

User Manual
Page 9
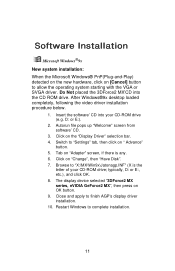
Discharge static electricity by touching the GROUND such as metal part of your case connected with good power ground before you handle the electronic circuit boards. 9 LCD Display Panel Connection 3DForce2 MX-LCD DVI Out Digital Video Interface AGP 4x 32MB Frame Buffer Hardware Installation Installation Procedures !! WARNING !!
Discharge static electricity by touching the GROUND such as metal part of your case connected with good power ground before you handle the electronic circuit boards. 9 LCD Display Panel Connection 3DForce2 MX-LCD DVI Out Digital Video Interface AGP 4x 32MB Frame Buffer Hardware Installation Installation Procedures !! WARNING !!
User Manual
Page 11
... completely, following the video driver installation procedure below. 1. typically, D: or E:, etc.), and click OK. 8. Close and apply to complete installation. 11 D: or E:). 2. Click on OK button. 9. Restart Windows to finish AGP's display driver installation. 10. Autorun file pops up "Welcome" screen from software' CD. 3. The display device selected "3DForce2 MX series, nVIDIA GeForce2 MX", then press...
... completely, following the video driver installation procedure below. 1. typically, D: or E:, etc.), and click OK. 8. Close and apply to complete installation. 11 D: or E:). 2. Click on OK button. 9. Restart Windows to finish AGP's display driver installation. 10. Autorun file pops up "Welcome" screen from software' CD. 3. The display device selected "3DForce2 MX series, nVIDIA GeForce2 MX", then press...
User Manual
Page 12
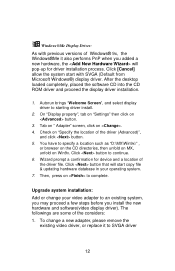
... continue. 6. Click button to starting driver install. 2. Then, press on to specify a location such as "D:\MX\Win9x\" , or browser on the CD directories, then unfold on MX, unfold on "Specify the location of Windows® 9x, the Windows®Me it to an existing system,... operating system. 7. Upgrade system installation: Add or change a new adapter, please remove the existing video driver, or replace it also performs PnP when you install the new hardware and software(video display driver). ÿ Windows®Me Display Driver: As with SVGA (Default from Microsoft Windows&#...
... continue. 6. Click button to starting driver install. 2. Then, press on to specify a location such as "D:\MX\Win9x\" , or browser on the CD directories, then unfold on MX, unfold on "Specify the location of Windows® 9x, the Windows®Me it to an existing system,... operating system. 7. Upgrade system installation: Add or change a new adapter, please remove the existing video driver, or replace it also performs PnP when you install the new hardware and software(video display driver). ÿ Windows®Me Display Driver: As with SVGA (Default from Microsoft Windows&#...
User Manual
Page 13
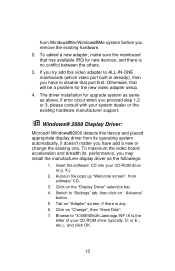
...D: or E:, etc.), and click OK. 13 Tab on " Advance" button. 5. Autorun file pops up "Welcome screen" from software' CD. 3. Switch to "X:\MX\Win2k\Jatonagp.INF (X is no conflict between the others. 3. Browse to "Settings" tab, then click on "Adapter" screen, if there is any. 6. from Windows...you have add a new or change the existing one. Click on the "Display Driver" selection bar. 4. Otherwise, that has available IRQ for the new video adapter setup. 4. X:). 2. Insert the software' CD into your CD-ROM drive; Click on "Change", then "Have Disk". 7. To added a new ...
...D: or E:, etc.), and click OK. 13 Tab on " Advance" button. 5. Autorun file pops up "Welcome screen" from software' CD. 3. Switch to "X:\MX\Win2k\Jatonagp.INF (X is no conflict between the others. 3. Browse to "Settings" tab, then click on "Adapter" screen, if there is any. 6. from Windows...you have add a new or change the existing one. Click on the "Display Driver" selection bar. 4. Otherwise, that has available IRQ for the new video adapter setup. 4. X:). 2. Insert the software' CD into your CD-ROM drive; Click on "Change", then "Have Disk". 7. To added a new ...
User Manual
Page 14
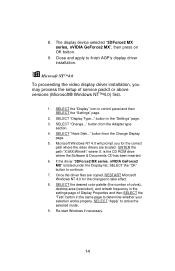
... control panel and then SELECT the "Settings" page. 2. button from the Adapter type section. 4. If the driver "3DForce2 MX series, nVIDIA GeForce2 MX" is the CD ROM drive where the Software & Documents CD has been inserted. 6. SELECT the desired color palette (the ... The display device selected "3DForce2 MX series, nVIDIA GeForce2 MX", then press on OK button. 9. SELECT "Apply" to finish AGP's display driver installation. ÿ Microsoft NT™4.0 To proceeding the video display driver installation, you for the correct path where the video drivers are copied, RESTART Microsoft ...
... control panel and then SELECT the "Settings" page. 2. button from the Adapter type section. 4. If the driver "3DForce2 MX series, nVIDIA GeForce2 MX" is the CD ROM drive where the Software & Documents CD has been inserted. 6. SELECT the desired color palette (the ... The display device selected "3DForce2 MX series, nVIDIA GeForce2 MX", then press on OK button. 9. SELECT "Apply" to finish AGP's display driver installation. ÿ Microsoft NT™4.0 To proceeding the video display driver installation, you for the correct path where the video drivers are copied, RESTART Microsoft ...

