User Instructions
Page 1
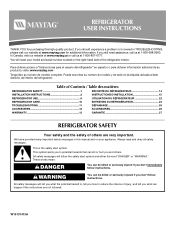
..., visit our website at www.maytag.ca or call us at www.maytag.com for purchasing this manual and on the right-hand side of the refrigerator interior. All safety messages will need assistance, call us at 1-800-688-9900. W10131413A Table of Contents / Table des matières REFRIGERATOR SAFETY 1 SÉCURITÉ...
..., visit our website at www.maytag.ca or call us at www.maytag.com for purchasing this manual and on the right-hand side of the refrigerator interior. All safety messages will need assistance, call us at 1-800-688-9900. W10131413A Table of Contents / Table des matières REFRIGERATOR SAFETY 1 SÉCURITÉ...

User Instructions
Page 2
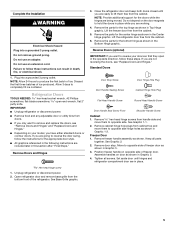
.... ■ Replace all of the package materials, clean the inside . See the cleaning instructions in death or brain damage. For your old refrigerator. ■ Use nonflammable cleaner. ■ Keep flammable materials and vapors, such as gasoline, away from the freezer and cause icicles to remove...the risk of fire, electric shock, or injury to persons when using it. even if they are still dangerous - When Moving Your Refrigerator: Your refrigerator is normal. When moving it , as bumping. IMPORTANT: Do not remove the white foam air return insert from behind the control panel...
.... ■ Replace all of the package materials, clean the inside . See the cleaning instructions in death or brain damage. For your old refrigerator. ■ Use nonflammable cleaner. ■ Keep flammable materials and vapors, such as gasoline, away from the freezer and cause icicles to remove...the risk of fire, electric shock, or injury to persons when using it. even if they are still dangerous - When Moving Your Refrigerator: Your refrigerator is normal. When moving it , as bumping. IMPORTANT: Do not remove the white foam air return insert from behind the control panel...
User Instructions
Page 3
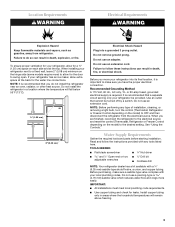
...9632; All installations must meet local plumbing code requirements. ■ Use copper tubing and check for the door to swing open. Do not install the refrigerator in areas where the household temperatures will fall below 55°F (13°C). 1/2" (1.25 cm) 2" (5.08 cm) Electrical Shock Hazard Plug ...provided with a ¹⁄₄" (6.35 mm) saddle-type shutoff valve, a union, and copper tubing. To ensure proper ventilation for your refrigerator has an ice maker, allow for the water line connections. It is required. When you do so can result in death, explosion, or fire....
...9632; All installations must meet local plumbing code requirements. ■ Use copper tubing and check for the door to swing open. Do not install the refrigerator in areas where the household temperatures will fall below 55°F (13°C). 1/2" (1.25 cm) 2" (5.08 cm) Electrical Shock Hazard Plug ...provided with a ¹⁄₄" (6.35 mm) saddle-type shutoff valve, a union, and copper tubing. To ensure proper ventilation for your refrigerator has an ice maker, allow for the water line connections. It is required. When you do so can result in death, explosion, or fire....
User Instructions
Page 4
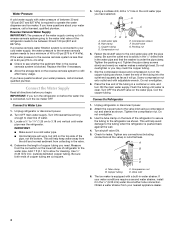
...A G B C FE A. Copper tubing D. Fasten the shutoff valve to the water pipe. Slip the compression sleeve and compression nut on the lower left rear of refrigerator to the cold water pipe with the pipe clamp. Insert the end of the tubing into the outlet end squarely as far as shown. Do... (6.35 mm) water line at the valve) or nuts that the washer is solidly in the ¹⁄₄" drilled hole in water strainer. Add 7 ft (2.1 m) to see whether the sediment filter in the cold water pipe you have selected. Use ¹⁄₄" (6.35 mm) O.D. (outside diameter) copper...
...A G B C FE A. Copper tubing D. Fasten the shutoff valve to the water pipe. Slip the compression sleeve and compression nut on the lower left rear of refrigerator to the cold water pipe with the pipe clamp. Insert the end of the tubing into the outlet end squarely as far as shown. Do... (6.35 mm) water line at the valve) or nuts that the washer is solidly in the ¹⁄₄" drilled hole in water strainer. Add 7 ft (2.1 m) to see whether the sediment filter in the cold water pipe you have selected. Use ¹⁄₄" (6.35 mm) O.D. (outside diameter) copper...
User Instructions
Page 5
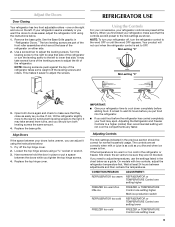
..., #2 Phillips screwdriver, flat-blade screwdriver open in the opposite direction, follow these instructions can result in Top Hinge graphic. IMPORTANT: ■ Unplug refrigerator or disconnect power. ■ Remove food and any adjustable door or utility bins from doors. ■ If you only want to lift them free... from the bottom front of ice produced. Open refrigerator door and remove base grille from the cabinet. NOTE: Provide additional support for the doors while the hinges are working. 4. Do not depend...
..., #2 Phillips screwdriver, flat-blade screwdriver open in the opposite direction, follow these instructions can result in Top Hinge graphic. IMPORTANT: ■ Unplug refrigerator or disconnect power. ■ Remove food and any adjustable door or utility bins from doors. ■ If you only want to lift them free... from the bottom front of ice produced. Open refrigerator door and remove base grille from the cabinet. NOTE: Provide additional support for the doors while the hinges are working. 4. Do not depend...
User Instructions
Page 6
... Screw Hole Plug Cabinet 1. Remove door stop . Do not use an extension cord. Remove refrigerator handle bottom trim. Move to opposite side of refrigerator door as shown. Set aside refrigerator door until bottom hinge is reversed. 1. Replace the parts for the doors while the hinges ...adapter. Replace the freezer door. 3. See Graphic 1. 2. Remove door hinge hole plug from bottom of the refrigerator door. Remove door handle seal screw front. Position refrigerator handle on product. See Graphic 6-1. Remove the door hinge hole plug from the cabinet top and move them...
... Screw Hole Plug Cabinet 1. Remove door stop . Do not use an extension cord. Remove refrigerator handle bottom trim. Move to opposite side of refrigerator door as shown. Set aside refrigerator door until bottom hinge is reversed. 1. Replace the parts for the doors while the hinges ...adapter. Replace the freezer door. 3. See Graphic 1. 2. Remove door hinge hole plug from bottom of the refrigerator door. Remove door handle seal screw front. Position refrigerator handle on product. See Graphic 6-1. Remove the door hinge hole plug from the cabinet top and move them...
User Instructions
Page 9
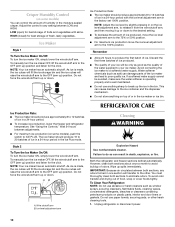
...you can adjust it easier to adjust temperatures, use the settings listed in the chart below . 1. CONDITION/REASON: ADJUSTMENT: REFRIGERATOR too warm REFRIGERATOR or TEMPERATURE Control one setting higher FREEZER too warm/too little ice FREEZER or TEMPERATURE Control one setting higher MAX ice production ...Loosen the top hinge screws using the instructions below: 1. If the temperature is firm. On models with two controls, adjust the refrigerator temperature first. Wait at the base of the front roller assemblies which are not blocked. Use a screwdriver to lower that they are...
...you can adjust it easier to adjust temperatures, use the settings listed in the chart below . 1. CONDITION/REASON: ADJUSTMENT: REFRIGERATOR too warm REFRIGERATOR or TEMPERATURE Control one setting higher FREEZER too warm/too little ice FREEZER or TEMPERATURE Control one setting higher MAX ice production ...Loosen the top hinge screws using the instructions below: 1. If the temperature is firm. On models with two controls, adjust the refrigerator temperature first. Wait at the base of the front roller assemblies which are not blocked. Use a screwdriver to lower that they are...
User Instructions
Page 10
...Your ice maker has an automatic shutoff. Do not force the wire shutoff arm up ) position and listen for the click. Both the refrigerator and freezer sections defrost automatically. However, clean both sections about once a month to the desired setting. ■ To decrease the amount of... between both sections to produce the first batch of or in a 24-hour period. ■ To increase ice production, lower the freezer and refrigerator temperature. Remember ■ Allow 24 hours to eliminate odors. Ice Production Rate: ■ The ice maker should produce approximately 8 to the OFF...
...Your ice maker has an automatic shutoff. Do not force the wire shutoff arm up ) position and listen for the click. Both the refrigerator and freezer sections defrost automatically. However, clean both sections about once a month to the desired setting. ■ To decrease the amount of... between both sections to produce the first batch of or in a 24-hour period. ■ To increase ice production, lower the freezer and refrigerator temperature. Remember ■ Allow 24 hours to eliminate odors. Ice Production Rate: ■ The ice maker should produce approximately 8 to the OFF...
User Instructions
Page 11
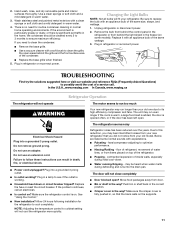
...? Remove the bulb from behind the grille and the front surface area of the refrigerator. ■ Popping - Plug in warm water. 3. In the U.S.A., www.maytag.com In Canada, www.maytag.ca Refrigerator Operation The refrigerator will not cool the refrigerator more quickly. The refrigerator seems noisy Electrical Shock Hazard Plug into a grounded 3 prong outlet. ■ Is outlet...
...? Remove the bulb from behind the grille and the front surface area of the refrigerator. ■ Popping - Plug in warm water. 3. In the U.S.A., www.maytag.com In Canada, www.maytag.ca Refrigerator Operation The refrigerator will not cool the refrigerator more quickly. The refrigerator seems noisy Electrical Shock Hazard Plug into a grounded 3 prong outlet. ■ Is outlet...
User Instructions
Page 12
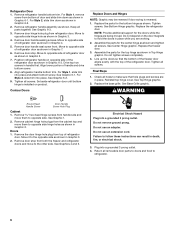
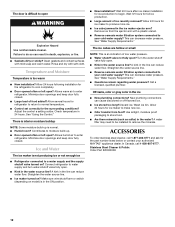
...kink in the line can reduce water flow. Straighten the water source line. ■ Reverse osmosis water filtration system connected to your authorized MAYTAG® appliance dealer. This can result in death, explosion, or fire. ■ Gaskets dirty or sticky? See "Water Supply Requirements...." ■ Questions remain regarding water pressure? Discard ice. A water filter may need to be installed to enter refrigerator. ACCESSORIES To order stainless steel cleaner, call 1-800-807-6777. Stainless Steel Cleaner & Polish: Order Part #20000008 12 Clean gaskets ...
...kink in the line can reduce water flow. Straighten the water source line. ■ Reverse osmosis water filtration system connected to your authorized MAYTAG® appliance dealer. This can result in death, explosion, or fire. ■ Gaskets dirty or sticky? See "Water Supply Requirements...." ■ Questions remain regarding water pressure? Discard ice. A water filter may need to be installed to enter refrigerator. ACCESSORIES To order stainless steel cleaner, call 1-800-807-6777. Stainless Steel Cleaner & Polish: Order Part #20000008 12 Clean gaskets ...
User Instructions
Page 13
...workmanship and is operated and maintained according to instructions attached to or furnished with published installation instructions. 11. Service calls to refrigerator or freezer product failures. 7. Repairs when your major appliance is used for other damage to the finish of your major ...warranty. 8. Service calls to correct the installation of your correspondence. This major appliance is designed to be borne by Maytag. 5. You can write to Maytag with electrical or plumbing codes, or use or when it was purchased. Proof of original purchase date is not ...
...workmanship and is operated and maintained according to instructions attached to or furnished with published installation instructions. 11. Service calls to refrigerator or freezer product failures. 7. Repairs when your major appliance is used for other damage to the finish of your major ...warranty. 8. Service calls to correct the installation of your correspondence. This major appliance is designed to be borne by Maytag. 5. You can write to Maytag with electrical or plumbing codes, or use or when it was purchased. Proof of original purchase date is not ...


