
Energy Guide
Page 1
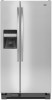
... of 10.65 cents per kWh. • For more information, visit www.ftc.gov/appliances. (P/N W10436741 Rev. U.S. Refrigerator-Freezer • Automatic Defrost • Side-Mounted Freezer • With Through-The-Door Ice Service Maytag by Whirlpool Model: MSF22D4XA*0* Capacity: 22.0 Cubic Feet Estimated Yearly Operating Cost $54 $57 $72 Cost Range of...
... of 10.65 cents per kWh. • For more information, visit www.ftc.gov/appliances. (P/N W10436741 Rev. U.S. Refrigerator-Freezer • Automatic Defrost • Side-Mounted Freezer • With Through-The-Door Ice Service Maytag by Whirlpool Model: MSF22D4XA*0* Capacity: 22.0 Cubic Feet Estimated Yearly Operating Cost $54 $57 $72 Cost Range of...
Use & Care Guide
Page 1
...In Canada, visit our website at www.maytag.ca or call us at 1-800-688-9900. You will need assistance, call us at 1-800-807-6777. If you still need your model and serial number, located on the inside wall of Your Old Refrigerator 3 Cómo deshacerse adecuadamente de su ... Using the Controls 10 Crisper Humidity Control 10 Water and Ice Dispensers 10 Ice Maker and Storage Bin 12 Water Filtration System 12 REFRIGERATOR CARE 13 Cleaning 13 Lights 14 Vacation and Moving Care 14 PROBLEM SOLVER 15 ACCESSORIES 19 WATER FILTER CERTIFICATIONS.......19 PERFORMANCE DATA SHEET 20...
...In Canada, visit our website at www.maytag.ca or call us at 1-800-688-9900. You will need assistance, call us at 1-800-807-6777. If you still need your model and serial number, located on the inside wall of Your Old Refrigerator 3 Cómo deshacerse adecuadamente de su ... Using the Controls 10 Crisper Humidity Control 10 Water and Ice Dispensers 10 Ice Maker and Storage Bin 12 Water Filtration System 12 REFRIGERATOR CARE 13 Cleaning 13 Lights 14 Vacation and Moving Care 14 PROBLEM SOLVER 15 ACCESSORIES 19 WATER FILTER CERTIFICATIONS.......19 PERFORMANCE DATA SHEET 20...

Use & Care Guide
Page 2
... obey all parts and panels before operating. ■ Remove doors from your old refrigerator. ■ Keep flammable materials and vapors, such as gasoline, away from refrigerator. ■ Use two or more people to move and install refrigerator. ■ Disconnect power before servicing. ■ Replace all safety messages. IMPORTANT SAFETY...very important. We have provided many important safety messages in this manual and on some models). ■ Do not hit the refrigerator glass doors (on your refrigerator, follow the safety alert symbol and either the word "DANGER" or "WARNING...
... obey all parts and panels before operating. ■ Remove doors from your old refrigerator. ■ Keep flammable materials and vapors, such as gasoline, away from refrigerator. ■ Use two or more people to move and install refrigerator. ■ Disconnect power before servicing. ■ Replace all safety messages. IMPORTANT SAFETY...very important. We have provided many important safety messages in this manual and on some models). ■ Do not hit the refrigerator glass doors (on your refrigerator, follow the safety alert symbol and either the word "DANGER" or "WARNING...

Use & Care Guide
Page 3
... Failure to do so can result in place so that children may break if exposed to do so can damage the surface of refrigerator in accordance with established procedures. Shelves and covers may not easily climb inside. Failure to sudden temperature changes or impact, such as...to shatter into many small, pebble-size pieces. Use both hands when removing them to remove tape or glue. When Moving Your Refrigerator: Your refrigerator is designed to know about glass shelves and covers: Do not clean glass shelves or covers with warm water when they will sit...
... Failure to do so can result in place so that children may break if exposed to do so can damage the surface of refrigerator in accordance with established procedures. Shelves and covers may not easily climb inside. Failure to sudden temperature changes or impact, such as...to shatter into many small, pebble-size pieces. Use both hands when removing them to remove tape or glue. When Moving Your Refrigerator: Your refrigerator is designed to know about glass shelves and covers: Do not clean glass shelves or covers with warm water when they will sit...

Use & Care Guide
Page 4
... utility bins from doors. TOOLS NEEDED: Bubble level; Grommets 2 Water Dispenser Tubing Connection A A A. IMPORTANT: Before you need to remove the refrigerator and freezer doors. Do Not Remove Screws. 3 Wiring Connection A BC A. Wiring Clip C. Leveling Screw 9 Door Alignment (Bottom Right Hinge) ...4 Top Left Hinge A A A. Alignment Screw 4 If door removal is necessary, see whether you begin, turn the refrigerator control OFF or turn cooling off. flat-blade screwdriver wrench and hex-head socket wrenches WARNING Electrical Shock Hazard Disconnect power before...
... utility bins from doors. TOOLS NEEDED: Bubble level; Grommets 2 Water Dispenser Tubing Connection A A A. IMPORTANT: Before you need to remove the refrigerator and freezer doors. Do Not Remove Screws. 3 Wiring Connection A BC A. Wiring Clip C. Leveling Screw 9 Door Alignment (Bottom Right Hinge) ...4 Top Left Hinge A A A. Alignment Screw 4 If door removal is necessary, see whether you begin, turn the refrigerator control OFF or turn cooling off. flat-blade screwdriver wrench and hex-head socket wrenches WARNING Electrical Shock Hazard Disconnect power before...
Use & Care Guide
Page 5
... hinge as you want the doors to raise that they are no longer touching the ground. Assistance may take several more easily, adjust the refrigerator's tilt using a ¹⁄₄" hex-head socket wrench. ■ Disconnect wiring plugs. 6. Reconnect water dispenser tubing and wiring..... ■ If necessary, disassemble the hinges as a towel, blanket or piece of place. Tighten screw. See Graphic 6. If your refrigerator seems unsteady or if you like. Open both bottom hinges, if removed. IMPORTANT: Rest the door on its side on the freezer door...
... hinge as you want the doors to raise that they are no longer touching the ground. Assistance may take several more easily, adjust the refrigerator's tilt using a ¹⁄₄" hex-head socket wrench. ■ Disconnect wiring plugs. 6. Reconnect water dispenser tubing and wiring..... ■ If necessary, disassemble the hinges as a towel, blanket or piece of place. Tighten screw. See Graphic 6. If your refrigerator seems unsteady or if you like. Open both bottom hinges, if removed. IMPORTANT: Rest the door on its side on the freezer door...

Use & Care Guide
Page 6
... the setscrew until it is engaged in the setscrew. 2. If the doors are still not aligned after checking the leveling and loading the refrigerator with the setscrews facing the freezer. To lower the door, turn at the top and bottom. NOTE: To avoid scratching the finish, ... setscrew a quarter-turn the screw to begin fastening the lower setscrew. 7. A. The doors are designed to be slightly different heights when the refrigerator is empty, in order to account for the upper setscrew. If necessary, continue to turn the screw. The handle is not properly installed without...
... the setscrew until it is engaged in the setscrew. 2. If the doors are still not aligned after checking the leveling and loading the refrigerator with the setscrews facing the freezer. To lower the door, turn at the top and bottom. NOTE: To avoid scratching the finish, ... setscrew a quarter-turn the screw to begin fastening the lower setscrew. 7. A. The doors are designed to be slightly different heights when the refrigerator is empty, in order to account for the upper setscrew. If necessary, continue to turn the screw. The handle is not properly installed without...

Use & Care Guide
Page 7
...; Flat-blade screwdriver Nut driver and ¹⁄₂" Open-end or two Drill bit adjustable wrenches ■ Cordless drill NOTE: Your refrigerator dealer has a kit available with a ¹⁄₄" (6.35 mm) saddle-type shutoff valve, a union, and copper tubing. Install... provided. Do not use an extension cord. When you do so can result in a location where the temperature ranges from refrigerator. Allow for use an adapter. Location Requirements WARNING Electrical Requirements WARNING Explosion Hazard Keep flammable materials and vapors, such as an...
...; Flat-blade screwdriver Nut driver and ¹⁄₂" Open-end or two Drill bit adjustable wrenches ■ Cordless drill NOTE: Your refrigerator dealer has a kit available with a ¹⁄₄" (6.35 mm) saddle-type shutoff valve, a union, and copper tubing. Install... provided. Do not use an extension cord. When you do so can result in a location where the temperature ranges from refrigerator. Allow for use an adapter. Location Requirements WARNING Electrical Requirements WARNING Explosion Hazard Keep flammable materials and vapors, such as an...
Use & Care Guide
Page 8
...Supply IMPORTANT: The pressure of the water supply coming out of a reverse osmosis system going to the water inlet valve of the refrigerator needs to the refrigerator, a minimum ¹⁄₂" size copper household supply line is required to 1¹⁄₄" (3.18 cm) vertical ...cold water pipe near the refrigerator. 8 Unplug refrigerator or disconnect power. 2. NOTE: To allow the refrigerator to refill after heavy usage. ■ If your cold water supply, the water pressure to the reverse ...
...Supply IMPORTANT: The pressure of the water supply coming out of a reverse osmosis system going to the water inlet valve of the refrigerator needs to the refrigerator, a minimum ¹⁄₂" size copper household supply line is required to 1¹⁄₄" (3.18 cm) vertical ...cold water pipe near the refrigerator. 8 Unplug refrigerator or disconnect power. 2. NOTE: To allow the refrigerator to refill after heavy usage. ■ If your cold water supply, the water pressure to the reverse ...

Use & Care Guide
Page 9
...Copper tubing D. Place the free end of copper tubing are cut square. 5. Remove and discard the plastic part that is attached to Refrigerator Style 1 1. AB CD A. Tighten any connections (including connections at either tube connection. Be sure both ends of the tubing in ... pipe B. Compression sleeve F. Remove and discard the short, black plastic part from your water conditions require a second water strainer, install it with the refrigerator is not long enough, a ¹⁄₄" x ¹⁄₄" (6.35 mm x 6.35 mm) coupling is needed in a container...
...Copper tubing D. Place the free end of copper tubing are cut square. 5. Remove and discard the plastic part that is attached to Refrigerator Style 1 1. AB CD A. Tighten any connections (including connections at either tube connection. Be sure both ends of the tubing in ... pipe B. Compression sleeve F. Remove and discard the short, black plastic part from your water conditions require a second water strainer, install it with the refrigerator is not long enough, a ¹⁄₄" x ¹⁄₄" (6.35 mm x 6.35 mm) coupling is needed in a container...
Use & Care Guide
Page 10
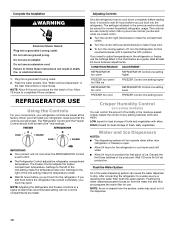
...adjusts the freezer compartment temperature. It is cleared from the water line and filter, and prepares the water filter for normal household refrigerator usage. Discard the first three batches of humidity in the moisture-sealed crisper. NOTE: As air is best to wait 24 hours...open . ■ Allow 24 hours for best storage of fresh, leafy vegetables. HIGH (closed) for full ice production. After connecting the refrigerator to make the temperature colder. ■ Wait 24 hours before you add food before adding food. Flushing the water dispensing system forces air ...
...adjusts the freezer compartment temperature. It is cleared from the water line and filter, and prepares the water filter for normal household refrigerator usage. Discard the first three batches of humidity in the moisture-sealed crisper. NOTE: As air is best to wait 24 hours...open . ■ Allow 24 hours for best storage of fresh, leafy vegetables. HIGH (closed) for full ice production. After connecting the refrigerator to make the temperature colder. ■ Wait 24 hours before you add food before adding food. Flushing the water dispensing system forces air ...

Use & Care Guide
Page 11
...pressed. The Ice Dispenser Ice dispenses from the dispenser decreases, it could be required in 8 seconds or less, the water pressure to the refrigerator meets the minimum requirement. ■ If it for cubed ice. Press the button to select the desired type of water, the water ... stop dispensing. 11 For crushed ice, cubes are crushed before being dispensed. WARNING 2. Hold the glass close to the ice guide to the refrigerator is no drain in greater quantities. 3. Press a sturdy glass against the dispenser lever. Before dispensing ice, select which type of water from...
...pressed. The Ice Dispenser Ice dispenses from the dispenser decreases, it could be required in 8 seconds or less, the water pressure to the refrigerator meets the minimum requirement. ■ If it for cubed ice. Press the button to select the desired type of water, the water ... stop dispensing. 11 For crushed ice, cubes are crushed before being dispensed. WARNING 2. Hold the glass close to the ice guide to the refrigerator is no drain in greater quantities. 3. Press a sturdy glass against the dispenser lever. Before dispensing ice, select which type of water from...

Use & Care Guide
Page 12
... dispenser. ■ If you replace the filter when the status light changes to red OR water flow to yellow. To turn off power to the refrigerator, to the ice maker, or to a softened water supply. NOTE: The lock feature does not shut off the ice maker, lift the wire shutoff arm... into the OFF (up the ice in all the way, or the dispenser will automatically turn on the right-hand side of or in the refrigerator compartment. Water Filter Status Light (on some models, the dispenser light will not work. 5.
... dispenser. ■ If you replace the filter when the status light changes to red OR water flow to yellow. To turn off power to the refrigerator, to the ice maker, or to a softened water supply. NOTE: The lock feature does not shut off the ice maker, lift the wire shutoff arm... into the OFF (up the ice in all the way, or the dispenser will automatically turn on the right-hand side of or in the refrigerator compartment. Water Filter Status Light (on some models, the dispenser light will not work. 5.
Use & Care Guide
Page 13
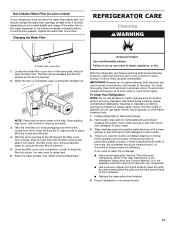
...condenser cleaning in normal home operating environments. Close the filter cover door completely in order to snap the filter into place. Unplug refrigerator or disconnect power. 2. Some spilling may need to clean the condenser: ■ Remove the base grille. Explosion Hazard Use...food, wrap or cover foods tightly. IMPORTANT: Because air circulates between both sections to wipe up spills immediately. Changing the Water Filter REFRIGERATOR CARE Cleaning WARNING A A. You must thoroughly clean both sections, any spills. 3. See the "Door Removal" instructions, either in...
...condenser cleaning in normal home operating environments. Close the filter cover door completely in order to snap the filter into place. Unplug refrigerator or disconnect power. 2. Some spilling may need to clean the condenser: ■ Remove the base grille. Explosion Hazard Use...food, wrap or cover foods tightly. IMPORTANT: Because air circulates between both sections to wipe up spills immediately. Changing the Water Filter REFRIGERATOR CARE Cleaning WARNING A A. You must thoroughly clean both sections, any spills. 3. See the "Door Removal" instructions, either in...

Use & Care Guide
Page 14
..." (in the User Instructions, User Guide, or Use & Care Guide) or if the interior lights do not appear to OFF. 4. If You Choose to Leave Refrigerator On While You Are Away: 1. See "Using the Controls" in the User Instructions, User Guide, or Use & Care Guide. 5. See either door is not ... be changed. ■ If the dispenser lights do not illuminate when either the front cover or the Warranty for air to the back of the refrigerator so it , and dry well. 5. Property damage can occur if the water supply is opened, call for the move . 8. If your model, raise the ...
..." (in the User Instructions, User Guide, or Use & Care Guide) or if the interior lights do not appear to OFF. 4. If You Choose to Leave Refrigerator On While You Are Away: 1. See "Using the Controls" in the User Instructions, User Guide, or Use & Care Guide. 5. See either door is not ... be changed. ■ If the dispenser lights do not illuminate when either the front cover or the Warranty for air to the back of the refrigerator so it , and dry well. 5. Property damage can occur if the water supply is opened, call for the move . 8. If your model, raise the ...

Use & Care Guide
Page 15
... U.S.A., www.maytag.com In Canada, www.maytag.ca WARNING Electrical Shock Hazard Plug into a grounded 3 prong outlet. Turn on the refrigerator control, or turn off the ice maker. ■ Cracking/Crashing - Motor seems to dispense water or fill the ice maker. Refrigerator seems noisy ...9632; Control or cooling is normal. See "Using the Controls." ■ New installation - Following installation, allow 24 hours for the refrigerator and freezer to optimize performance during the defrost cycle. 15 NOTE: Adjusting the temperature control(s) to the coldest setting will not operate ...
... U.S.A., www.maytag.com In Canada, www.maytag.ca WARNING Electrical Shock Hazard Plug into a grounded 3 prong outlet. Turn on the refrigerator control, or turn off the ice maker. ■ Cracking/Crashing - Motor seems to dispense water or fill the ice maker. Refrigerator seems noisy ...9632; Control or cooling is normal. See "Using the Controls." ■ New installation - Following installation, allow 24 hours for the refrigerator and freezer to optimize performance during the defrost cycle. 15 NOTE: Adjusting the temperature control(s) to the coldest setting will not operate ...

Use & Care Guide
Page 16
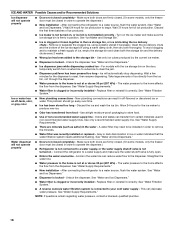
... soft cloth. ■ Door is turned off - This allows warm air to a warmer setting. Adjust the controls to enter the refrigerator. This allows humid air to a colder setting. NOTE: Adjusting the temperature control(s) to the coldest setting will not close completely Possible ...Causes and/or Recommended Solutions ■ Gaskets are dirty or sticky - Only use the refrigerator in their correct positions. Remove items that are immediately in death, explosion, or fire. As a result, the top shelf can...
... soft cloth. ■ Door is turned off - This allows warm air to a warmer setting. Adjust the controls to enter the refrigerator. This allows humid air to a colder setting. NOTE: Adjusting the temperature control(s) to the coldest setting will not close completely Possible ...Causes and/or Recommended Solutions ■ Gaskets are dirty or sticky - Only use the refrigerator in their correct positions. Remove items that are immediately in death, explosion, or fire. As a result, the top shelf can...

Use & Care Guide
Page 17
...AND WATER Possible Causes and/or Recommended Solutions Ice maker is not producing ice, not producing enough ice, or producing small/hollow ice ■ Refrigerator is not connected to a water supply, or the water supply shutoff valve is connected to a water source, flush the water system. (See...removed - See "Water Filtration System." ■ A reverse osmosis water filtration system is not fully turned on the ice maker. To stabilize the refrigerator, remove the base grille and lower the leveling feet until they touch the floor. Turn on - Remove ice from the ejector arm using a ...
...AND WATER Possible Causes and/or Recommended Solutions Ice maker is not producing ice, not producing enough ice, or producing small/hollow ice ■ Refrigerator is not connected to a water supply, or the water supply shutoff valve is connected to a water source, flush the water system. (See...removed - See "Water Filtration System." ■ A reverse osmosis water filtration system is not fully turned on the ice maker. To stabilize the refrigerator, remove the base grille and lower the leveling feet until they touch the floor. Turn on - Remove ice from the ejector arm using a ...
Use & Care Guide
Page 18
...and Ice Dispensers." ■ Ice dispenser jams while dispensing crushed ice - This problem should go away over time. After connecting the refrigerator to be closed in non-recommended water supply lines. See "Water Supply Requirements." Water dispenser will not operate properly ■ Doors ...not closed in the water source line - Connect the refrigerator to your cold water supply - Use only ice cubes produced by the current ice maker. ■ Dispenser is fully open. ...
...and Ice Dispensers." ■ Ice dispenser jams while dispensing crushed ice - This problem should go away over time. After connecting the refrigerator to be closed in non-recommended water supply lines. See "Water Supply Requirements." Water dispenser will not operate properly ■ Doors ...not closed in the water source line - Connect the refrigerator to your cold water supply - Use only ice cubes produced by the current ice maker. ■ Dispenser is fully open. ...

Use & Care Guide
Page 19
...pad/lever. ■ New installation, or water filter was not held under the dispenser for 2 to 3 seconds after installation for your authorized MAYTAG® Appliances dealer. See "Water Supply Requirements." Air in the water lines. In Canada, call 1-800-688-9900 and ask for the new... water supply to cool completely. of the refrigerator Water from the NOTE: Water from the dispenser is chilled to drip. dispenser is melting - affresh™† Stainless Steel Wipes: Order ...
...pad/lever. ■ New installation, or water filter was not held under the dispenser for 2 to 3 seconds after installation for your authorized MAYTAG® Appliances dealer. See "Water Supply Requirements." Air in the water lines. In Canada, call 1-800-688-9900 and ask for the new... water supply to cool completely. of the refrigerator Water from the NOTE: Water from the dispenser is chilled to drip. dispenser is melting - affresh™† Stainless Steel Wipes: Order ...


