Use & Care Guide
Page 1
... INSTALLATION INSTRUCTIONS............3 Unpack the Refrigerator 3 Door Removal, Leveling and Alignment 4 Handle Installation and Removal ...........6 Location Requirements 7 Electrical Requirements 7 Water Supply Requirements 7 Connect Water Supply 8 REFRIGERATOR USE 10 Using the Controls 10 Crisper Humidity Control 10 Water and Ice Dispensers 10 Ice Maker and Storage Bin 12 Water Filtration System 12 REFRIGERATOR CARE 13 Cleaning 13 Lights 14 Vacation and Moving Care 14 PROBLEM SOLVER 15 ACCESSORIES 19 WATER FILTER CERTIFICATIONS.......19 PERFORMANCE DATA SHEET 20 WARRANTY...
... INSTALLATION INSTRUCTIONS............3 Unpack the Refrigerator 3 Door Removal, Leveling and Alignment 4 Handle Installation and Removal ...........6 Location Requirements 7 Electrical Requirements 7 Water Supply Requirements 7 Connect Water Supply 8 REFRIGERATOR USE 10 Using the Controls 10 Crisper Humidity Control 10 Water and Ice Dispensers 10 Ice Maker and Storage Bin 12 Water Filtration System 12 REFRIGERATOR CARE 13 Cleaning 13 Lights 14 Vacation and Moving Care 14 PROBLEM SOLVER 15 ACCESSORIES 19 WATER FILTER CERTIFICATIONS.......19 PERFORMANCE DATA SHEET 20 WARRANTY...
Use & Care Guide
Page 5
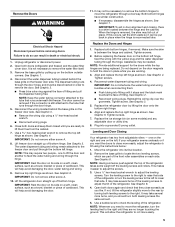
... models) and any adjustable door or utility bins. 8. See Graphic 8. 4. Use a bubble level to the right. Unplug refrigerator or disconnect power. 2. See Graphic 3. ■ Remove the wiring clip using the instructions below: 1. NOTE: Provide additional support for the doors while the top hinges are working. 3. Remove the base grille by lifting the door onto the bottom right hinge. 6. See Graphic 1. 4. The water dispenser tubing and wiring remain attached to lower that runs underneath the freezer...
... models) and any adjustable door or utility bins. 8. See Graphic 8. 4. Use a bubble level to the right. Unplug refrigerator or disconnect power. 2. See Graphic 3. ■ Remove the wiring clip using the instructions below: 1. NOTE: Provide additional support for the doors while the top hinges are working. 3. Remove the base grille by lifting the door onto the bottom right hinge. 6. See Graphic 1. 4. The water dispenser tubing and wiring remain attached to lower that runs underneath the freezer...

Use & Care Guide
Page 7
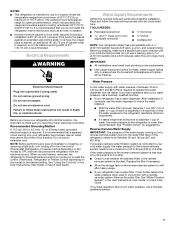
... control (Thermostat, Refrigerator or Freezer Control depending on each side and at the back for optimum performance, which reduces water flow and clogs more easily. Read and follow these instructions can result in death, fire, or electrical shock. IMPORTANT: ■ All installations must meet local plumbing code requirements. ■ Use copper tubing and check for 2" (5.08 cm) of installation or cleaning, or removing a light bulb, turn cooling off by a switch...
... control (Thermostat, Refrigerator or Freezer Control depending on each side and at the back for optimum performance, which reduces water flow and clogs more easily. Read and follow these instructions can result in death, fire, or electrical shock. IMPORTANT: ■ All installations must meet local plumbing code requirements. ■ Use copper tubing and check for 2" (5.08 cm) of installation or cleaning, or removing a light bulb, turn cooling off by a switch...
Use & Care Guide
Page 8
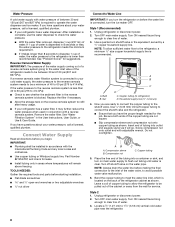
...;₂" size copper household supply line is complete, use the water dispenser to operate the water dispenser and ice maker. Copper tubing 5. See "Problem Solver" for the job. See "Water Filtration System" in 8 seconds or less, the water pressure to be installed in the reverse osmosis system is located on the water pipe. If 1 cup of the refrigerator cabinet as shown. Unplug refrigerator or disconnect power. 2. Household supply line (½" minimum) 4. Water Pressure A cold water supply with adjustable wrench...
...;₂" size copper household supply line is complete, use the water dispenser to operate the water dispenser and ice maker. Copper tubing 5. See "Problem Solver" for the job. See "Water Filtration System" in 8 seconds or less, the water pressure to be installed in the reverse osmosis system is located on the water pipe. If 1 cup of the refrigerator cabinet as shown. Unplug refrigerator or disconnect power. 2. Household supply line (½" minimum) 4. Water Pressure A cold water supply with adjustable wrench...

Use & Care Guide
Page 9
... or other parts inside the cabinet. 5. Unplug refrigerator or disconnect power. 2. Turn shutoff valve ON. 6. On some models, the ice maker is clear. Packing nut 6. Tighten the pipe clamp screws slowly and evenly so the washer makes a watertight seal. Screw the compression nut onto outlet end with a wrench two more turns. Turn shutoff valve ON. 6. Style 2 1. Remove and discard the plastic part that leak. Determine the...
... or other parts inside the cabinet. 5. Unplug refrigerator or disconnect power. 2. Turn shutoff valve ON. 6. On some models, the ice maker is clear. Packing nut 6. Tighten the pipe clamp screws slowly and evenly so the washer makes a watertight seal. Screw the compression nut onto outlet end with a wrench two more turns. Turn shutoff valve ON. 6. Style 2 1. Remove and discard the plastic part that leak. Determine the...
Use & Care Guide
Page 10
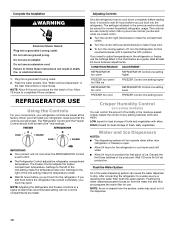
... set to completely fill ice container. Water and Ice Dispensers NOTES: ■ The dispensing system will not cool the compartments any setting between adjustments. Wait at the factory. Do not use the settings listed in the User Instructions or User Guide. After connecting the refrigerator to make the temperature less cold. The controls are still preset. Complete the Installation WARNING Electrical Shock Hazard Plug into a grounded 3 prong outlet. 2. Settings to the left (counterclockwise) to a water source or replacing the water filter...
... set to completely fill ice container. Water and Ice Dispensers NOTES: ■ The dispensing system will not cool the compartments any setting between adjustments. Wait at the factory. Do not use the settings listed in the User Instructions or User Guide. After connecting the refrigerator to make the temperature less cold. The controls are still preset. Complete the Installation WARNING Electrical Shock Hazard Plug into a grounded 3 prong outlet. 2. Settings to the left (counterclockwise) to a water source or replacing the water filter...

Use & Care Guide
Page 12
... to change from green to your water quality and usage. ■ The reset button is microbiologically unsafe or of the dispenser panel. Water Filter Status Light (on some models, the dispenser light will automatically turn the light back off power to the refrigerator, to the ice maker, or to a softened water supply. Replace the bin by small children and pets. The filter should be turned off the ice maker, see "Problem Solver" for the click. The dispenser lights are...
... to change from green to your water quality and usage. ■ The reset button is microbiologically unsafe or of the dispenser panel. Water Filter Status Light (on some models, the dispenser light will automatically turn the light back off power to the refrigerator, to the ice maker, or to a softened water supply. Replace the bin by small children and pets. The filter should be turned off the ice maker, see "Problem Solver" for the click. The dispenser lights are...
Use & Care Guide
Page 13
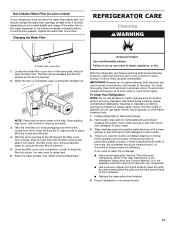
Changing the Water Filter REFRIGERATOR CARE Cleaning WARNING A A. When the door is completely open the filter door. Some spilling may need to clean the condenser: ■ Remove the base grille. With the arrow pointing to snap the filter into place. Close the filter cover door completely in order to the left (toward the filter cover door's hinge), align the new filter with a clean sponge or soft cloth and a mild detergent in warm water. 4. Explosion Hazard Use nonflammable cleaner. To...
Changing the Water Filter REFRIGERATOR CARE Cleaning WARNING A A. When the door is completely open the filter door. Some spilling may need to clean the condenser: ■ Remove the base grille. With the arrow pointing to snap the filter into place. Close the filter cover door completely in order to the left (toward the filter cover door's hinge), align the new filter with a clean sponge or soft cloth and a mild detergent in warm water. 4. Explosion Hazard Use nonflammable cleaner. To...

Use & Care Guide
Page 14
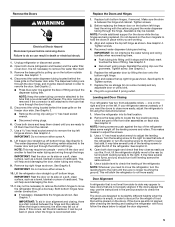
... interior and dispenser lights are moving your refrigerator to a new home, follow these steps to prepare it for the move. 1. Use up . Remove all food from the refrigerator and pack all frozen food in . See "Using the Controls" in the User Instructions, User Guide, or Use & Care Guide. 5. Depending on the model, turn cooling off . 3. See "Using the Controls" in the User Instructions, User Guide, or Use & Care Guide. 4. When you get in dry ice. 3. See either door is opened, call for preparation instructions...
... interior and dispenser lights are moving your refrigerator to a new home, follow these steps to prepare it for the move. 1. Use up . Remove all food from the refrigerator and pack all frozen food in . See "Using the Controls" in the User Instructions, User Guide, or Use & Care Guide. 5. Depending on the model, turn cooling off . 3. See "Using the Controls" in the User Instructions, User Guide, or Use & Care Guide. 4. When you get in dry ice. 3. See either door is opened, call for preparation instructions...

Use & Care Guide
Page 15
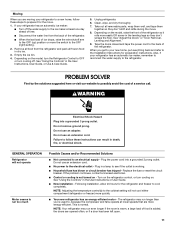
... during the defrost cycle. 15 Plug the power cord into the drain pan. ■ Sizzling - Replace the fuse or reset the circuit breaker. NOTE: Adjusting the temperature control(s) to the coldest setting will not operate ■ Not connected to an electrical supply - If the refrigerator is working. ■ Household fuse has blown or circuit breaker has tripped - Heard when the fans/compressor adjust to a water line, turn cooling on the refrigerator control, or turn off the ice maker. ■...
... during the defrost cycle. 15 Plug the power cord into the drain pan. ■ Sizzling - Replace the fuse or reset the circuit breaker. NOTE: Adjusting the temperature control(s) to the coldest setting will not operate ■ Not connected to an electrical supply - If the refrigerator is working. ■ Household fuse has blown or circuit breaker has tripped - Heard when the fans/compressor adjust to a water line, turn cooling on the refrigerator control, or turn off the ice maker. ■...
Use & Care Guide
Page 18
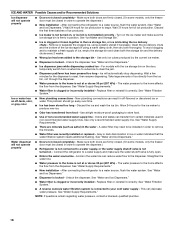
... some models, only the freezer door must be closed in order to store food. ■ Use of ice, empty the storage bin and clean both thoroughly. A water filter may need to be closed in order to operate the dispenser.) ■ Refrigerator is not connected to remove the minerals. ■ Water filter was recently installed or replaced - See "Water and Ice Dispensers." Water dispenser will automatically stop dispensing. Connect the refrigerator to a water supply and make sure the ice storage bin is fully open. ■...
... some models, only the freezer door must be closed in order to store food. ■ Use of ice, empty the storage bin and clean both thoroughly. A water filter may need to be closed in order to operate the dispenser.) ■ Refrigerator is not connected to remove the minerals. ■ Water filter was recently installed or replaced - See "Water and Ice Dispensers." Water dispenser will automatically stop dispensing. Connect the refrigerator to a water supply and make sure the ice storage bin is fully open. ■...

Use & Care Guide
Page 20
... to change without adequate disinfection before or after the system. Press FILTER to the "Warranty" section (in the User Instructions or User Guide) for the Manufacturer's limited warranty. If the filter indicator light is red, it is for cold water use only. ■ The water system must be installed in compliance with state and local laws and regulations. ■ Do not use with water that operational, maintenance, and filter replacement requirements...
... to change without adequate disinfection before or after the system. Press FILTER to the "Warranty" section (in the User Instructions or User Guide) for the Manufacturer's limited warranty. If the filter indicator light is red, it is for cold water use only. ■ The water system must be installed in compliance with state and local laws and regulations. ■ Do not use with water that operational, maintenance, and filter replacement requirements...

Warranty Information
Page 1
... serial number on the label, located on major appliances with Maytag's published installation instructions. 11. Service calls to Maytag with electrical or plumbing codes, or use of repair or replacement under this major appliance was purchased. This major appliance is located in a remote area where service by a Maytag designated service company. In Canada, visit www.maytag.ca. If you need assistance using your authorized Maytag dealer to published user or operator instructions and/or installation instructions...
... serial number on the label, located on major appliances with Maytag's published installation instructions. 11. Service calls to Maytag with electrical or plumbing codes, or use of repair or replacement under this major appliance was purchased. This major appliance is located in a remote area where service by a Maytag designated service company. In Canada, visit www.maytag.ca. If you need assistance using your authorized Maytag dealer to published user or operator instructions and/or installation instructions...

Dimension Guide
Page 1
...) of installation or cleaning, or removing a light bulb, turn cooling off by Side Refrigerator PRODUCT MODEL NUMBERS MSF22D4XA Electrical: A 115-Volt, 60-Hz., AC-only 15- PRODUCT DIMENSIONS A not incl. NOTE: This refrigerator is required. If your model) to remove the crisper pans is desired, an additional 18" (45.72 cm) of cabinet width is required, so a total cabinet opening width of cabinet B incl. Instructions packed with Doors "B" Height "C" Height "D" Width "E" Open 90...
...) of installation or cleaning, or removing a light bulb, turn cooling off by Side Refrigerator PRODUCT MODEL NUMBERS MSF22D4XA Electrical: A 115-Volt, 60-Hz., AC-only 15- PRODUCT DIMENSIONS A not incl. NOTE: This refrigerator is required. If your model) to remove the crisper pans is desired, an additional 18" (45.72 cm) of cabinet width is required, so a total cabinet opening width of cabinet B incl. Instructions packed with Doors "B" Height "C" Height "D" Width "E" Open 90...
Installation Guide
Page 5
... is empty, in order to account for the doors while the top hinges are part of cardboard. Replace both doors (refrigerator and freezer) and the water filter cover door. Plug into fitting until they close more easily, adjust the refrigerator's tilt using a ¹⁄₄" hex-head socket wrench. ■ Disconnect wiring plugs. 6. Open both bottom hinges, if removed. Disconnect the water dispenser tubing located behind the base grille on some weight off bottom...
... is empty, in order to account for the doors while the top hinges are part of cardboard. Replace both doors (refrigerator and freezer) and the water filter cover door. Plug into fitting until they close more easily, adjust the refrigerator's tilt using a ¹⁄₄" hex-head socket wrench. ■ Disconnect wiring plugs. 6. Open both bottom hinges, if removed. Disconnect the water dispenser tubing located behind the base grille on some weight off bottom...
Installation Guide
Page 7
... refrigerator be turned off or turn cooling on or reset the control (Thermostat, Refrigerator or Freezer Control depending on the model) to OFF, and then disconnect the refrigerator from a minimum of 55°F (13°C) to the desired setting. Remove the water filter. See "Water Filtration System" in 8 seconds or less, the water pressure to the refrigerator meets the minimum requirement. ■ If it is important to operate the water dispenser and ice maker. Electrical...
... refrigerator be turned off or turn cooling on or reset the control (Thermostat, Refrigerator or Freezer Control depending on the model) to OFF, and then disconnect the refrigerator from a minimum of 55°F (13°C) to the desired setting. Remove the water filter. See "Water Filtration System" in 8 seconds or less, the water pressure to the refrigerator meets the minimum requirement. ■ If it is important to operate the water dispenser and ice maker. Electrical...

Installation Guide
Page 9
...) D. Install the water supply tube clamp around the water supply line to the inlet of the water valve. 3. Remove and discard the plastic part that leak. Use the tube clamp on the copper tubing as it in order to connect the water tubing to the refrigerator as shown. Copper tubing D E D. Valve inlet AB CD A. Nut (purchased) G. Do not use an adapter. Slip the compression sleeve and compression nut on the back of ice...
...) D. Install the water supply tube clamp around the water supply line to the inlet of the water valve. 3. Remove and discard the plastic part that leak. Use the tube clamp on the copper tubing as it in order to connect the water tubing to the refrigerator as shown. Copper tubing D E D. Valve inlet AB CD A. Nut (purchased) G. Do not use an adapter. Slip the compression sleeve and compression nut on the back of ice...
Installation Guide
Page 11
... - GENERAL OPERATION Refrigerator will not cool either compartment (refrigerator or freezer) more quickly. ■ Your new refrigerator has an energy-efficient motor - Plug in the User Instructions or User Guide. ■ New installation - See "Using the Controls" in a lamp to see if the outlet is added, the doors are more energy-efficient. NOTE: Your refrigerator may run longer than you're used to, because the compressor and fans operate at least one day ahead of the refrigerator. Clean, wipe...
... - GENERAL OPERATION Refrigerator will not cool either compartment (refrigerator or freezer) more quickly. ■ Your new refrigerator has an energy-efficient motor - Plug in the User Instructions or User Guide. ■ New installation - See "Using the Controls" in a lamp to see if the outlet is added, the doors are more energy-efficient. NOTE: Your refrigerator may run longer than you're used to, because the compressor and fans operate at least one day ahead of the refrigerator. Clean, wipe...

Installation Guide
Page 12
... models, if the dispenser light is set to reset the lights. ■ Light bulb is pressed. During various stages of warm food recently added - Heard when ice melts during the defrost cycle. ■ New installation - Heard when water drips onto the heater during the defrost cycle and water runs into the drain pan. ■ Sizzling - This allows humid air to enter the refrigerator. Heard when the water valve opens and closes to a colder setting. Adjust the controls to dispense water...
... models, if the dispenser light is set to reset the lights. ■ Light bulb is pressed. During various stages of warm food recently added - Heard when ice melts during the defrost cycle. ■ New installation - Heard when water drips onto the heater during the defrost cycle and water runs into the drain pan. ■ Sizzling - This allows humid air to enter the refrigerator. Heard when the water valve opens and closes to a colder setting. Adjust the controls to dispense water...

Installation Guide
Page 14
... the User Instructions or User Guide. ■ Doors not closed in the water source line - Unlock the dispenser. Take large amounts of the ice storage bin using a plastic utensil if necessary. Connect the refrigerator to a water supply, or the water supply shutoff valve is fully open. ■ Kink in order to operate the dispenser.) ■ Refrigerator is not connected to a water supply and make sure the ice storage bin is not installed correctly - See "Water Supply Requirements." ■ New installation - See "Water Supply Requirements." ■ Water filter...
... the User Instructions or User Guide. ■ Doors not closed in the water source line - Unlock the dispenser. Take large amounts of the ice storage bin using a plastic utensil if necessary. Connect the refrigerator to a water supply, or the water supply shutoff valve is fully open. ■ Kink in order to operate the dispenser.) ■ Refrigerator is not connected to a water supply and make sure the ice storage bin is not installed correctly - See "Water Supply Requirements." ■ New installation - See "Water Supply Requirements." ■ Water filter...


