Maytag MMV5208WQ Support and Manuals

Get Help and Manuals for this Maytag item

View All Support Options Below
Free Maytag MMV5208WQ manuals!
Problems with Maytag MMV5208WQ?

Ask a Question

Most Recent Maytag MMV5208WQ Questions

What Does F-6 Mean Displayed On Screen
(Posted by thebaumanns21 10 years ago)
Position Of The Surface Light
Is the surface light closer to you (the front of the microwave) or in the back? thank you
(Posted by gbradt1 12 years ago)

Popular Maytag MMV5208WQ Manual Pages

Installation Instructions - Page 1

...or seriously injured if you don't follow instructions. All safety messages will tell you what the potential hazard is, tell you how to Wall 8 Prepare Upper Cabinet 8 Install Damper Assembly 9 Install the Microwave Oven 9 Complete Installation 10 VENTING DESIGN SPECIFICATIONS 11 ASSISTANCE 12 Replacement Parts 12 Accessories 12 MICROWAVE HOOD COMBINATION SAFETY Your safety and the...
Installation Instructions - Page 2

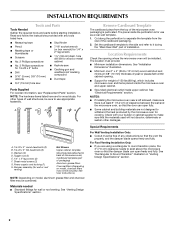
... ■ 3/4" (19 mm) hole saw Parts Supplied For reorder information, see "Replacement Parts" section. See "Venting Design Specifications" section. See "Installation Dimensions" illustration. ■ Minimum one 2" x 4" (50.8 x 101.6 mm) wood wall stud and minimum 3/8" (10 mm) thickness drywall or plaster/lath within cabinet opening where the microwave oven will not discolor, delaminate or...
Installation Instructions - Page 3

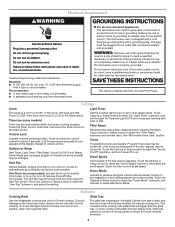
... the microwave oven is properly installed and grounded. Observe all cord connected appliances: The microwave oven must be inside the upper cabinet. Product Dimensions 17¹⁄₄" (43.8 cm) 16¹⁄₄" (41.3 cm) (411.06¹c⁄₈m") 29⁷⁄₈" (76.0 cm) GROUNDING INSTRUCTIONS ■ For all governing codes and ordinances...
Installation Instructions - Page 4

... plate with 2 screws removed in Step 3. 7. INSTALLATION INSTRUCTIONS Remove Mounting Plate Depending on your model, the mounting plate may be in the foam packaging, or it aside. 3. Remove any remaining contents from the microwave oven cavity. 2. Tape the microwave oven door closed so that exhaust ports face the back of microwave oven, and lower blower motor back into the...
Installation Instructions - Page 7

...Set the mounting plate aside. This is damaged or unusable, measure and mark the wall with each be installed... holes must be on a level line with the dimensions described in Step 3, and that the top of ... With the support tabs facing forward (see illustrations in "Locate Wall Stud(s)" section. 7 Measure down from the centerline. 5. Mark Rear Wall The microwave oven must attach to...
Installation Instructions - Page 10

.... ■ See the User Instructions for filter placement. Save Installation Instructions for future use an extension cord. Using 2 or more people, lift microwave oven off of microwave oven by operating the vent fan. 5. Do not use an adapter. NOTE: If microwave oven does not need to be added. Check the operation of mounting plate, and set aside on the turntable...
Installation Instructions - Page 11

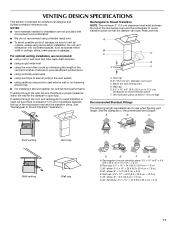
... minimum 3" (7.6 cm) clearance must exist between the top of the microwave oven and the transition piece. Roof cap: 3¹⁄₄" x 10...elbow: 6" = 10 ft (15.2 cm = 3 m) E. VENTING DESIGN SPECIFICATIONS This section is intended for the damper to open freely and fully. See "...using recirculation installation. NOTES: ■ Vent materials needed for installation are for...
Installation Instructions - Page 12

...opening , behind the microwave oven door on the model and serial number plate, which is a list of vent. Replacement Parts If any of the microwave oven opening . Following is located behind the door. ■ Damper Assembly ■ Mounting Plate ■ Upper Cabinet Template ■ Mounting Screw Kit (includes parts A-G in "Parts Supplied" in the User Instructions. Both numbers can...
Owners Manual - Page 1

...provided Installation Instructions. ■ Read all safety messages. MICROWAVE HOOD COMBINATION USER INSTRUCTIONS THANK YOU for example, closed glass jars - You will follow the specific "PRECAUTIONS TO AVOID POSSIBLE EXPOSURE TO EXCESSIVE MICROWAVE ENERGY" found in this manual and on the front facing of others . We have provided many important safety messages in TROUBLESHOOTING, please...
Owners Manual - Page 2

... cleaning instructions in the "Microwave Oven Care" section. ■ To reduce the risk of the microwave oven when the microwave oven is no damage to be adjusted or repaired by qualified service personnel. Do not use as water, coffee, or tea are placed inside the oven ignite, keep oven door closed, turn the fan on the microwave oven. ■ Do not store this manual...
Owners Manual - Page 3

... tones (including end-of electric shock. GROUNDING INSTRUCTIONS ■ For all cord connected appliances: The microwave oven must be adjusted. Control Lock Activate to follow these instructions can result in hours and minutes with A.M. Repeat to soil buildup, clean rack supports often. Comes on some models). Set the cooktop light to turn tones off . Filter Reset Reset...
Owners Manual - Page 4

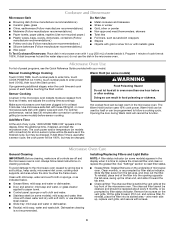
..., enter the cook time and cook power of the filter into its slotted area - Installing/Replacing Filters and Light Bulbs NOTE: A filter status indicator (on some models) appears in the display when it is time to follow label instructions on some models) before sensor cooking. Slide the filter away from food as it toward the tab area...
Owners Manual - Page 5

...■ Rack support ■ Grease filter ■ Charcoal filter ■ Cooktop light bulb ■ Cavity light bulb ■ Heavy Duty Degreaser ■ All-Purpose Appliance Cleaner ■ Stainless Steel Cleaner and Polish 5 Open bulb cover and replace bulb. Troubleshooting First try the steps in "Microwave Oven Care" section. If the problem continues, call for service. ■ Door...
Owners Manual - Page 6

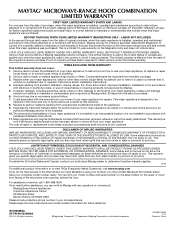
... This limited warranty is effective from unauthorized modifications made to the appliance. 9. Service calls to microwave product failure. 7. Consumable parts are excluded from warranty coverage. 3. Any food loss due to repair or replace appliance light bulbs or filters. Major appliances with electrical or plumbing codes, or use of consumables or cleaning products not approved by this warranty...
Warranty Information - Page 1

... state to state or province to province. This major appliance is designed to repair or replace appliance light bulbs or filters. Major appliances with electrical or plumbing codes, or use of consumables or cleaning products not approved by Maytag. 5. The cost of repair or replacement under this limited warranty. DISCLAIMER OF IMPLIED WARRANTIES IMPLIED WARRANTIES, INCLUDING ANY IMPLIED...

Maytag MMV5208WQ Reviews

Do you have an experience with the Maytag MMV5208WQ that you would like to share?
Earn 750 points for your review!
We have not received any reviews for Maytag yet.

Popular Maytag MMV5208WQ Search Terms

The following terms are frequently used to search for Maytag MMV5208WQ support:

Ask a New Question
Use the box below to post a new question about Maytag MMV5208WQ.
Manuals / Documents
Download any of our Maytag MMV5208WQ manuals for free!

We have the following 4 documents available for the Maytag MMV5208WQ:
  • Installation Instructions
  • Owners Manual
  • Dimension Guide
  • Warranty Information

Points & Prizes
  • You can earn points for nearly everything you do on HelpOwl.com
  • You can trade in those points for gift cards at leading retailers such as Amazon.com and Walmart
  • It's that simple!
See How it Works
Create a Free Account

Maytag Manuals

Find free Maytag MMV5208WQ manuals and user guides available at ManualOwl.com. Try out our unique manual viewer allowing you to interact with manuals from directly within your browser!

Maytag Reviews

View thousands of Maytag MMV5208WQ user reviews and customer ratings available at ReviewOwl.com.

Contact Information

Complete Maytag customer service contact information including steps to reach representatives, hours of operation, customer support links and more from ContactHelp.com.

Scoreboard Ratings

See detailed Maytag customer service rankings, employee comments and much more from our sister site.

Maytag Recalls

Find comprehensive Maytag recall information updated hourly on RecallOwl.com.