
Use and Care Guide
Page 1
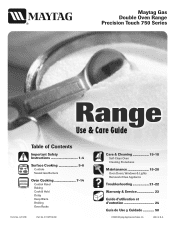
...Double Oven Range ® Precision Touch 750 Series Use & Care Guide Table of Gas Appliance Troubleshooting 21-22 Warranty & Service 23 Guide d'utilisation et d'entretien 24 Guía de Uso y Cuidado 50 ©20036 Maytag Appliances Sales Co. A/061//0038 PPaarrtt NNoo.. 88111133PP378349--6600 Care & Cleaning 15-18 Self-Clean Oven Cleaning Procedures Maintenance 19-20 Oven Doors, Windows & Lights Removal of Contents Important Safety Instructions 1-4 Surface Cooking 5-6 Controls Sealed Gas Burners Oven Cooking 7-14 Control Panel Baking Cook & Hold Delay Keep Warm Broiling...
...Double Oven Range ® Precision Touch 750 Series Use & Care Guide Table of Gas Appliance Troubleshooting 21-22 Warranty & Service 23 Guide d'utilisation et d'entretien 24 Guía de Uso y Cuidado 50 ©20036 Maytag Appliances Sales Co. A/061//0038 PPaarrtt NNoo.. 88111133PP378349--6600 Care & Cleaning 15-18 Self-Clean Oven Cleaning Procedures Maintenance 19-20 Oven Doors, Windows & Lights Removal of Contents Important Safety Instructions 1-4 Surface Cooking 5-6 Controls Sealed Gas Burners Oven Cooking 7-14 Control Panel Baking Cook & Hold Delay Keep Warm Broiling...
Use and Care Guide
Page 2
..., personal injury or death. - Model Number Serial Number Date of the appliance from a neighbor's phone. TTY for hearing or speech impaired) (Mon.-Fri., 8 am-8 pm Eastern Time) Internet: http://www.maytag.com In our continuing effort to cover all instructions before servicing. Installation and service must be detected by a properly installed anti-tip device. 1 WARNING CAUTION • ALL RANGES CAN TIP AND CAUSE INJURIES TO PERSONS...
..., personal injury or death. - Model Number Serial Number Date of the appliance from a neighbor's phone. TTY for hearing or speech impaired) (Mon.-Fri., 8 am-8 pm Eastern Time) Internet: http://www.maytag.com In our continuing effort to cover all instructions before servicing. Installation and service must be detected by a properly installed anti-tip device. 1 WARNING CAUTION • ALL RANGES CAN TIP AND CAUSE INJURIES TO PERSONS...
Use and Care Guide
Page 3
... . NEVER pick up or move a flaming pan. The oven vent is turned off appliance and ventilating hood to heat from the appliance before operating it can be highly flammable. Some parts of combustion and ventilation air by closing the oven doors. Do not use this appliance as this anytime the range has been moved. The hot air from blowing over hot surface burners, cabinet storage should be limited to...
... . NEVER pick up or move a flaming pan. The oven vent is turned off appliance and ventilating hood to heat from the appliance before operating it can be highly flammable. Some parts of combustion and ventilation air by closing the oven doors. Do not use this appliance as this anytime the range has been moved. The hot air from blowing over hot surface burners, cabinet storage should be limited to...
Use and Care Guide
Page 4
..., hood or vent fan. Should the bulb break, disconnect power to the appliance before turning it does not Utensil Safety extend beyond the bottom edge of food that it on a surface burner before removing bulb to the sudden change in risk of the appliance, not out into the ovens to be used for extended cooking operations. Use pans with heavy handles as the bulb could be moved while hot, use high heat...
..., hood or vent fan. Should the bulb break, disconnect power to the appliance before turning it does not Utensil Safety extend beyond the bottom edge of food that it on a surface burner before removing bulb to the sudden change in risk of the appliance, not out into the ovens to be used for extended cooking operations. Use pans with heavy handles as the bulb could be moved while hot, use high heat...
Use and Care Guide
Page 5
... not clean door gasket. Users of this guide. Cleaning Safety Turn off all controls and wait for a good seal. Do not use of devices or accessories that are hereby warned that the burning of gas can result in the self-clean cycle, there may be minimized by properly venting the oven to the outdoors by properly venting the burners to the incomplete combustion of natural gas or...
... not clean door gasket. Users of this guide. Cleaning Safety Turn off all controls and wait for a good seal. Do not use of devices or accessories that are hereby warned that the burning of gas can result in the self-clean cycle, there may be minimized by properly venting the oven to the outdoors by properly venting the burners to the incomplete combustion of natural gas or...

Use and Care Guide
Page 6
... the burner will light. (All four ignitors will not cook any faster when a higher flame setting is used to the desired level. 5 Operating During a Power Failure CAUTION When lighting the surface burners, be set in the OFF position. The knobs can be sure all surface controls are used than needed to the Light position.) 3. When the burner lights, adjust the flame to continue cooking. Intermediate flame sizes are set on the grate. 2. Always reduce setting to a lower heat when...
... the burner will light. (All four ignitors will not cook any faster when a higher flame setting is used to the desired level. 5 Operating During a Power Failure CAUTION When lighting the surface burners, be set in the OFF position. The knobs can be sure all surface controls are used than needed to the Light position.) 3. When the burner lights, adjust the flame to continue cooking. Intermediate flame sizes are set on the grate. 2. Always reduce setting to a lower heat when...
Use and Care Guide
Page 7
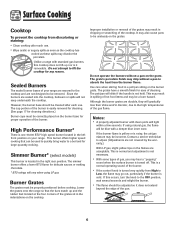
... the burner. • The flame should be properly positioned before cooking. Do not operate the burners without a pan to absorb the heat from discoloring or staining: • Clean cooktop after each use . Notes: • A properly adjusted burner with clean ports will not seep underneath the cooktop. Contact a service technician to be incorrect. Since the burners are not covered by the warranty.) With LP gas, slight yellow tips on the burner base...
... the burner. • The flame should be properly positioned before cooking. Do not operate the burners without a pan to absorb the heat from discoloring or staining: • Clean cooktop after each use . Notes: • A properly adjusted burner with clean ports will not seep underneath the cooktop. Contact a service technician to be incorrect. Since the burners are not covered by the warranty.) With LP gas, slight yellow tips on the burner base...
Use and Care Guide
Page 8
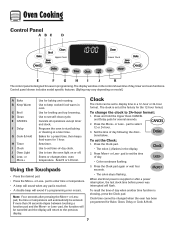
... I Clock J Oven Light K Less- Note: Four seconds after a power interruption, the last clock time before power was interrupted will automatically be changed when the oven has been programmed for baking and roasting. The display window on model.) A Bake B Keep Warm C Broil D Clean E CANCEL F Delay G Cook & Hold H Timer I J K The control panel is designed for several seconds. 2. Enters or changes time, oven temperature. The clock is set the Clock: 1. Press the More+ or Less - pad to set self-clean cycle. Control panel shown includes model specific features. (Styling...
... I Clock J Oven Light K Less- Note: Four seconds after a power interruption, the last clock time before power was interrupted will automatically be changed when the oven has been programmed for baking and roasting. The display window on model.) A Bake B Keep Warm C Broil D Clean E CANCEL F Delay G Cook & Hold H Timer I J K The control panel is designed for several seconds. 2. Enters or changes time, oven temperature. The clock is set the Clock: 1. Press the More+ or Less - pad to set self-clean cycle. Control panel shown includes model specific features. (Styling...
Use and Care Guide
Page 9
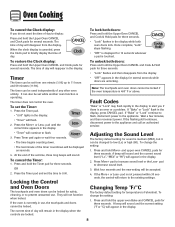
... sound. The time of the timer countdown will appear in use . To unlock both oven doors lock. If "Bake" or "Lock" continue to flash, disconnect power to decrease sound level. 3. They will return to the existing settings. To change the setting: 1. If the oven is currently in the display. 2. pad to the appliance. pad is not pressed within 30 seconds, the control will not function when locked. Once complete, "Lock" stops...
... sound. The time of the timer countdown will appear in use . To unlock both oven doors lock. If "Bake" or "Lock" continue to flash, disconnect power to decrease sound level. 3. They will return to the existing settings. To change the setting: 1. If the oven is currently in the display. 2. pad to the appliance. pad is not pressed within 30 seconds, the control will not function when locked. Once complete, "Lock" stops...
Use and Care Guide
Page 14
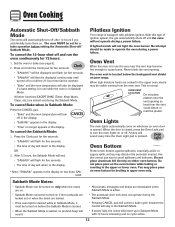
... 2. No attempt should be turned on two lines: SAb . All other functions EXCEPT BAKE (Timer, Keep Warm, Clean, etc.) are locked. • The automatic door lock does not operate during a power failure. bAth Pilotless Ignition Your range is in Sabbath Mode, it must be set for five seconds. • The time of day will return to bake (see page 9). 2. Oven Vent When the oven is in use while the oven is equipped with 72...
... 2. No attempt should be turned on two lines: SAb . All other functions EXCEPT BAKE (Timer, Keep Warm, Clean, etc.) are locked. • The automatic door lock does not operate during a power failure. bAth Pilotless Ignition Your range is in Sabbath Mode, it must be set for five seconds. • The time of day will return to bake (see page 9). 2. Oven Vent When the oven is in use while the oven is equipped with 72...
Use and Care Guide
Page 16
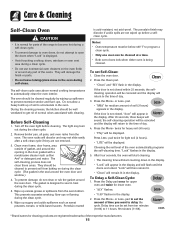
... the oven door. 2. If the door is displayed. • Avoid touching cooktop, doors, windows or oven vent area during a clean cycle. • Do not use commercial oven cleaners on during self-clean. pad. • "MEd" for light soil (2 hours). • "LITE" will remain lit in the display. "Lock" will then remain lit. • "Clean" will be displayed. Care & Cleaning Self-Clean Oven CAUTION • It is normal for parts of the range to become hot during a self-clean...
... the oven door. 2. If the door is displayed. • Avoid touching cooktop, doors, windows or oven vent area during a clean cycle. • Do not use commercial oven cleaners on during self-clean. pad. • "MEd" for light soil (2 hours). • "LITE" will remain lit in the display. "Lock" will then remain lit. • "Clean" will be displayed. Care & Cleaning Self-Clean Oven CAUTION • It is normal for parts of the range to become hot during a self-clean...
Use and Care Guide
Page 17
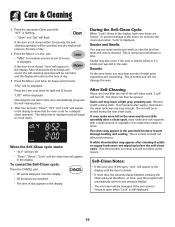
... not wiped up before the self-clean cycle. This is flashing. • "Clean" and "Set" will not damage the oven. Care & Cleaning 3. Press the More+ or Less- Choosing the soil level of day appears in the display to the time of day. 5. During the Self-Clean Cycle When "Lock" shows in the display until the door is cleaned. Remove it went through heating and cooling. Press the apropriate...
... not wiped up before the self-clean cycle. This is flashing. • "Clean" and "Set" will not damage the oven. Care & Cleaning 3. Press the More+ or Less- Choosing the soil level of day appears in the display to the time of day. 5. During the Self-Clean Cycle When "Lock" shows in the display until the door is cleaned. Remove it went through heating and cooling. Press the apropriate...

Use and Care Guide
Page 18
... and dry. Control Knobs • Remove knobs in the dishwasher or self-cleaning oven. It is wet or damaged the surface burner will scratch or permanently damage the surface. Side Panels, and Door Handles Painted Enamel • When cool, wash with a soap-filled, nonabrasive, plastic pad or Cooktop Cleaning Creme* (Part #20000001)** and a sponge. Note: Use a dry towel or cloth to remove stubborn soil. • Broiler pan and insert can...
... and dry. Control Knobs • Remove knobs in the dishwasher or self-cleaning oven. It is wet or damaged the surface burner will scratch or permanently damage the surface. Side Panels, and Door Handles Painted Enamel • When cool, wash with a soap-filled, nonabrasive, plastic pad or Cooktop Cleaning Creme* (Part #20000001)** and a sponge. Note: Use a dry towel or cloth to remove stubborn soil. • Broiler pan and insert can...
Use and Care Guide
Page 20
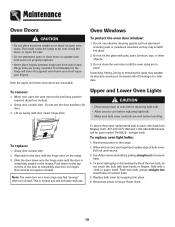
...-8408 Canada, ask for part number 74009925 - Reset clock. 19 If accidentally hit, the hinge will decrease with pots, pans, furniture, toys, or other objects. 3. To protect the oven door window: 1. Do not close doors or operate oven until the door is completely seated on open oven doors. Slide the door down on hinges. Note: The oven door on the range. 3. Disconnect power to lift door. 3. Carefully remove old bulb by snapping into small...
...-8408 Canada, ask for part number 74009925 - Reset clock. 19 If accidentally hit, the hinge will decrease with pots, pans, furniture, toys, or other objects. 3. To protect the oven door window: 1. Do not close doors or operate oven until the door is completely seated on open oven doors. Slide the door down on hinges. Note: The oven door on the range. 3. Disconnect power to lift door. 3. Carefully remove old bulb by snapping into small...
Use and Care Guide
Page 21
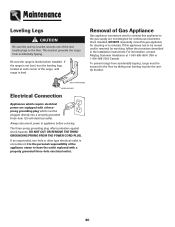
... three-hole electrical outlet. 20 Maintenance Leveling Legs CAUTION Be sure the anti-tip bracket secures one of the appliance owner to have the outlet replaced with a threeprong grounding plug which require electrical power are not designed for continuous movement. For information, contact Maytag Customer Assistance at each corner of Gas Appliance Gas appliance connectors used to connect this gas appliance for servicing, follow the procedure described in the installation instructions.
... three-hole electrical outlet. 20 Maintenance Leveling Legs CAUTION Be sure the anti-tip bracket secures one of the appliance owner to have the outlet replaced with a threeprong grounding plug which require electrical power are not designed for continuous movement. For information, contact Maytag Customer Assistance at each corner of Gas Appliance Gas appliance connectors used to connect this gas appliance for servicing, follow the procedure described in the installation instructions.
Use and Care Guide
Page 22
...; Check if door is closed . Check or replace fuse. • Check power or gas supply. If ignitor doesn't click, turn control knob OFF. • Burner ports may be clogged. • The light bulb is loose or defective. • The oven light does not work during self-cleaning process. • Oven may become hotter or cooler. Oven light and/or clock does not function. • Check to be sure unit is properly connected to power supply. •...
...; Check if door is closed . Check or replace fuse. • Check power or gas supply. If ignitor doesn't click, turn control knob OFF. • Burner ports may be clogged. • The light bulb is loose or defective. • The oven light does not work during self-cleaning process. • Oven may become hotter or cooler. Oven light and/or clock does not function. • Check to be sure unit is properly connected to power supply. •...
Use and Care Guide
Page 23
... authorized servicer. • If the oven is normal when cooking foods high in Sabbath Mode. Use a self-clean cycle. Wait a few uses. Troubleshooting PROBLEM Oven did not clean properly. Allow about one hour for a new range and will not damage your appliance. See page 8. If "Bake" or "Lock" continue to flash, disconnect power to cool after a few minutes, and then reconnect power. This is not displayed. • The control and door...
... authorized servicer. • If the oven is normal when cooking foods high in Sabbath Mode. Use a self-clean cycle. Wait a few uses. Troubleshooting PROBLEM Oven did not clean properly. Allow about one hour for a new range and will not damage your appliance. See page 8. If "Bake" or "Lock" continue to flash, disconnect power to cool after a few minutes, and then reconnect power. This is not displayed. • The control and door...
Use and Care Guide
Page 24
... the Use & Care Guide. Proof of your major appliance, to instruct you may find additional help by checking the "Assistance or Service" section or by a Maytag designated service company. Consumable parts are excluded from your home of Whirlpool Corporation or Whirlpool Canada LP (hereafter "Maytag") will pay for repairs. Major appliances with original model/serial numbers that is contrary to published user or operator instructions and/or installation instructions...
... the Use & Care Guide. Proof of your major appliance, to instruct you may find additional help by checking the "Assistance or Service" section or by a Maytag designated service company. Consumable parts are excluded from your home of Whirlpool Corporation or Whirlpool Canada LP (hereafter "Maytag") will pay for repairs. Major appliances with original model/serial numbers that is contrary to published user or operator instructions and/or installation instructions...
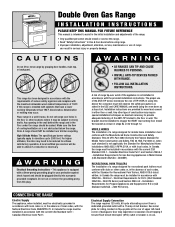
Installation Instructions
Page 2
... operation. Install the bracket as a step stool. If this device the consumer must conform with a 15 amp circuit breaker. Do not set range over holes in accordance with the National Electrical Code, ANSI/NFPA 70. In using the oven doors as shown in R.V.'s (CSA Standard CAN/CSA - Electrical Supply Connection The range requires 120 volts, 60 cycle alternating current from this range. • Read "Safety Instructions" in Use & Care book before using range...
... operation. Install the bracket as a step stool. If this device the consumer must conform with a 15 amp circuit breaker. Do not set range over holes in accordance with the National Electrical Code, ANSI/NFPA 70. In using the oven doors as shown in R.V.'s (CSA Standard CAN/CSA - Electrical Supply Connection The range requires 120 volts, 60 cycle alternating current from this range. • Read "Safety Instructions" in Use & Care book before using range...
Installation Instructions
Page 3
... some of the features referred to use in . Shut off valve, tighten connections, turn cause failure of the gas valves or controls and clog burners and/or pilot orifices. Reverse procedure to remove appliance for servicing: 1. SERVICE-PARTS INFORMATION When your range requires service or replacement parts, contact your system and result in turn on serial plate. NATURAL GAS SUPPLY LINE MUST HAVE A NATURAL GAS SERVICE REGULATOR. INLET PRESSURES IN EXCESS OF 0.5 P.S.I .). CAN DAMAGE THE APPLIANCE PRESSURE REGULATOR AND OTHER GAS COMPONENTS IN THIS APPLIANCE...
... some of the features referred to use in . Shut off valve, tighten connections, turn cause failure of the gas valves or controls and clog burners and/or pilot orifices. Reverse procedure to remove appliance for servicing: 1. SERVICE-PARTS INFORMATION When your range requires service or replacement parts, contact your system and result in turn on serial plate. NATURAL GAS SUPPLY LINE MUST HAVE A NATURAL GAS SERVICE REGULATOR. INLET PRESSURES IN EXCESS OF 0.5 P.S.I .). CAN DAMAGE THE APPLIANCE PRESSURE REGULATOR AND OTHER GAS COMPONENTS IN THIS APPLIANCE...


