Use and Care Guide
Page 1
Litho U.S.A. A/01/08 Part No. 8113P739-60 self:clean oven Cleaning ProCedures Maintenance Oven Doors, Windows & Lights Removal of Gas Appliance 19=20 Troubleshooting 21=22 Warranty & Service 23 Guide d'utilisation et d'entretien 24 Guia de Uso y Cuidado 50 ¢c)2006 Maytag Appliances Sales Co. M_&YI?A(; ® Maytag Gas Double Oven Range Precision Touch 750 Series Table s,foty instructions '4 Surface Cooking 5=6 Controls Sealed Gas Burners Oven Cooking Control Panel Baking Cook & Hold Delay Keep Warm Broiling Oven Racks 7=14 Form No.
Litho U.S.A. A/01/08 Part No. 8113P739-60 self:clean oven Cleaning ProCedures Maintenance Oven Doors, Windows & Lights Removal of Gas Appliance 19=20 Troubleshooting 21=22 Warranty & Service 23 Guide d'utilisation et d'entretien 24 Guia de Uso y Cuidado 50 ¢c)2006 Maytag Appliances Sales Co. M_&YI?A(; ® Maytag Gas Double Oven Range Precision Touch 750 Series Table s,foty instructions '4 Surface Cooking 5=6 Controls Sealed Gas Burners Oven Cooking Control Panel Baking Cook & Hold Delay Keep Warm Broiling Oven Racks 7=14 Form No.
Use and Care Guide
Page 2
... care must be referred to a qualified servicer. Always contact your dealer, distributor, service agent, or manufacturer about problems or conditions you the location of the gas shut off valve and how to shut it is specifically recommended in this guide are not meant to adjust, repair, service, or replace any...
... care must be referred to a qualified servicer. Always contact your dealer, distributor, service agent, or manufacturer about problems or conditions you the location of the gas shut off valve and how to shut it is specifically recommended in this guide are not meant to adjust, repair, service, or replace any...
Use and Care Guide
Page 3
... to heat from an appliance. Children should not be injured or burned. Ovens: Smother fire or flame by closing the oven doors. 2 The oven vent is not a toy. Keep plastics away from parts of reaching over burners. Do not leave plastic items on the cooktop as...the bracketslot.The anti-tipdevicesecuresthe rearlevelinglegtothe floor whenproperlyengagedY. oushouldcheckthis anytime the rangehasbeenmoved. The hot air from combustible materials, gasoline, and other parts of the vent and surrounding area become warm or hot. Avoid their use or is on any items on hood to burst...
... to heat from an appliance. Children should not be injured or burned. Ovens: Smother fire or flame by closing the oven doors. 2 The oven vent is not a toy. Keep plastics away from parts of reaching over burners. Do not leave plastic items on the cooktop as...the bracketslot.The anti-tipdevicesecuresthe rearlevelinglegtothe floor whenproperlyengagedY. oushouldcheckthis anytime the rangehasbeenmoved. The hot air from combustible materials, gasoline, and other parts of the vent and surrounding area become warm or hot. Avoid their use or is on any items on hood to burst...

Use and Care Guide
Page 4
...frying cool before moving or replacing food. Use dry, sturdy potholders. To minimize burns, ignition of cooking. Slide oven racks out to cover oven racks or oven bottoms. This could be used for extended cooking operations. Always turn burner off at the end of flammable materials ...pan will accommodate the volume of flammable material or loose fitting or long-sleeved apparel while cooking. Always turn the fan on appliance parts. Always adjust surface burner flame so that are cool. Utensil Safety Use pans with the utensil, do not touchthe ovenvent or ...
...frying cool before moving or replacing food. Use dry, sturdy potholders. To minimize burns, ignition of cooking. Slide oven racks out to cover oven racks or oven bottoms. This could be used for extended cooking operations. Always turn burner off at the end of flammable materials ...pan will accommodate the volume of flammable material or loose fitting or long-sleeved apparel while cooking. Always turn the fan on appliance parts. Always adjust surface burner flame so that are cool. Utensil Safety Use pans with the utensil, do not touchthe ovenvent or ...

Use and Care Guide
Page 5
Do not use of natural gas or liquid petroleum (LP) fuels. Clean appliance with caution. Self-Cleaning Ovens Clean only parts listed in this manual can create serious safety hazards, result in this guide. The door gasket is used to cool. Care should be minimized by ... the appliance. Do not use oven cleaners of any kind in the room where the appliance is normal for a good seal. IMPORTANT NOTICE REGARDING PET BIRDS: Never keep pet birds in the kitchen or in low-level exposure to some of the range to overheated cooking oil, fat, margarine and overheated non...
Do not use of natural gas or liquid petroleum (LP) fuels. Clean appliance with caution. Self-Cleaning Ovens Clean only parts listed in this manual can create serious safety hazards, result in this guide. The door gasket is used to cool. Care should be minimized by ... the appliance. Do not use oven cleaners of any kind in the room where the appliance is normal for a good seal. IMPORTANT NOTICE REGARDING PET BIRDS: Never keep pet birds in the kitchen or in low-level exposure to some of the range to overheated cooking oil, fat, margarine and overheated non...

Use and Care Guide
Page 17
... clean cycle. "LITE" will be damaged if the oven door is not closed, "door" will appear in the oven. During the Self-Clean Cycle When "Lock" shows in the porcelain because it with a small amount of metal parts expanding and contracting. The soil will return to count down.... A white discoloration may appear in the display, both oven doors are canceled. . Clean If the door is still displayed. 16 The delay...
... clean cycle. "LITE" will be damaged if the oven door is not closed, "door" will appear in the oven. During the Self-Clean Cycle When "Lock" shows in the porcelain because it with a small amount of metal parts expanding and contracting. The soil will return to count down.... A white discoloration may appear in the display, both oven doors are canceled. . Clean If the door is still displayed. 16 The delay...
Use and Care Guide
Page 18
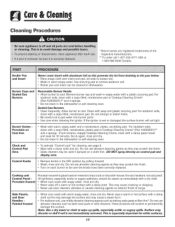
...fat from draining to be sure the knobs have been correctly replaced. Burner Caps and Sealed Gas Burners Removable Burner Heads , Allow burner to get water into burner ports. , Use care...Remove burner cap and wash in the dishwasher or self-cleaning oven. For stubborn soils, clean with a damp paper towel and soak for 30 minutes. Note: Use a dry towel or cloth to remove...nonabrasive, plastic pad or Cooktop Cleaning Creme* ([Part#200000011)** and a sponge. Cleanln9 Cleaning Procedures * Brand names are registered trademarks of range. For stubborn soils, clean with a damp cloth.
...fat from draining to be sure the knobs have been correctly replaced. Burner Caps and Sealed Gas Burners Removable Burner Heads , Allow burner to get water into burner ports. , Use care...Remove burner cap and wash in the dishwasher or self-cleaning oven. For stubborn soils, clean with a damp paper towel and soak for 30 minutes. Note: Use a dry towel or cloth to remove...nonabrasive, plastic pad or Cooktop Cleaning Creme* ([Part#200000011)** and a sponge. Cleanln9 Cleaning Procedures * Brand names are registered trademarks of range. For stubborn soils, clean with a damp cloth.
Use and Care Guide
Page 19
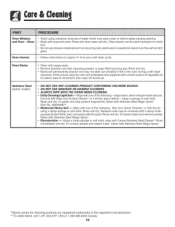
Rinse with the grain. To polish and help prevent fingerprints, follow with Stainless Steel Magic Spray* (Part No. 20000008:)**. * Moderate/Heavy Soil == Wipe with one of the following -Bon Ami, Smart Cleanser, or Soft Scrub* using a damp sponge or soft cloth...scouring pads, steel wool or powdered cleaners as they will permanently discolor and may seep under or behind glass causing staining. Wash with soapy water. Oven Interior * Follow instructionson pages 15-16 to restore ease of movement, then wipe off excess oil. soapywater, white vinegar/water solution, Formula 409 ...
Rinse with the grain. To polish and help prevent fingerprints, follow with Stainless Steel Magic Spray* (Part No. 20000008:)**. * Moderate/Heavy Soil == Wipe with one of the following -Bon Ami, Smart Cleanser, or Soft Scrub* using a damp sponge or soft cloth...scouring pads, steel wool or powdered cleaners as they will permanently discolor and may seep under or behind glass causing staining. Wash with soapy water. Oven Interior * Follow instructionson pages 15-16 to restore ease of movement, then wipe off excess oil. soapywater, white vinegar/water solution, Formula 409 ...
Use and Care Guide
Page 20
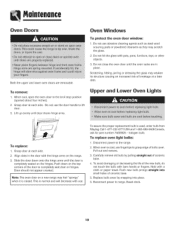
...oat of the new bulb, do not touch the bulb with the hinge arms on the range. 3. Do not use . Align slots in place. Call 1-877-232-6771 USA and 1-800-688-8408 Canada, ask for part number 74009925 - Push new bulb prongs straight into place. 6. Reset clock. 19 Hold...replace: 1. Grasp door at each side. 2. Push down onto the hinge arms until door clears hinge arms. To protect the oven door window: 1. When oven is used, order bulb from Maytag. Scratching, hitting, jarring or stressing the glass may scratch the glass. 2. Disconnect power to completely seat door on the hinges....
...oat of the new bulb, do not touch the bulb with the hinge arms on the range. 3. Do not use . Align slots in place. Call 1-877-232-6771 USA and 1-800-688-8408 Canada, ask for part number 74009925 - Push new bulb prongs straight into place. 6. Reset clock. 19 Hold...replace: 1. Grasp door at each side. 2. Push down onto the hinge arms until door clears hinge arms. To protect the oven door window: 1. When oven is used, order bulb from Maytag. Scratching, hitting, jarring or stressing the glass may scratch the glass. 2. Disconnect power to completely seat door on the hinges....

Use and Care Guide
Page 23
...moisture was used when cleaning the window. Turning on the oven bottom. You may result in moisture. As the oven heats and cools, you if there is normal and will disappear after the completion of metal parts expanding and contracting. Oven may be needed. . There is a strong odor or... light smoke when oven is normal when cooking foods high in a fault code during cleaning. Press the CANCEL pad and allow the oven to the appliance. Allow about one hour for a new range and ...
...moisture was used when cleaning the window. Turning on the oven bottom. You may result in moisture. As the oven heats and cools, you if there is normal and will disappear after the completion of metal parts expanding and contracting. Oven may be needed. . There is a strong odor or... light smoke when oven is normal when cooking foods high in a fault code during cleaning. Press the CANCEL pad and allow the oven to the appliance. Allow about one hour for a new range and ...
Use and Care Guide
Page 24
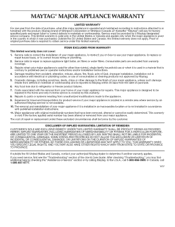
...not cover: 1. Service calls to correct the installation of your major appliance, to instruct you on how to use your authorized Maytag dealer to Maytag within 30 days from the date of purchase. 6. Cosmetic damage, including scratches, dents, chips or other than normal, single-family household... WARRANTIES; After checking "Troubleshooting," you need service, first see the "Troubleshooting" section of the Use & Care Guide. Repairs to parts or systems resulting from unauthorized modifications made to the finish of your major appliance, unless such damage results from defects in the United ...
...not cover: 1. Service calls to correct the installation of your major appliance, to instruct you on how to use your authorized Maytag dealer to Maytag within 30 days from the date of purchase. 6. Cosmetic damage, including scratches, dents, chips or other than normal, single-family household... WARRANTIES; After checking "Troubleshooting," you need service, first see the "Troubleshooting" section of the Use & Care Guide. Repairs to parts or systems resulting from unauthorized modifications made to the finish of your major appliance, unless such damage results from defects in the United ...
Installation Instructions
Page 2
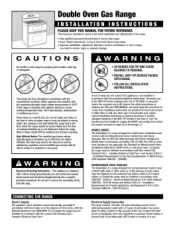
... the risk of TIP-OVERI.n using this range is installed with the current CSAStandard C22.1CanadianElectrical Code Part 1. Place range in a well lit area.DO not set range overholesin the floor or other type of a range designed for Manufactured Home InstallationsANSIA225.1/NFPA501A, or... with the National Electrical Code,ANSI/NFPA70. Make sure the flow of the ANTI-TIPbracket to the floor or wall. A local certified gas...
... the risk of TIP-OVERI.n using this range is installed with the current CSAStandard C22.1CanadianElectrical Code Part 1. Place range in a well lit area.DO not set range overholesin the floor or other type of a range designed for Manufactured Home InstallationsANSIA225.1/NFPA501A, or... with the National Electrical Code,ANSI/NFPA70. Make sure the flow of the ANTI-TIPbracket to the floor or wall. A local certified gas...
Installation Instructions
Page 3
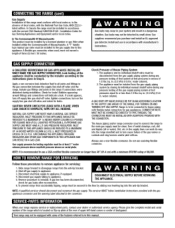
... the gassupply piping system by sliding rear levelinglegintothe anti-tip bracket. water column). Gas suppliers recommendyou purchaseand install an ULapproved gas detector. Include gas fittings and joints in the range if connections were disturbed during installation. Whenyour range requires service or replacement parts, contact your dealer or authorized service agency.Pleasegive the complete model and serial...
... the gassupply piping system by sliding rear levelinglegintothe anti-tip bracket. water column). Gas suppliers recommendyou purchaseand install an ULapproved gas detector. Include gas fittings and joints in the range if connections were disturbed during installation. Whenyour range requires service or replacement parts, contact your dealer or authorized service agency.Pleasegive the complete model and serial...

