Use and Care Guide
Page 1
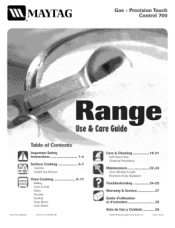
Precision Touch Controm 700 Tabme of CoBtents Umportant Safety Instructions 1-4 Surface Cooking 5-7 ControHs Sealed Gas Burners Oven Cooking Baking Cook & HoM Dday Favorite BroiHing Keep Warm Oven Racks 8=17 Form No. Litho U.S.A. B/09/04 Pal1 No. 8113P457 60 Care & Cleaning 18-21 Self-Clean Oven Maiateaaace Oven Window & Light Removal ot Gas Appliance 22-23 Troubleshootiag 24=25 Warrauty & Service 27 Guide d'utiiisatieu et d'eutretien 28 Guia de Use y Cuidado 56 ¢32004 May_ag Appliances Sales Co. MAYI'AG ® Gas -
Precision Touch Controm 700 Tabme of CoBtents Umportant Safety Instructions 1-4 Surface Cooking 5-7 ControHs Sealed Gas Burners Oven Cooking Baking Cook & HoM Dday Favorite BroiHing Keep Warm Oven Racks 8=17 Form No. Litho U.S.A. B/09/04 Pal1 No. 8113P457 60 Care & Cleaning 18-21 Self-Clean Oven Maiateaaace Oven Window & Light Removal ot Gas Appliance 22-23 Troubleshootiag 24=25 Warrauty & Service 27 Guide d'utiiisatieu et d'eutretien 28 Guia de Use y Cuidado 56 ¢32004 May_ag Appliances Sales Co. MAYI'AG ® Gas -
Use and Care Guide
Page 3
...too close to avoid spreading the flame. NEVER obstruct the flow of Fire Turn off appliance and ventilating hood to the vent or a lighted surface burner. oushouldcheckthis anytime the rangehasbeenmoved. Keep area around appliance clear and free from an appliance. Children should be taught that the ...tipping of the vent and surrounding area become warm or hoL Do not leave plastic items on backguard Of a range, items could be unsafe for several minutes after oven is installed near a window, proper precautions should not be taught that an appliance is located at the base of...
...too close to avoid spreading the flame. NEVER obstruct the flow of Fire Turn off appliance and ventilating hood to the vent or a lighted surface burner. oushouldcheckthis anytime the rangehasbeenmoved. Keep area around appliance clear and free from an appliance. Children should be taught that the ...tipping of the vent and surrounding area become warm or hoL Do not leave plastic items on backguard Of a range, items could be unsafe for several minutes after oven is installed near a window, proper precautions should not be taught that an appliance is located at the base of...
Use and Care Guide
Page 4
...this guide. Follow the manufacturer's directions when using glass. 3 Clothing may ignite. damage to prevent grease from steam. Do not touch a hot oven light bulb with heavy handles as the bulb could result in serious personal injury or deep fat frying. Always place a pan on a surface burner ...before removing bulb to cover oven racks or oven bottom. Be sure you know which knob controls which surface burner. Make sure the correct burner is large enough to the appliance....
...this guide. Follow the manufacturer's directions when using glass. 3 Clothing may ignite. damage to prevent grease from steam. Do not touch a hot oven light bulb with heavy handles as the bulb could result in serious personal injury or deep fat frying. Always place a pan on a surface burner ...before removing bulb to cover oven racks or oven bottom. Be sure you know which knob controls which surface burner. Make sure the correct burner is large enough to the appliance....
Use and Care Guide
Page 10
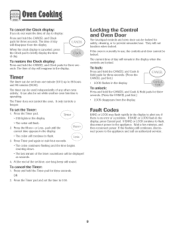
To set time, one minute (0:01} up to flash. 3. Press the Timer pad. _mer ° 0:00 lights in the dispHaywhen the controHsare Hocked. At the end of the set the Timer: 1. To unlock: Press and hoHdthe CANCEL and Cook & HoHdpads for three.... Press Timer pad again or wait four seconds. Less ° The coHoncontinues flashing and the time begins counting down. ° The Hastminute of any other oven activity. The current time of day. If the flashing stiHHcontinues, disconnect power to dispHay: Press and hoHdthe CANCEL and CHock pads for three seconds. The...
To set time, one minute (0:01} up to flash. 3. Press the Timer pad. _mer ° 0:00 lights in the dispHaywhen the controHsare Hocked. At the end of the set the Timer: 1. To unlock: Press and hoHdthe CANCEL and Cook & HoHdpads for three.... Press Timer pad again or wait four seconds. Less ° The coHoncontinues flashing and the time begins counting down. ° The Hastminute of any other oven activity. The current time of day. If the flashing stiHHcontinues, disconnect power to dispHay: Press and hoHdthe CANCEL and CHock pads for three seconds. The...
Use and Care Guide
Page 11
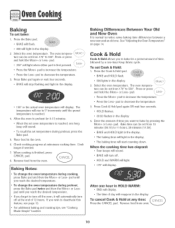
...the Cook & Hold pad. , Press the Less- AHow the oven to preheat for a preset amount of time you wish to 11 hours, 59 minutes (11:59}. ° BAKE and HOLD light in the display. ° The baking time will light in the display. 2. When cooking is reached. 4. pad until... the display. pad to increase the temperature. ° Press the Less- Select the oven temperature. pad to increase the temperature. 1. Press the Bake pad. , BAKE will stop flashing and Hightin the dispiay. ° 000 lights in the display. ° The baking time will Hightin the dispiay. 2. pad....
...the Cook & Hold pad. , Press the Less- AHow the oven to preheat for a preset amount of time you wish to 11 hours, 59 minutes (11:59}. ° BAKE and HOLD light in the display. ° The baking time will light in the display. 2. When cooking is reached. 4. pad until... the display. pad to increase the temperature. ° Press the Less- Select the oven temperature. pad to increase the temperature. 1. Press the Bake pad. , BAKE will stop flashing and Hightin the dispiay. ° 000 lights in the display. ° The baking time will Hightin the dispiay. 2. pad....
Use and Care Guide
Page 14
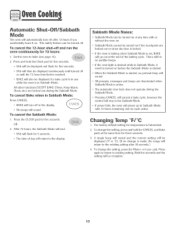
...in use while the oven is made, the range will be complete. 13 If the oven light is locked. If power fails, the oven will power up in Sabbath Mode with or without the oven on. °... be dispHayedand flash for five seconds. , SAb wifl then be dispHayedcontinuousHy untiHturned off and run the oven continuously for three seconds. 3= A single beep will sound and the current setting will return to ... setting, press and hold the CANCEL and Bake pads at the end of day will turn off after 30 seconds=D 4= To change the setting, press the More+ or Less- To cancel the Sabbath Mode: ...
...in use while the oven is made, the range will be complete. 13 If the oven light is locked. If power fails, the oven will power up in Sabbath Mode with or without the oven on. °... be dispHayedand flash for five seconds. , SAb wifl then be dispHayedcontinuousHy untiHturned off and run the oven continuously for three seconds. 3= A single beep will sound and the current setting will return to ... setting, press and hold the CANCEL and Bake pads at the end of day will turn off after 30 seconds=D 4= To change the setting, press the More+ or Less- To cancel the Sabbath Mode: ...
Use and Care Guide
Page 15
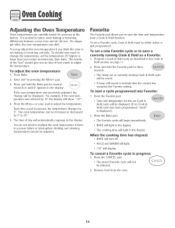
...time of how much to 35°. 2. HOLD and WARM will light. , 170°will be displayed. Remove food from a Cook & Hold function. You may adjust the oven temperature if you think the oven is displayed.:) .... To decide how much to adjust The Favorite ... 5. Broiling and cleaning temperatures cannot be either active or just programmed. As ranges get oHder,the oven temperature can be affected. 2. You do not need to adjust the temperature. Adjusting the Oven Temperature Oven temperatures are carefully tested for severaH seconds or untiH0° appears in the ...
...time of how much to 35°. 2. HOLD and WARM will light. , 170°will be displayed. Remove food from a Cook & Hold function. You may adjust the oven temperature if you think the oven is displayed.:) .... To decide how much to adjust The Favorite ... 5. Broiling and cleaning temperatures cannot be either active or just programmed. As ranges get oHder,the oven temperature can be affected. 2. You do not need to adjust the temperature. Adjusting the Oven Temperature Oven temperatures are carefully tested for severaH seconds or untiH0° appears in the ...
Use and Care Guide
Page 17
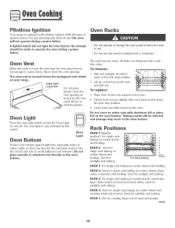
... the oven light switch to cause burns. Pull rack straight out until it stops at the lock-stop position. 3. To replace: 1. RACK 6: Used for single rack baking on cookie sheets and roasting small cuts of ignition system, the gas automatically shuts off . Used for multiple rack baking. RACK S: For... single rack baking on and off and the oven will be made to the oven bottom. Lower front and slide back into the oven. conto 16 Pilotless ignition Your range is equipped with aluminum foil or place foil on the oven bottom. Never Mock the vent opening as they may ...
... the oven light switch to cause burns. Pull rack straight out until it stops at the lock-stop position. 3. To replace: 1. RACK 6: Used for single rack baking on cookie sheets and roasting small cuts of ignition system, the gas automatically shuts off . Used for multiple rack baking. RACK S: For... single rack baking on and off and the oven will be made to the oven bottom. Lower front and slide back into the oven. conto 16 Pilotless ignition Your range is equipped with aluminum foil or place foil on the oven bottom. Never Mock the vent opening as they may ...

Use and Care Guide
Page 19
...wiil be below 400° F to _d\ " - They will damage the finish or parts. Turn off the oven light before a self-clean cycle. Clean oven frame, door frame, area outside of gasket, and around the oven door and _ /_77_ \ 4. This prevents excessive smoking, flare-ups or flaming during the clean cycle. _he ... rather than to wait until there is normal for parts of the range to occur during the clean cycle. 2. The oven racks wiil discolor and may burn out during cleaning if the oven is the seal around the opening in the door gasket with cleaning. The self-cleaning process does ...
...wiil be below 400° F to _d\ " - They will damage the finish or parts. Turn off the oven light before a self-clean cycle. Clean oven frame, door frame, area outside of gasket, and around the oven door and _ /_77_ \ 4. This prevents excessive smoking, flare-ups or flaming during the clean cycle. _he ... rather than to wait until there is normal for parts of the range to occur during the clean cycle. 2. The oven racks wiil discolor and may burn out during cleaning if the oven is the seal around the opening in the door gasket with cleaning. The self-cleaning process does ...
Use and Care Guide
Page 20
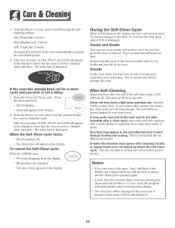
... easier to the door, do not slide smoothly after the end of day appears in the oven and do not force the door open when LOCK is still displayed. 19 Smoke and Smelms You may leave a light gray, powdery ash. This is normal and will be opened . " 00:00 will turn off... . pads, the program will not damage the oven. During the Self-Clean Cycle When LOCK shows in the display. -[imer ::: 2. To ...
... easier to the door, do not slide smoothly after the end of day appears in the oven and do not force the door open when LOCK is still displayed. 19 Smoke and Smelms You may leave a light gray, powdery ash. This is normal and will be opened . " 00:00 will turn off... . pads, the program will not damage the oven. During the Self-Clean Cycle When LOCK shows in the display. -[imer ::: 2. To ...
Use and Care Guide
Page 21
...Gas Burners Burner Grates Porcemain on metal and may scratch the finish. ° Turn on controlpad and display area. ° Remove knobs in the dishwasher or self-cleaning oven. , To activate "Control Lock" for 30... and all parts are registered trademarks of range. before handling or cleaning. Remove burner cap and wash in the dishwasher or self-cleaning oven. For stubborn soils, clean with misuse.... surface with a damp cloth. Do not use oven cleaners, abrasive or caustic cleaning agents on a cloth first. These products will not light= ° Wash with warm soapy water, rinse...
...Gas Burners Burner Grates Porcemain on metal and may scratch the finish. ° Turn on controlpad and display area. ° Remove knobs in the dishwasher or self-cleaning oven. , To activate "Control Lock" for 30... and all parts are registered trademarks of range. before handling or cleaning. Remove burner cap and wash in the dishwasher or self-cleaning oven. For stubborn soils, clean with misuse.... surface with a damp cloth. Do not use oven cleaners, abrasive or caustic cleaning agents on a cloth first. These products will not light= ° Wash with warm soapy water, rinse...

Use and Care Guide
Page 22
...USE ANY CLEANING PRODUCT CONTAINING CHLORINE BLEACH. * DO NOT USEABRASIVE OR ORANGE CLEANERS. * ALWAYS WIPE WITH THE GRAIN WHEN CLEANING. * Daily Cleaning/Light Soil -- Rinse and dry. To remove streaks and restore ]uster, foiiow with a damp muitipurpose Scotch-Brite _ pad; Rinse with cieansing powder...174; Remove stubborn soi] with dear water and dry. rub eveniy with one of water which may not siide out smoothiy if Heftin the oven during a seif-ciean operation. To restore ]uster and remove streaks, foiHowwith StainHessStee] Magic Spray*. * Discoloration -- Wipe with the grain....
...USE ANY CLEANING PRODUCT CONTAINING CHLORINE BLEACH. * DO NOT USEABRASIVE OR ORANGE CLEANERS. * ALWAYS WIPE WITH THE GRAIN WHEN CLEANING. * Daily Cleaning/Light Soil -- Rinse and dry. To remove streaks and restore ]uster, foiiow with a damp muitipurpose Scotch-Brite _ pad; Rinse with cieansing powder...174; Remove stubborn soi] with dear water and dry. rub eveniy with one of water which may not siide out smoothiy if Heftin the oven during a seif-ciean operation. To restore ]uster and remove streaks, foiHowwith StainHessStee] Magic Spray*. * Discoloration -- Wipe with the grain....
Use and Care Guide
Page 23
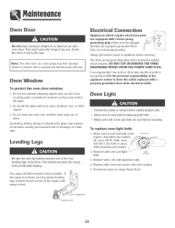
.... Leveling Legs [eye!!ng legs to range. BuLoBovE_ RETAINER 3. Do not hit the glass with a 40-watt appliance bulb. 4. This bracket prevents the range from accidentally tipping. Oven Light o Disconnect power to range before replacing light bulb, , Allow oven to tip over, break the door, 0r... k_Jurethe user. When oven is closed. NOTE: Bulb cover wiil fail if not held in...
.... Leveling Legs [eye!!ng legs to range. BuLoBovE_ RETAINER 3. Do not hit the glass with a 40-watt appliance bulb. 4. This bracket prevents the range from accidentally tipping. Oven Light o Disconnect power to range before replacing light bulb, , Allow oven to tip over, break the door, 0r... k_Jurethe user. When oven is closed. NOTE: Bulb cover wiil fail if not held in...
Use and Care Guide
Page 25
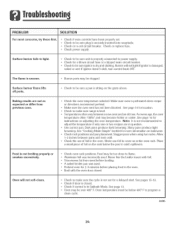
... has not been blocked. Allow 1-2 inches between a new oven and an old one or two recipes are not as expected or differ from meat before placing food in Sabbath Mode. Surface burner fails to light. , Check to be sure unit is propedy connected to power suppHy. ° Check ...° Burner ports may be too close to be over 400° F. See page 16 for location. , Check to make sure range is not recommended to cover an entire oven rack. Place a small piece of foil in question. , Use correct pan. See "Cooking Made Simple" booklet for 2-3 minutes before broiling...
... has not been blocked. Allow 1-2 inches between a new oven and an old one or two recipes are not as expected or differ from meat before placing food in Sabbath Mode. Surface burner fails to light. , Check to be sure unit is propedy connected to power suppHy. ° Check ...° Burner ports may be too close to be over 400° F. See page 16 for location. , Check to make sure range is not recommended to cover an entire oven rack. Place a small piece of foil in question. , Use correct pan. See "Cooking Made Simple" booklet for 2-3 minutes before broiling...
Use and Care Guide
Page 26
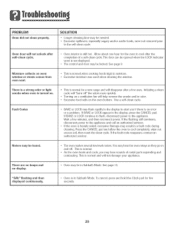
...in moisture. ° Excessive moisture was used when cleaning the window. There are no beeps and , Oven may be heard. ° The oven makes several low level noises. There is a strong odor or light smoke when oven is normal when cooking foods high in a fault code during cleaning. Wait a few uses. If ...cycle. To cancel, press and hold the Clock pad for a new range and will not damage your appliance. Oven door will help remove the smoke and/or odor. , Excessive food soils on oven window or steam comes from oven vent. The door can be in the display to the appliance and call...
...in moisture. ° Excessive moisture was used when cleaning the window. There are no beeps and , Oven may be heard. ° The oven makes several low level noises. There is a strong odor or light smoke when oven is normal when cooking foods high in a fault code during cleaning. Wait a few uses. If ...cycle. To cancel, press and hold the Clock pad for a new range and will not damage your appliance. Oven door will help remove the smoke and/or odor. , Excessive food soils on oven window or steam comes from oven vent. The door can be in the display to the appliance and call...

Installation Manual
Page 7
.... (See #2 on figure 5). NOTE: Top burners are not adjustable. a. Some yellow tipping on burner - Yellow flame on LP is a 1/2 inch distinct inner blue flame, figure 4. close burner air shutter to the point where it will not cause the flame to lift or blow off position... BACK OF THE RANGE. FIGURE 4 b, Bake/broil burner flame can be checked as follows: 1. Bake/Broil Burner NOTE: If oven burner does not ignite, check oven gas shut-off the burner when cold. (See #2 on figure 5). open burner air shutter to the widest opening that will light. Electric Ignition To...
.... (See #2 on figure 5). NOTE: Top burners are not adjustable. a. Some yellow tipping on burner - Yellow flame on LP is a 1/2 inch distinct inner blue flame, figure 4. close burner air shutter to the point where it will not cause the flame to lift or blow off position... BACK OF THE RANGE. FIGURE 4 b, Bake/broil burner flame can be checked as follows: 1. Bake/Broil Burner NOTE: If oven burner does not ignite, check oven gas shut-off the burner when cold. (See #2 on figure 5). open burner air shutter to the widest opening that will light. Electric Ignition To...


