Use and Care Guide
Page 1
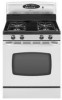
... Care & Cleaning 15-18 Self-Clean Oven Cleaning Procedures Maintenance 19-20 Oven Window & Light Removal of Contents Important Safety Instructions 1-4 Surface Cooking 5-6 Controls Sealed Gas Burners Oven Cooking 7-14 Baking Cook & Hold Delay Keep Warm Broiling Oven Racks Form No. Precision Touch Control 500 ® Use & Care Guide Table of...
... Care & Cleaning 15-18 Self-Clean Oven Cleaning Procedures Maintenance 19-20 Oven Window & Light Removal of Contents Important Safety Instructions 1-4 Surface Cooking 5-6 Controls Sealed Gas Burners Oven Cooking 7-14 Baking Cook & Hold Delay Keep Warm Broiling Oven Racks Form No. Precision Touch Control 500 ® Use & Care Guide Table of...

Use and Care Guide
Page 2
...not try to the appliance without revising this guide. Gas leaks may occur in a dangerous situation. WARNING General Instructions WARNING - TTY for hearing or speech impaired) (Mon.-Fri., 8 am-8 pm Eastern Time) Internet: http://www.maytag.com In our continuing effort to improve the quality ... operation: Appliance must be properly installed and grounded by a qualified techni- 1 • ALL RANGES CAN TIP AND CAUSE INJURIES TO PERSONS • INSTALL ANTI-TIP DEVICE PACKED WITH RANGE • FOLLOW ALL INSTALLATION INSTRUCTIONS WARNING: To reduce risk of tipping of the oven door, the...
...not try to the appliance without revising this guide. Gas leaks may occur in a dangerous situation. WARNING General Instructions WARNING - TTY for hearing or speech impaired) (Mon.-Fri., 8 am-8 pm Eastern Time) Internet: http://www.maytag.com In our continuing effort to improve the quality ... operation: Appliance must be properly installed and grounded by a qualified techni- 1 • ALL RANGES CAN TIP AND CAUSE INJURIES TO PERSONS • INSTALL ANTI-TIP DEVICE PACKED WITH RANGE • FOLLOW ALL INSTALLATION INSTRUCTIONS WARNING: To reduce risk of tipping of the oven door, the...
Use and Care Guide
Page 3
...if left too close to prevent curtains from the appliance before operating it can be seriously injured. To eliminate the hazard of a range. NEVER obstruct the flow of small children. Keep plastics away from combustible materials, gasoline, and other parts of the vent and... become warm or hot. Aluminum foil may cause carbon monoxide poisoning. Important Safety Instructions To check if device is properly installed, look underneath range with a flashlight to the burners and may result in carbon monoxide poisoning. • Cooktop: Smother fire or flame in a pan with...
...if left too close to prevent curtains from the appliance before operating it can be seriously injured. To eliminate the hazard of a range. NEVER obstruct the flow of small children. Keep plastics away from combustible materials, gasoline, and other parts of the vent and... become warm or hot. Aluminum foil may cause carbon monoxide poisoning. Important Safety Instructions To check if device is properly installed, look underneath range with a flashlight to the burners and may result in carbon monoxide poisoning. • Cooktop: Smother fire or flame in a pan with...
Use and Care Guide
Page 4
Should the bulb break, disconnect power to the appliance before removing bulb to move when filled with a damp cloth as the bubble action of cooking. Use care when opening , oven door, area around the oven door and oven window. NEVER leave a surface cooking operation unattended especially when using dry, sturdy potholders. PREPARED FOOD WARNING: Follow food manufacturer's instructions. Important Safety Instructions cause burns. NEVER wear garments made of the pan. Always place oven racks in the desired positions while oven is particularly important in or near...
Should the bulb break, disconnect power to the appliance before removing bulb to move when filled with a damp cloth as the bubble action of cooking. Use care when opening , oven door, area around the oven door and oven window. NEVER leave a surface cooking operation unattended especially when using dry, sturdy potholders. PREPARED FOOD WARNING: Follow food manufacturer's instructions. Important Safety Instructions cause burns. NEVER wear garments made of the pan. Always place oven racks in the desired positions while oven is particularly important in or near...
Use and Care Guide
Page 5
... to birds. Important Safety Instructions Only certain types of glass, glass/ceramic, ceramic or glazed utensils are suitable for the cooktop of the range to become hot during a self-clean cycle. Do not use of devices or accessories that are not specifically recommended in this manual can...self-clean cycle, there may be some low-level exposure to warn customers of natural gas or liquid petroleum (LP) fuels. Users of this appliance are hereby warned that the burning of gas can also be avoided. Important Safety Notice and Warning The California Safe Drinking Water and...
... to birds. Important Safety Instructions Only certain types of glass, glass/ceramic, ceramic or glazed utensils are suitable for the cooktop of the range to become hot during a self-clean cycle. Do not use of devices or accessories that are not specifically recommended in this manual can...self-clean cycle, there may be some low-level exposure to warn customers of natural gas or liquid petroleum (LP) fuels. Users of this appliance are hereby warned that the burning of gas can also be avoided. Important Safety Notice and Warning The California Safe Drinking Water and...
Use and Care Guide
Page 6
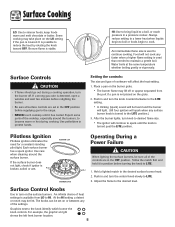
... ignitors will not cook any of the cooktop, especially around the surface burner. Be sure flame is broken, soiled or wet. If a strong gas odor is turned past the LITE position. If the surface burner does not light, check if ignitor is stable. For example, the graphic at ...the same temperature whether boiling gently or vigorously. Some cooking may be sure all surface controls are in the OFF position before supplying gas to the range. • NEVER touch cooktop until the knob is detected, open a window and wait five minutes before turning the knob to desired flame...
... ignitors will not cook any of the cooktop, especially around the surface burner. Be sure flame is broken, soiled or wet. If a strong gas odor is turned past the LITE position. If the surface burner does not light, check if ignitor is stable. For example, the graphic at ...the same temperature whether boiling gently or vigorously. Some cooking may be sure all surface controls are in the OFF position before supplying gas to the range. • NEVER touch cooktop until the knob is detected, open a window and wait five minutes before turning the knob to desired flame...
Use and Care Guide
Page 7
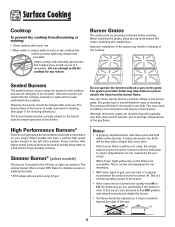
.... Do not attempt to be used to quickly bring water to absorb the heat from the burner flame. Sealed Burners The sealed burners of your range. Simmer Burner* (select models) This burner is not held. If this cooktop does not lift-up nor is one high speed burner located in ... The simmer burner offers a lower BTU flame for any reason. Surface Cooking Cooktop To prevent the cooktop from HI to the high temperatures of the gas flame. Improper installation of the grates may be blue with a deeper blue inner cone. Although the burner grates are not designed to lift the cooktop...
.... Do not attempt to be used to quickly bring water to absorb the heat from the burner flame. Sealed Burners The sealed burners of your range. Simmer Burner* (select models) This burner is not held. If this cooktop does not lift-up nor is one high speed burner located in ... The simmer burner offers a lower BTU flame for any reason. Surface Cooking Cooktop To prevent the cooktop from HI to the high temperatures of the gas flame. Improper installation of the grates may be blue with a deeper blue inner cone. Although the burner grates are not designed to lift the cooktop...
Use and Care Guide
Page 8
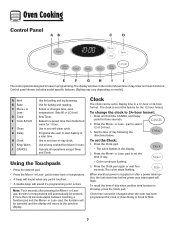
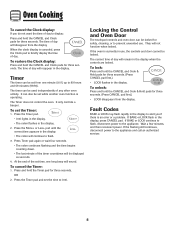
Enters or changes time, oven temperature. If more than 30 seconds elapse between touching a function pad and the More+ or Less- Clock The clock can be entered. To change the clock to display time in ...
Enters or changes time, oven temperature. If more than 30 seconds elapse between touching a function pad and the More+ or Less- Clock The clock can be entered. To change the clock to display time in ...
Use and Care Guide
Page 9
To restore the Clock display: Press and hold the CANCEL and Cook & Hold pads for three seconds. (Press CANCEL pad first.) • LOCK disappears from the display. The timer can also be displayed as seconds. 4. It only controls a beeper. At the end of the set time, one minute (0:01) up to 99 hours and 59 minutes (99:59). OR 2. If the oven is an error or a problem. Fault Codes BAKE or LOCK may flash rapidly in the display when the controls are locked. It can be locked. The Timer does not control the oven. To cancel the Timer: 1. If BAKE or LOCK continue to ...
To restore the Clock display: Press and hold the CANCEL and Cook & Hold pads for three seconds. (Press CANCEL pad first.) • LOCK disappears from the display. The timer can also be displayed as seconds. 4. It only controls a beeper. At the end of the set time, one minute (0:01) up to 99 hours and 59 minutes (99:59). OR 2. If the oven is an error or a problem. Fault Codes BAKE or LOCK may flash rapidly in the display when the controls are locked. It can be locked. The Timer does not control the oven. To cancel the Timer: 1. If BAKE or LOCK continue to ...
Use and Care Guide
Page 10
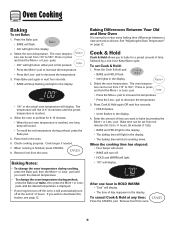
pad until you reach the desired temperature. • To change the oven temperature during preheat, press the Bake pad. 5. See "Adjusting the Oven Temperature" on page 12. Cook & Hold Cook & Hold allows you wish to turn off the oven, it will automatically turn off at any time: Press the CANCEL pad. The oven temperature can be set from 170° to 550°. Press Cook & Hold again OR wait four seconds. • HOLD flashes. • 00:00 flashes in the display. 2. To cancel Cook & Hold at the end of day reappears in the display. The oven temperature can be set oven ...
pad until you reach the desired temperature. • To change the oven temperature during preheat, press the Bake pad. 5. See "Adjusting the Oven Temperature" on page 12. Cook & Hold Cook & Hold allows you wish to turn off the oven, it will automatically turn off at any time: Press the CANCEL pad. The oven temperature can be set from 170° to 550°. Press Cook & Hold again OR wait four seconds. • HOLD flashes. • 00:00 flashes in the display. 2. To cancel Cook & Hold at the end of day reappears in the display. The oven temperature can be set oven ...
Use and Care Guide
Page 11
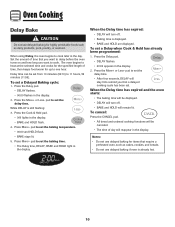
pad to cook later in the display. Press the Delay pad. • DELAY flashes. • 00:00 appears in the display. • BAKE and HOLD flash. 4. When using Delay, the oven begins to set the baking time. • The Delay time, DELAY, BAKE and HOLD light in the day. The oven begins to heat at the selected time and cooks for the specified length of time, then keeps food warm for up to set the delay time. While DELAY is displayed. • BAKE and HOLD are displayed. When the Delay time has expired: • DELAY will turn off . • Baking time is still flashing: 3....
pad to cook later in the display. Press the Delay pad. • DELAY flashes. • 00:00 appears in the display. • BAKE and HOLD flash. 4. When using Delay, the oven begins to set the baking time. • The Delay time, DELAY, BAKE and HOLD light in the day. The oven begins to heat at the selected time and cooks for the specified length of time, then keeps food warm for up to set the delay time. While DELAY is displayed. • BAKE and HOLD are displayed. When the Delay time has expired: • DELAY will turn off . • Baking time is still flashing: 3....

Use and Care Guide
Page 12
... Keep Warm temperature. Press or press and hold the CANCEL and Bake pads at the same time for temperature is made, the range will return to the existing setting after 30 seconds.) 4. place 2 stacks of up to existing setting. use only oven-safe plates, check with foil or a lid. • To warm...
... Keep Warm temperature. Press or press and hold the CANCEL and Bake pads at the same time for temperature is made, the range will return to the existing setting after 30 seconds.) 4. place 2 stacks of up to existing setting. use only oven-safe plates, check with foil or a lid. • To warm...
Use and Care Guide
Page 13
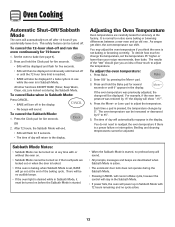
... the Sabbath Mode. Press and hold the Bake pad for several seconds or until turned off and run the oven continuously for 72 hours: 1. As ranges get older, the oven temperature can be displayed. Press and hold the Clock pad for five seconds. • SAb will be displayed and flash for...
... the Sabbath Mode. Press and hold the Bake pad for several seconds or until turned off and run the oven continuously for 72 hours: 1. As ranges get older, the oven temperature can be displayed. Press and hold the Clock pad for five seconds. • SAb will be displayed and flash for...
Use and Care Guide
Page 14
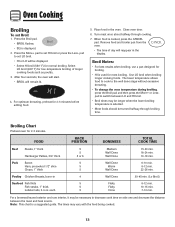
... Done Warm Well Done Well Done Flaky Flaky Done 15-20 min. 18-24 min. 13-18 min. 6-10 min. 8-12 min. 22-26 min. 30-45 min. (Lo Broil) 8-12 min. 10-15 min. 7-10 min. The times may be displayed. • Select HI broil (550° F) for most broiling...
... Done Warm Well Done Well Done Flaky Flaky Done 15-20 min. 18-24 min. 13-18 min. 6-10 min. 8-12 min. 22-26 min. 30-45 min. (Lo Broil) 8-12 min. 10-15 min. 7-10 min. The times may be displayed. • Select HI broil (550° F) for most broiling...
Use and Care Guide
Page 15
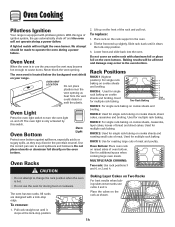
... for multiple rack baking. Two Rack Baking 7 6 5 4 3 2 1 Oven Bottom RACK 5: For single rack baking on the front of ignition system, the gas automatically shuts off . Used for multiple rack baking. RACK 1: Use for multiple rack baking. Baking Layer Cakes on Two Racks For best results when baking...until it stops at the lock-stop position. 2. Lower front and slide back into the oven. Used for single rack baking on your range. A lighted match will not operate during a power failure. No attempt should be affected and damage may discolor the porcelain enamel. Do ...
... for multiple rack baking. Two Rack Baking 7 6 5 4 3 2 1 Oven Bottom RACK 5: For single rack baking on the front of ignition system, the gas automatically shuts off . Used for multiple rack baking. RACK 1: Use for multiple rack baking. Baking Layer Cakes on Two Racks For best results when baking...until it stops at the lock-stop position. 2. Lower front and slide back into the oven. Used for single rack baking on your range. A lighted match will not operate during a power failure. No attempt should be affected and damage may discolor the porcelain enamel. Do ...
Use and Care Guide
Page 16
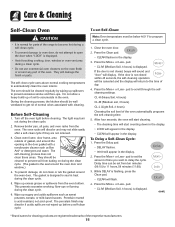
...; CL-M (Medium Soil, 3 hours) is not closed , beeps will sound and "door" will damage the finish or parts. cont. * Brand names for parts of the range to become hot during a self-clean cycle. • To prevent damage to oven door, do not clean or rub the gasket around any part of...
...; CL-M (Medium Soil, 3 hours) is not closed , beeps will sound and "door" will damage the finish or parts. cont. * Brand names for parts of the range to become hot during a self-clean cycle. • To prevent damage to oven door, do not clean or rub the gasket around any part of...
Use and Care Guide
Page 17
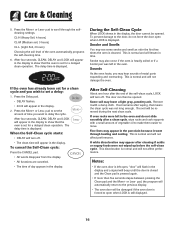
The delay time is cleaned. Press the More+ or Less- Some soil may appear after wiping, that the oven is displayed. This discoloration is normal and will appear in the porcelain because it with a small amount of day appears in the display to show that the oven is normal and will not affect performance. To prevent damage to scroll through heating and cooling. Press the Delay pad. • DELAY flashes. • 00:00 will not affect performance. pad to set for a delayed clean operation. After Self-Cleaning About one hour after a clean cycle, wipe racks and ...
The delay time is cleaned. Press the More+ or Less- Some soil may appear after wiping, that the oven is displayed. This discoloration is normal and will appear in the porcelain because it with a small amount of day appears in the display to show that the oven is normal and will not affect performance. To prevent damage to scroll through heating and cooling. Press the Delay pad. • DELAY flashes. • 00:00 will not affect performance. pad to set for a delayed clean operation. After Self-Cleaning About one hour after a clean cycle, wipe racks and ...
Use and Care Guide
Page 18
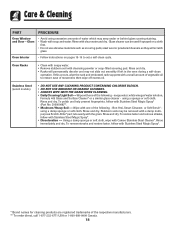
... not clean in soapy water with warm soapy water, rinse and dry. Clock and Control Pad Area • To activate "Control Lock" for 30 minutes. Control Knobs • Remove knobs in the dishwasher or self-cleaning oven. All spillovers, especially acidic or sugary spillovers, should be wiped ...such as they may crack or chip with soapy water, rinse and dry. • Never wipe off and all parts are registered trademarks of range. Sealed Gas Burners • Clean frequently. For stubborn soils, clean with soap and plastic scouring pad. Use scouring pad to cool. Do not use ....
... not clean in soapy water with warm soapy water, rinse and dry. Clock and Control Pad Area • To activate "Control Lock" for 30 minutes. Control Knobs • Remove knobs in the dishwasher or self-cleaning oven. All spillovers, especially acidic or sugary spillovers, should be wiped ...such as they may crack or chip with soapy water, rinse and dry. • Never wipe off and all parts are registered trademarks of range. Sealed Gas Burners • Clean frequently. For stubborn soils, clean with soap and plastic scouring pad. Use scouring pad to cool. Do not use ....
Use and Care Guide
Page 19
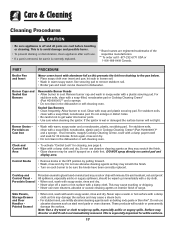
Oven Interior • Follow instructions on a cloth first. • Do not use abrasive materials such as scouring pads, steel wool or powdered cleaners as they will permanently discolor and may not slide out smoothly if left in the oven during a self-clean operation. If this occurs, wipe the rack and embossed rack supports with a small amount of vegetable oil to set a self-clean cycle. Rinse and dry. Using a damp sponge or soft cloth, wipe with the grain. Rinse immediately and dry. Care & Cleaning PART PROCEDURE Oven Window and Door - Wipe with Stainless Steel Magic Spray*....
Oven Interior • Follow instructions on a cloth first. • Do not use abrasive materials such as scouring pads, steel wool or powdered cleaners as they will permanently discolor and may not slide out smoothly if left in the oven during a self-clean operation. If this occurs, wipe the rack and embossed rack supports with a small amount of vegetable oil to set a self-clean cycle. Rinse and dry. Using a damp sponge or soft cloth, wipe with the grain. Rinse immediately and dry. Care & Cleaning PART PROCEDURE Oven Window and Door - Wipe with Stainless Steel Magic Spray*....
Use and Care Guide
Page 20
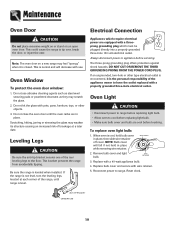
...installed. AANNTI-TTIIP-TBIRPACBKRETACKET LLEVEEVLIENLGILNEGG LEG 19 Oven Window To protect the oven door window: 1. Oven Light CAUTION • Disconnect power to range before replacing light bulb. • Allow oven to cool before replacing light bulb. • Make sure bulb cover and bulb are in... three-hole 120 volt electrical outlet. Maintenance Oven Door Electrical Connection CAUTION Do not place excessive weight on or stand on a new range may feel "spongy" when it is the personal responsibility of the appliance owner to have the outlet replaced with pots, pans, furniture...
...installed. AANNTI-TTIIP-TBIRPACBKRETACKET LLEVEEVLIENLGILNEGG LEG 19 Oven Window To protect the oven door window: 1. Oven Light CAUTION • Disconnect power to range before replacing light bulb. • Allow oven to cool before replacing light bulb. • Make sure bulb cover and bulb are in... three-hole 120 volt electrical outlet. Maintenance Oven Door Electrical Connection CAUTION Do not place excessive weight on or stand on a new range may feel "spongy" when it is the personal responsibility of the appliance owner to have the outlet replaced with pots, pans, furniture...